 make up the DIY picnic table and benches project" />
Here's how to create a picnic table that will serve as a focal point of your outdoor entertaining for years.
by John Casey Updated 08/13/2024Here's how to create a durable picnic table that will serve as a gathering spot for family meals and outdoor entertaining for years.
With the right tools and materials, you can create a durable picnic table that will serve as a gathering spot for family meals and outdoor entertaining for years. In the video above, This Old House demonstrates the step-by-step process of constructing an updated version of a backyard staple.
Before beginning your picnic table project, gather the following materials and tools:
make up the DIY picnic table and benches project" />
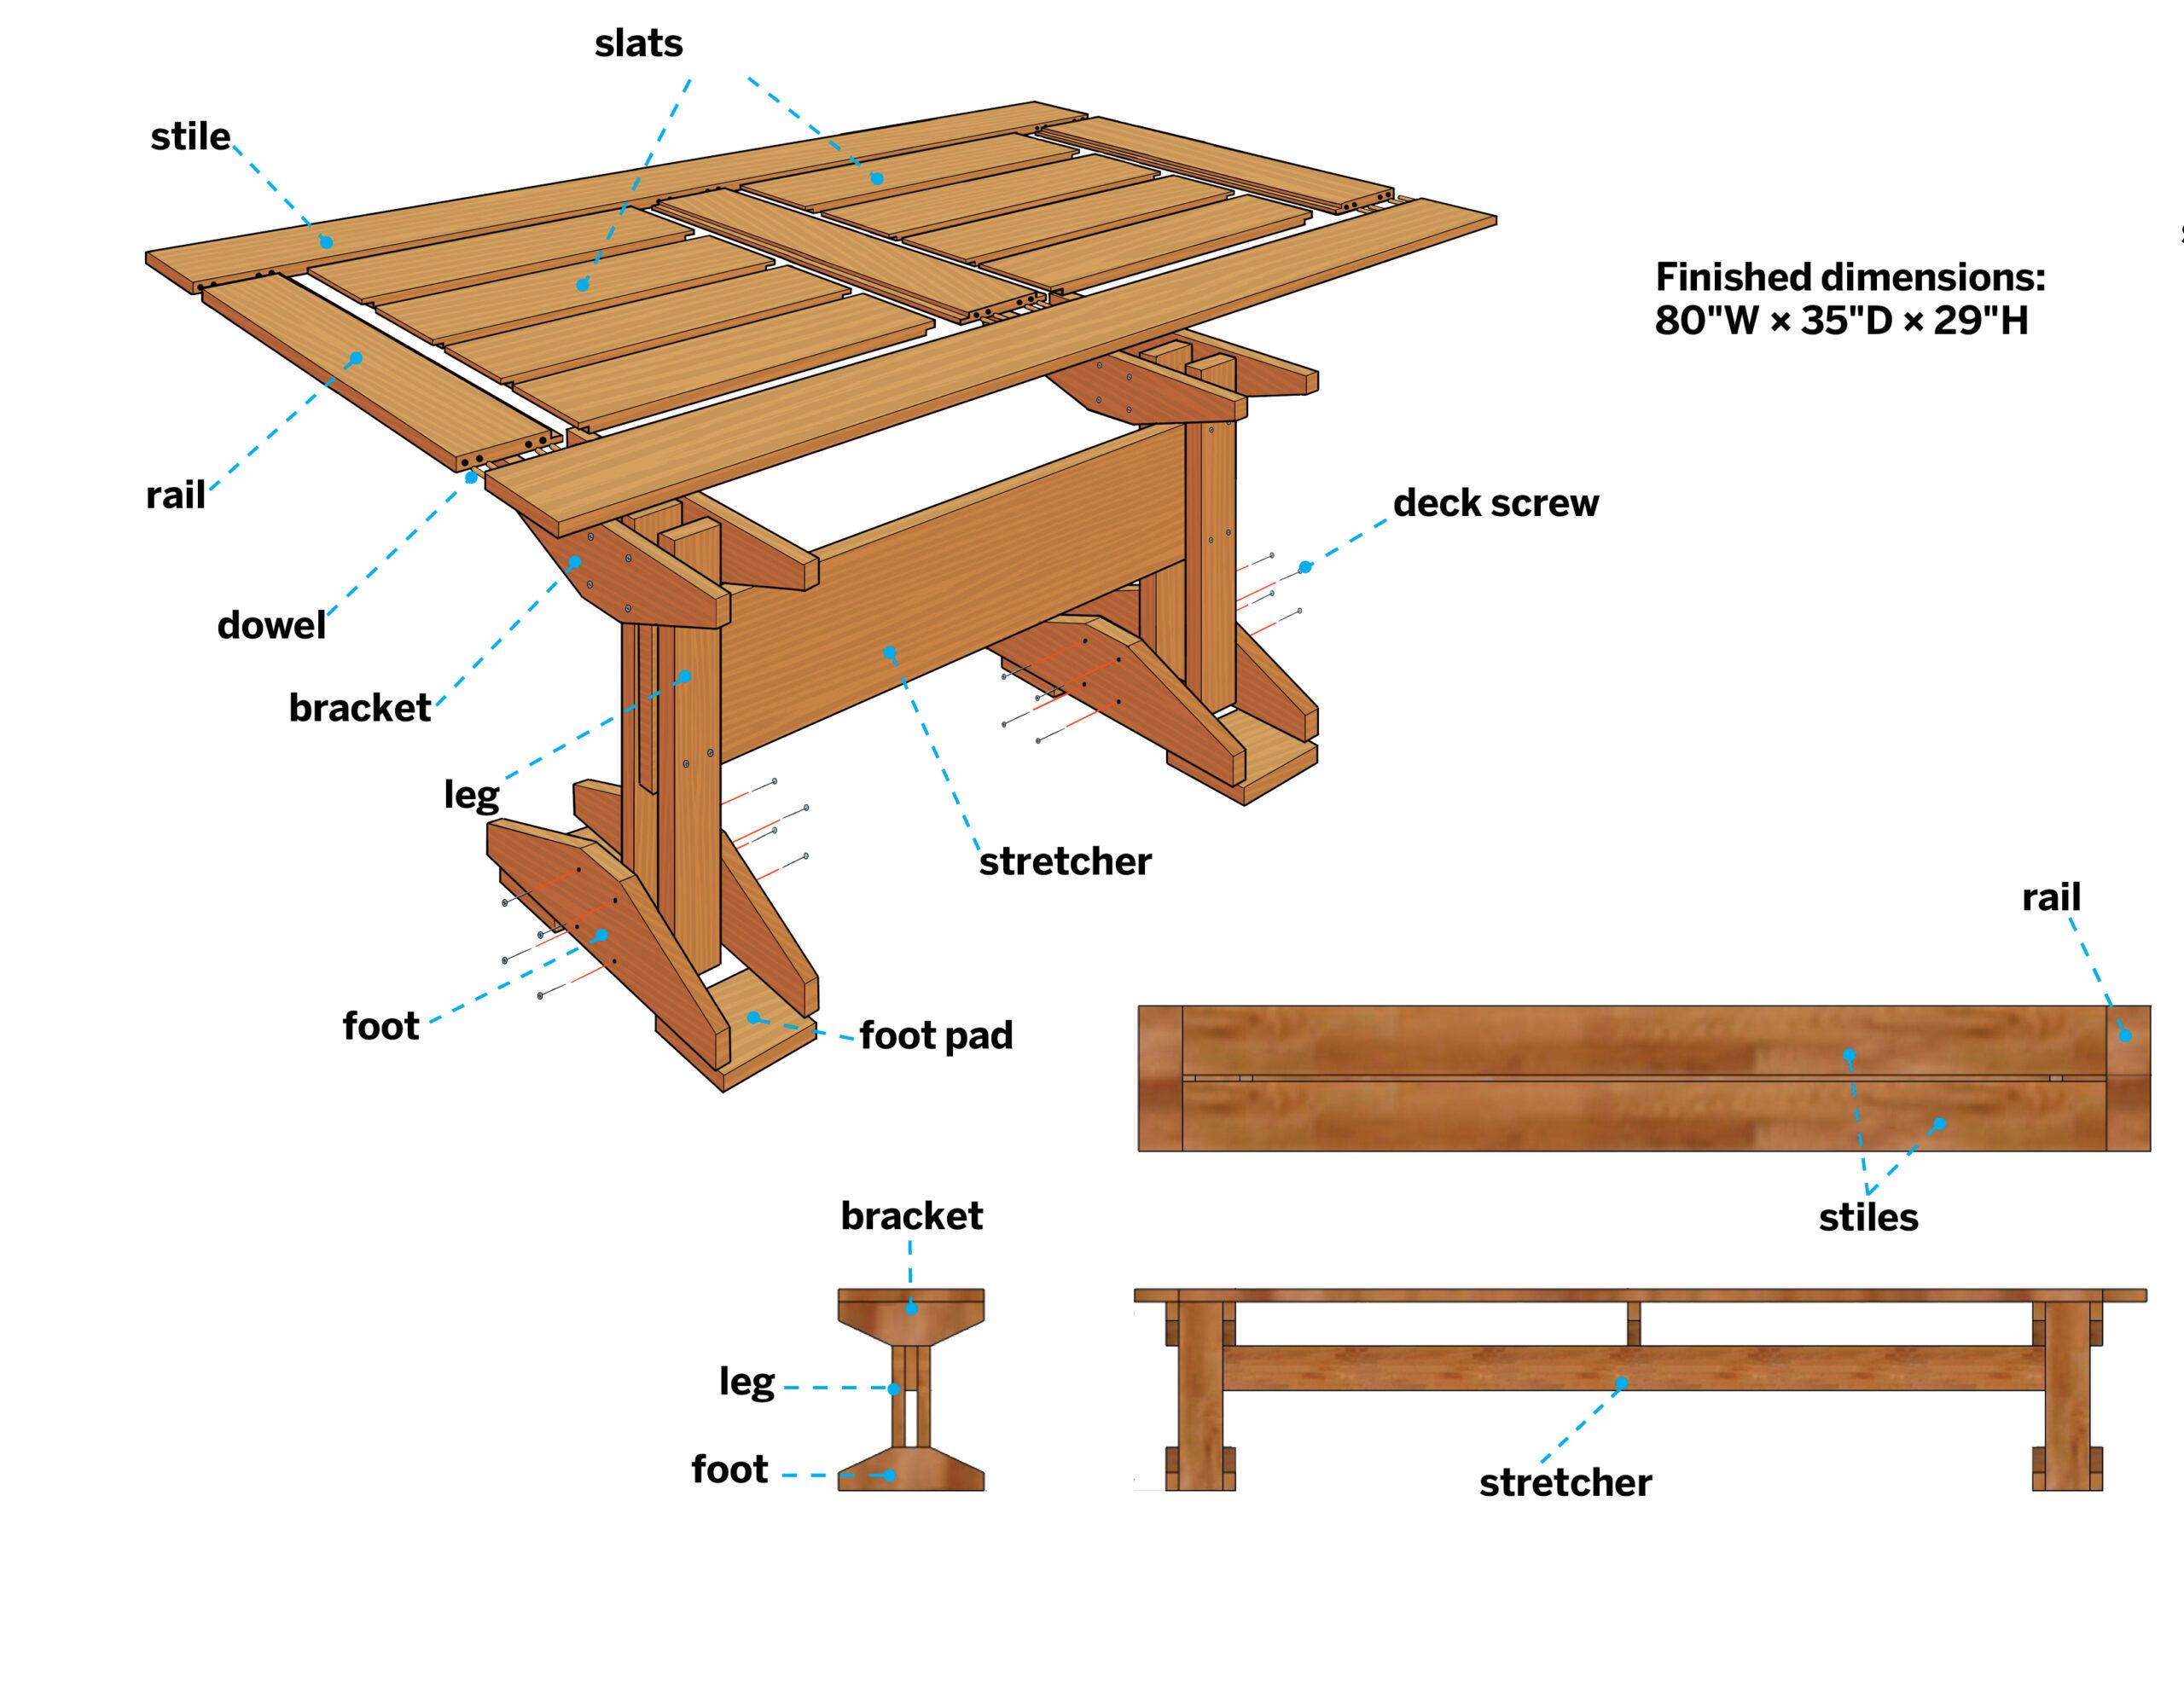
This trestle-and-slat design from This Old House contributor Christopher Beidel is both welcoming and functional — ready for corn on the cob, potato salad, apple pie, and the Fourth of July.
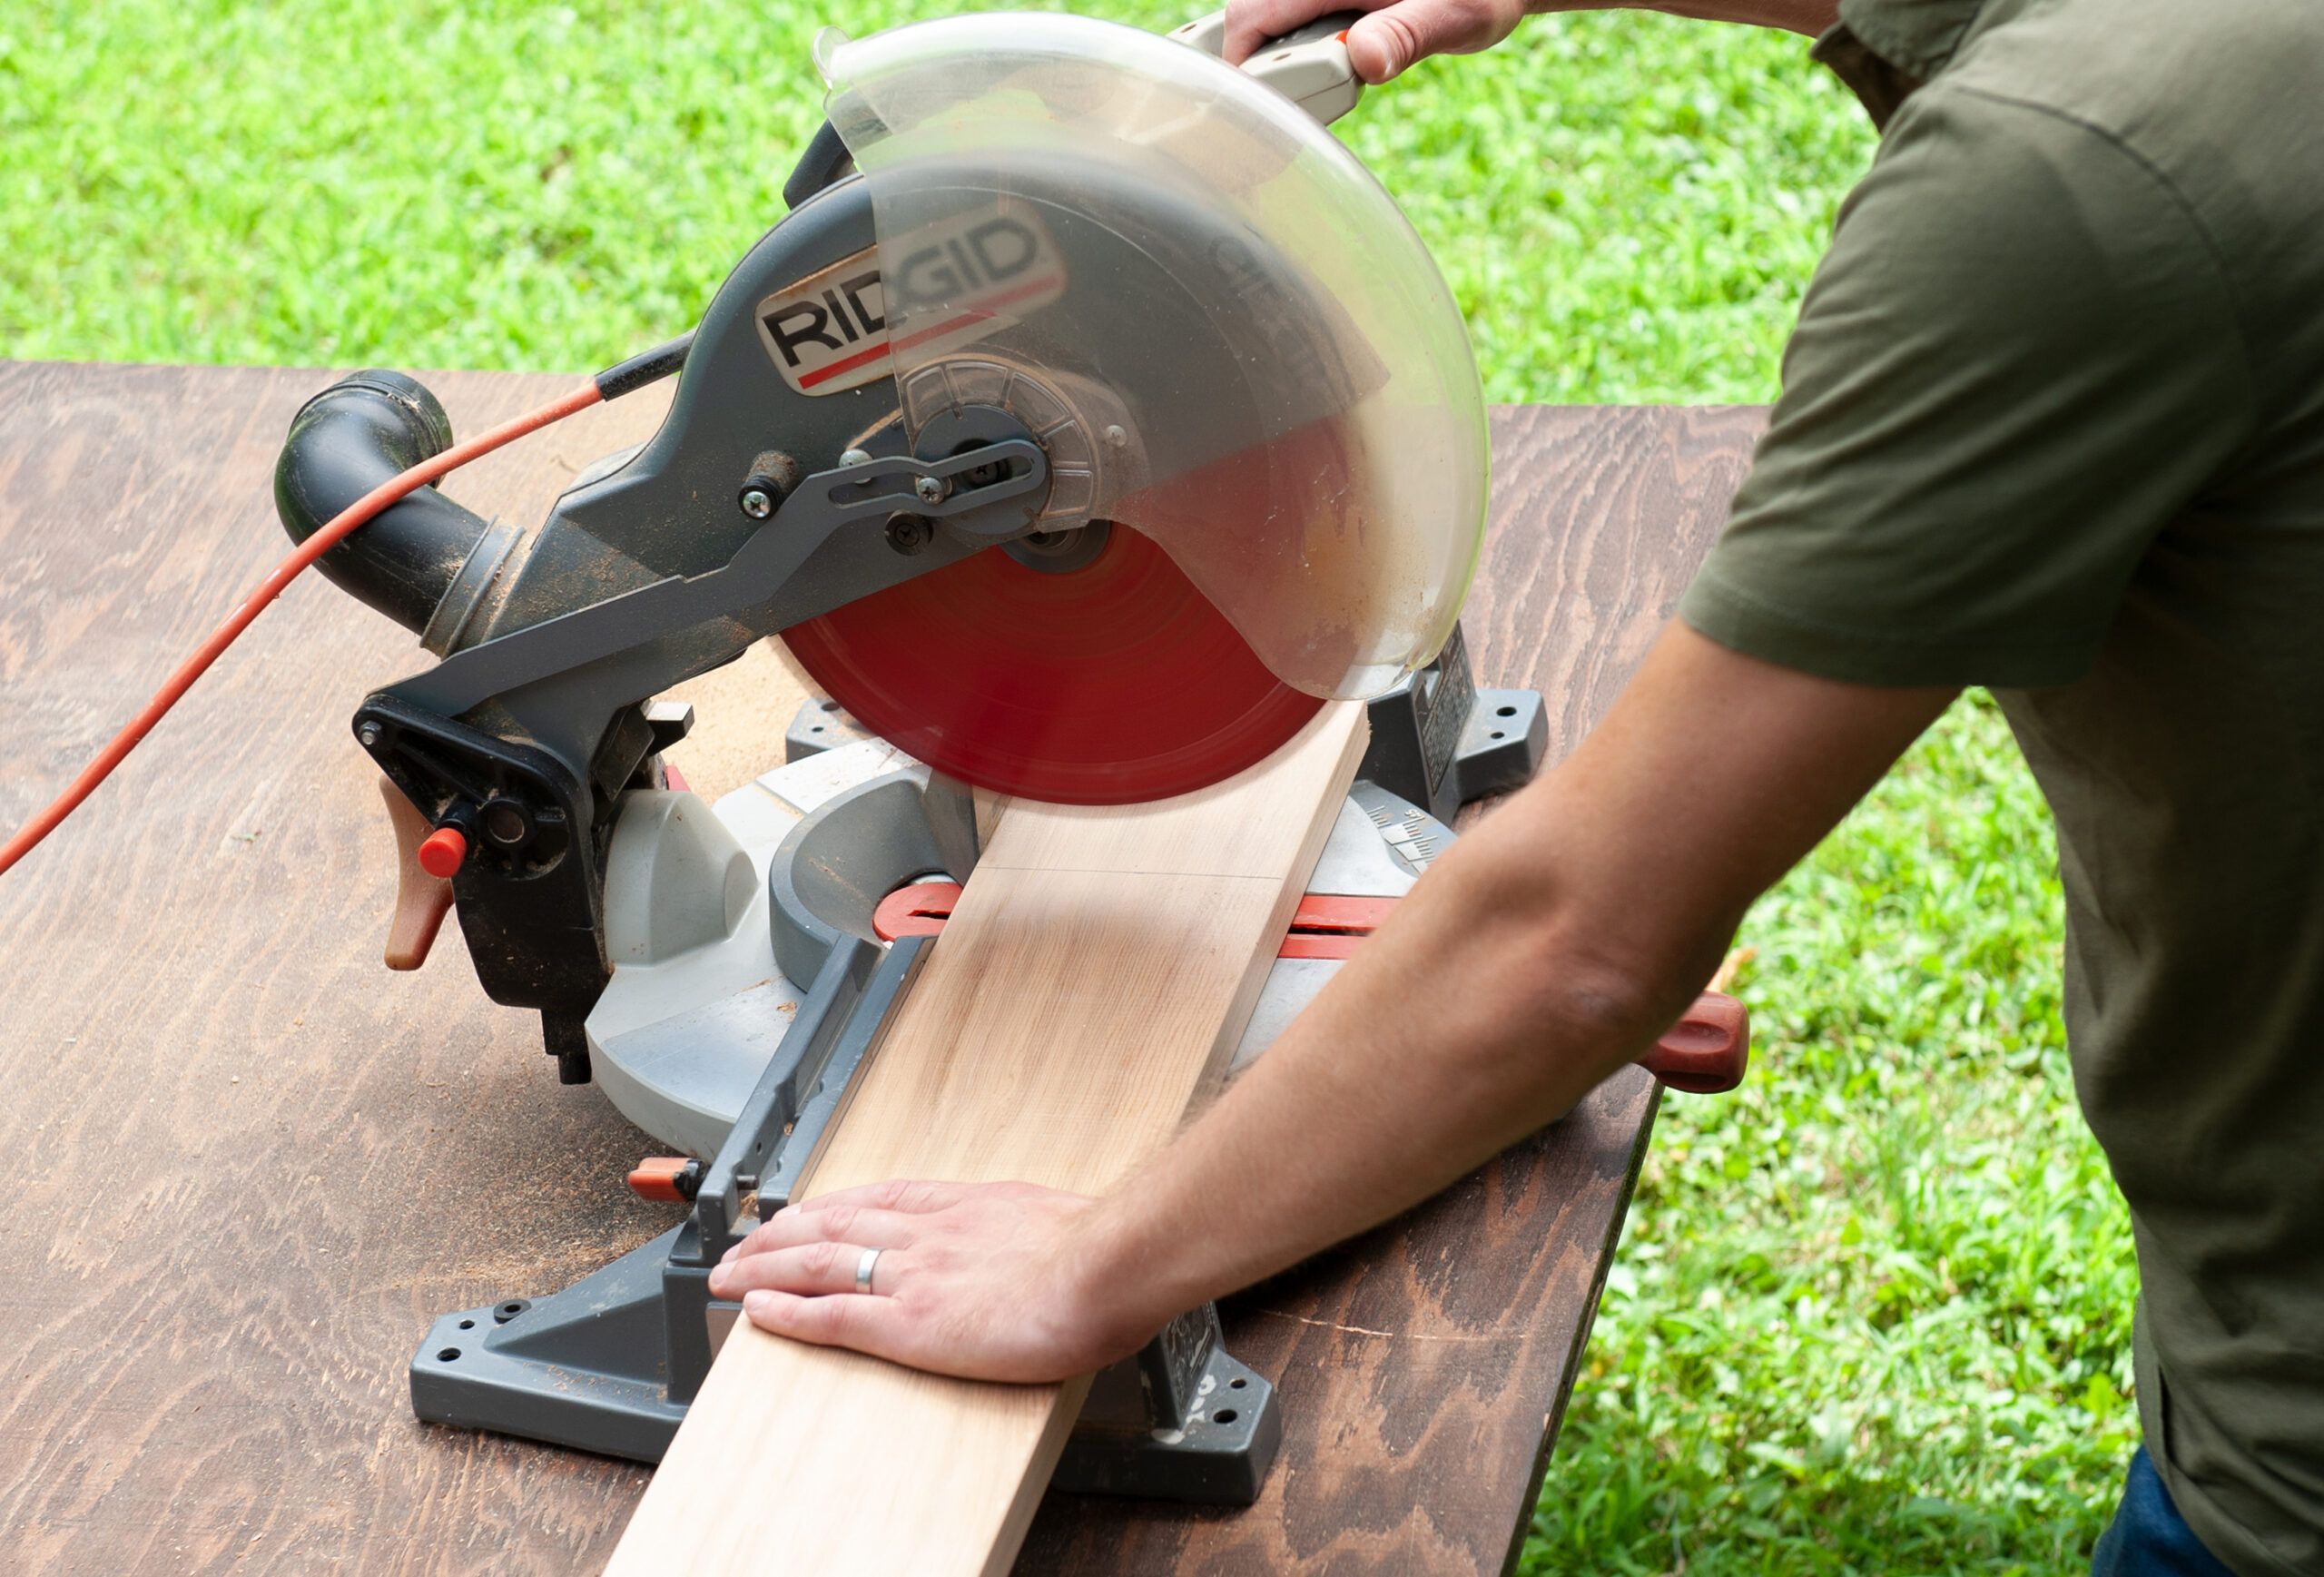
On a miter saw, cut all the boards except the tabletop slats to length according to the cut list below. You’ll size the slats in Step 8.
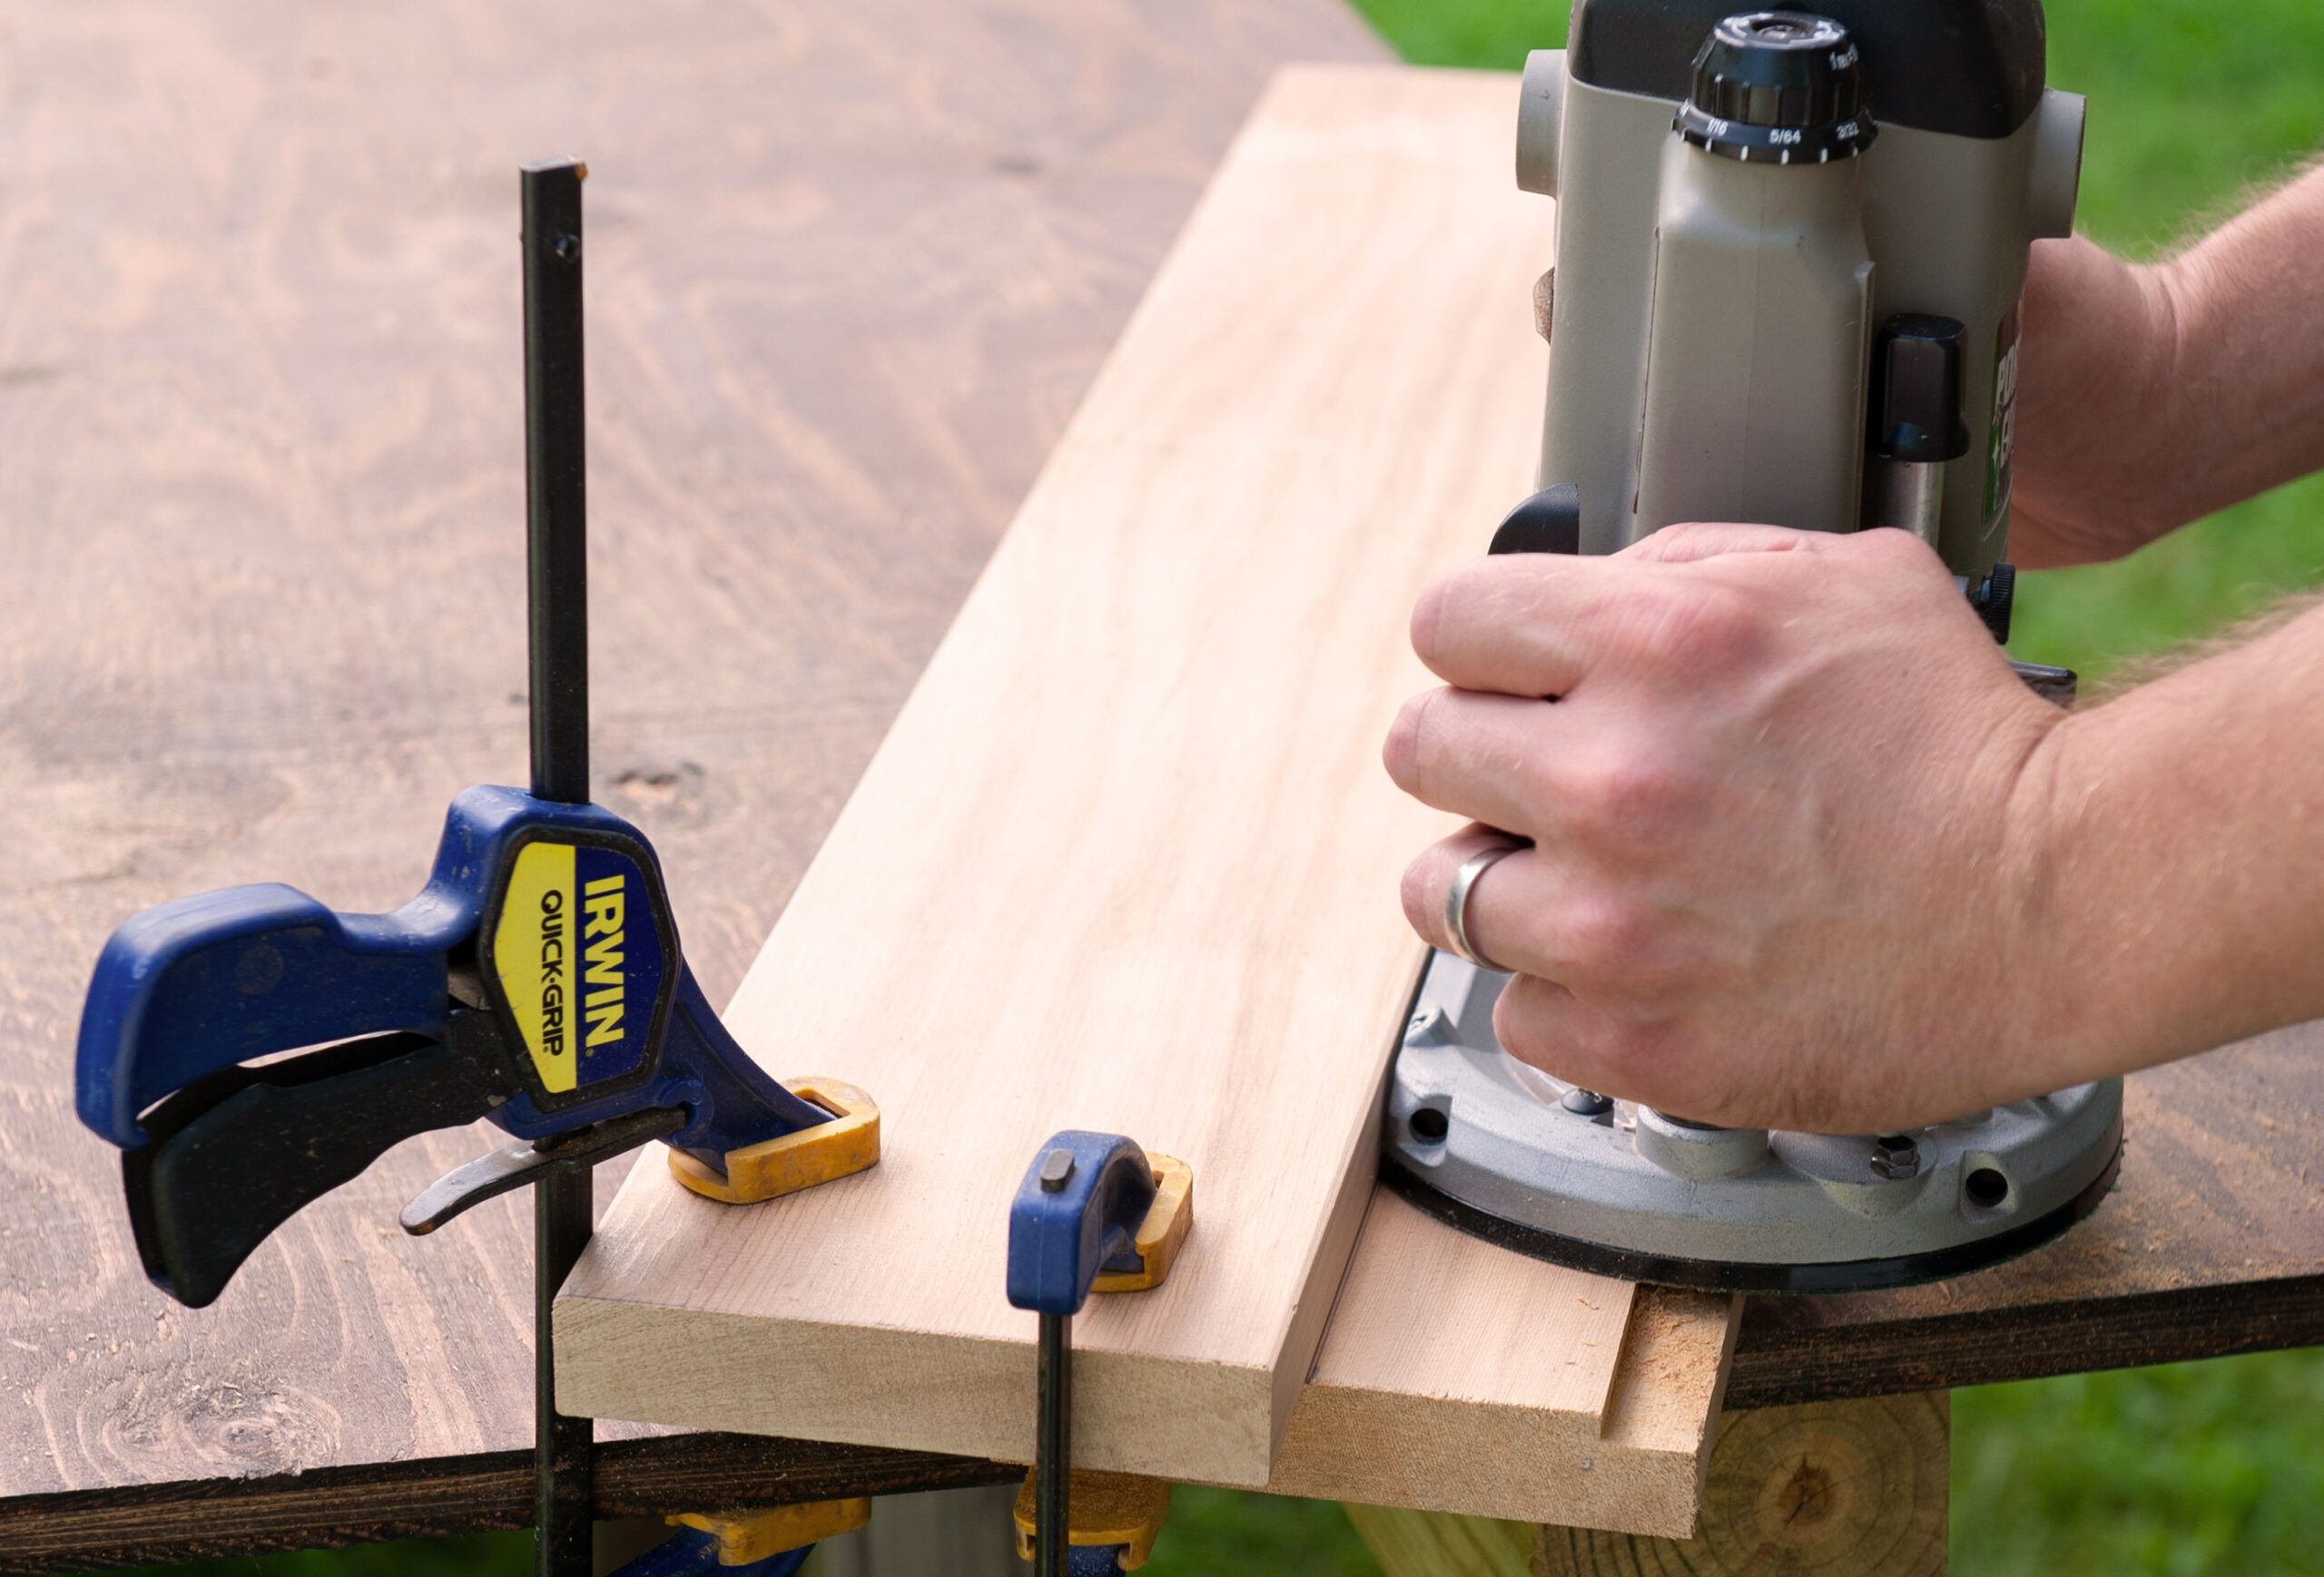
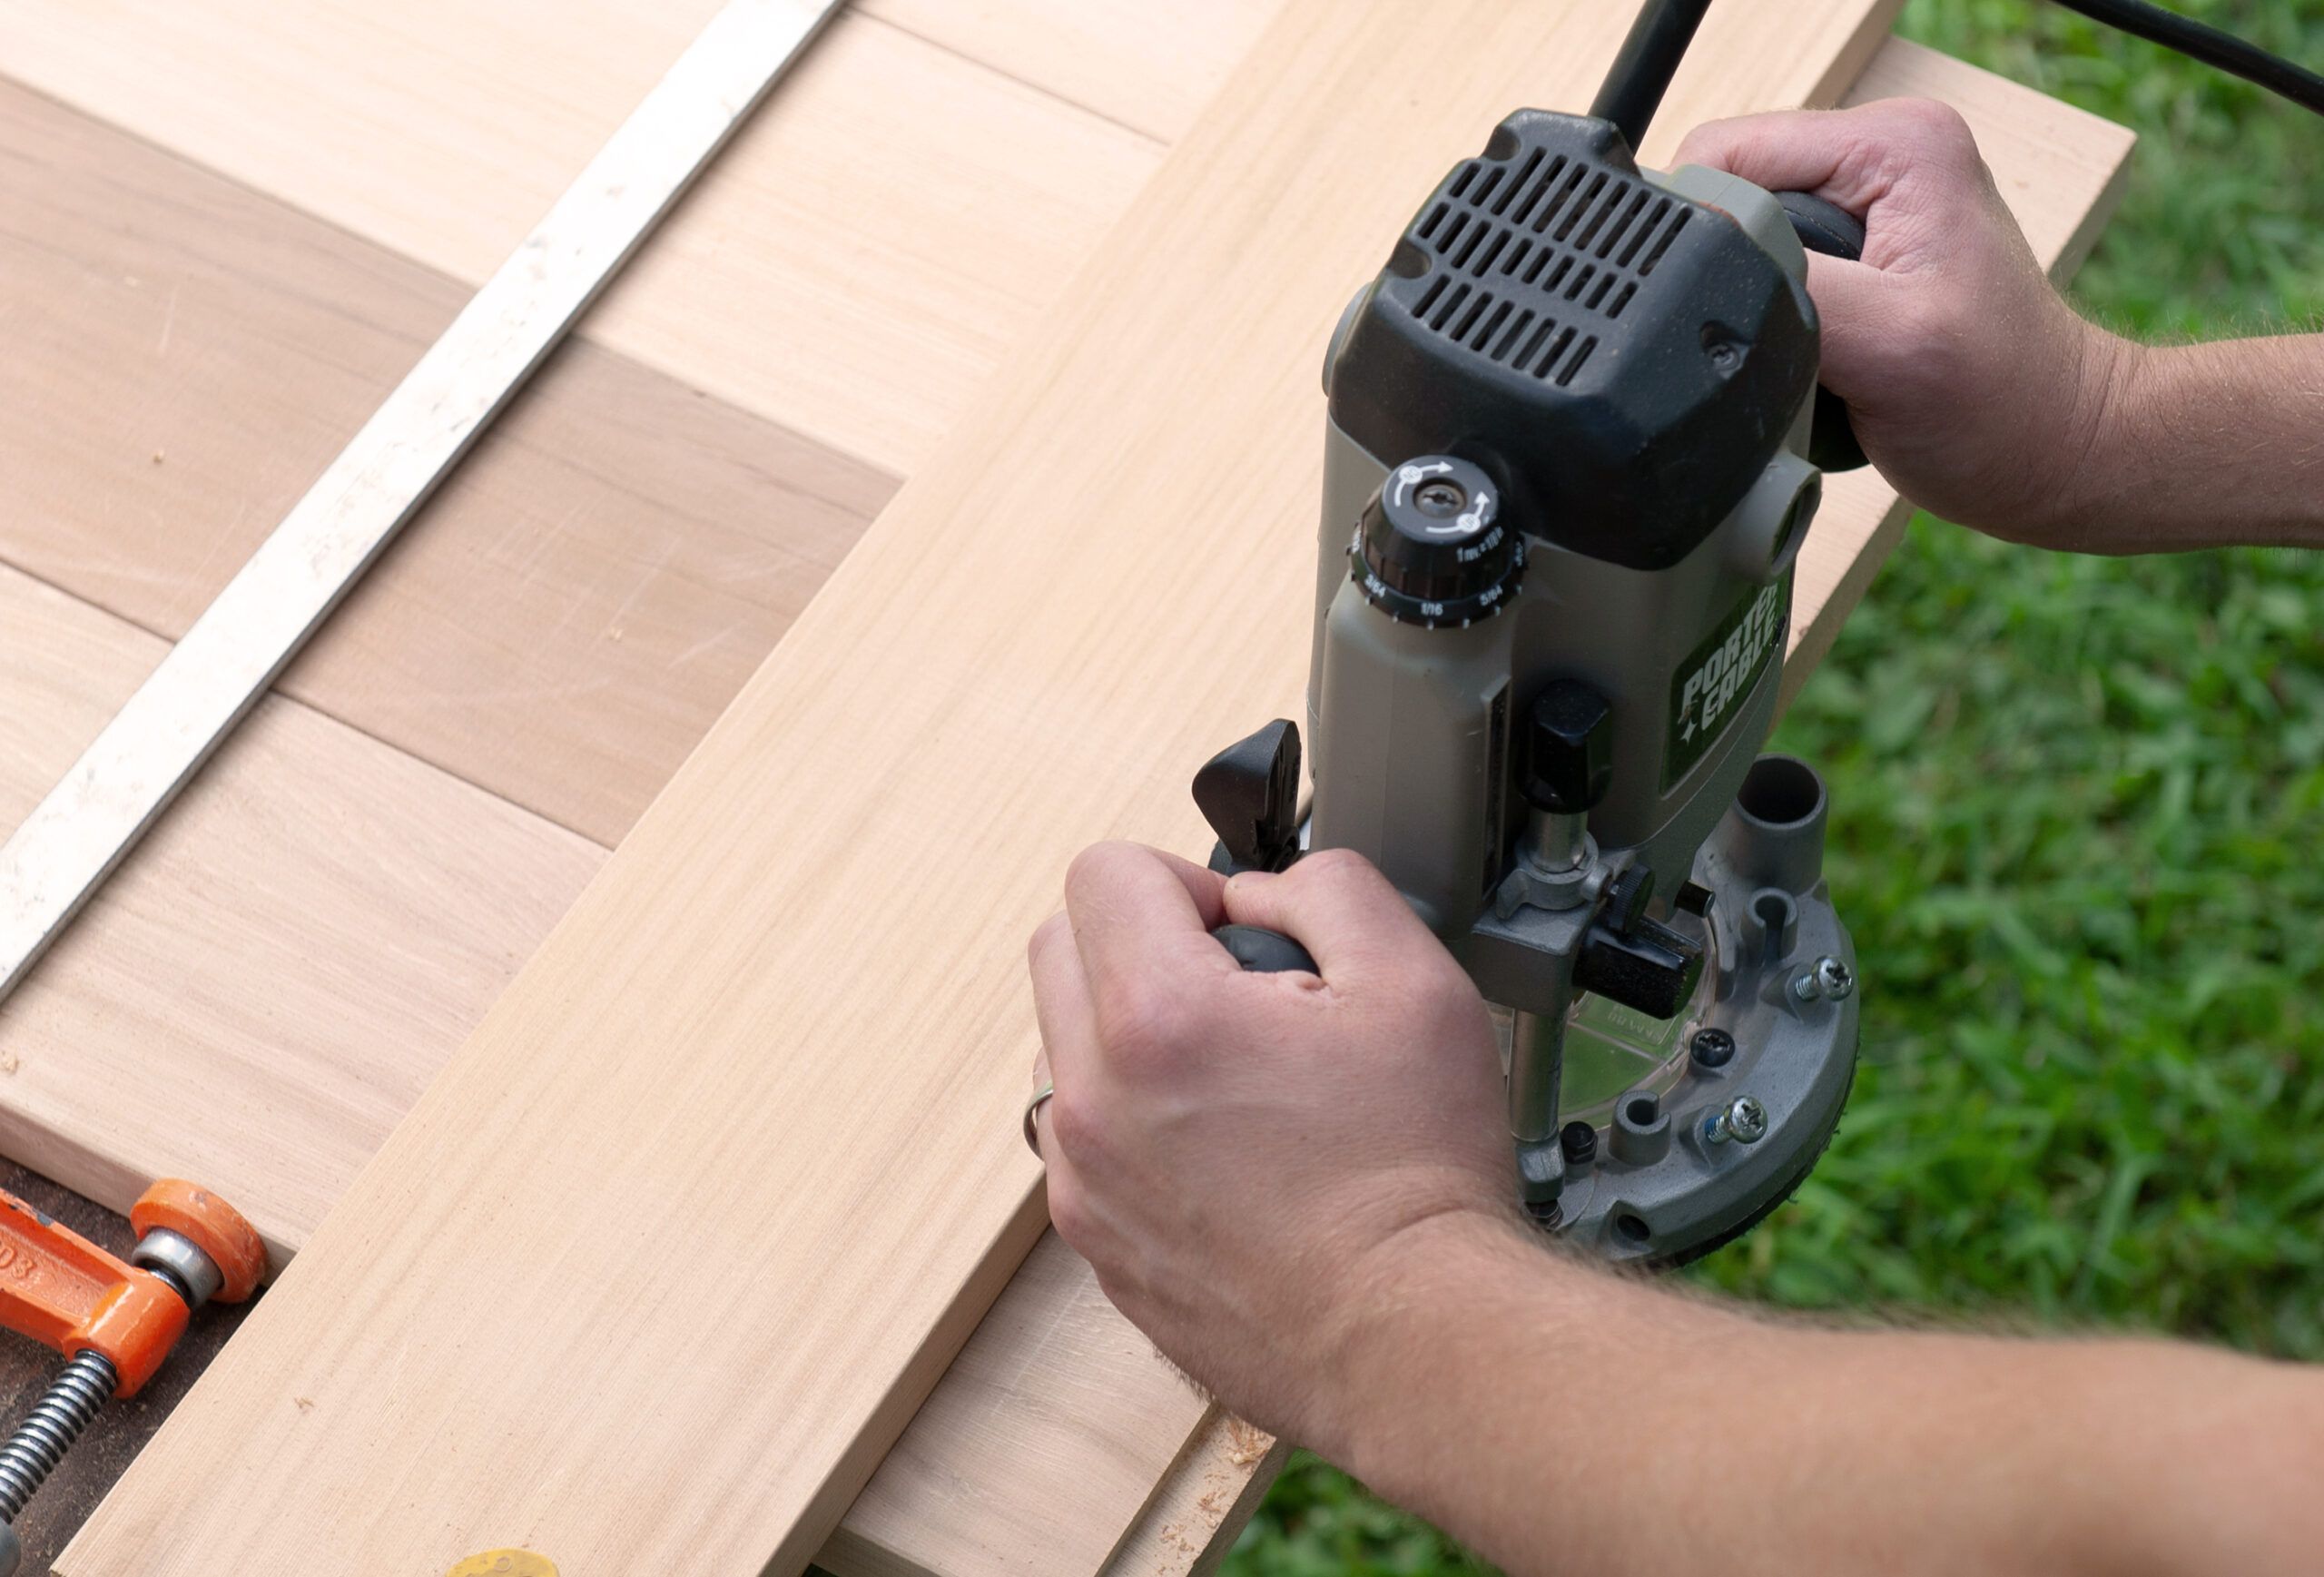
To keep the clamps out of the router’s path, angle a rail across the corner of your work surface. Clamp a straightedge to your work surface, as shown, to allow your router to cut a ¾-inch-wide by ½-inch-deep channel.
Chuck a ¾-inch straight bit in your router. Start at ⅛ inch deep and make several passes, adjusting the bit as you go, until the rabbet is a full ½ inch deep. Repeat the process on the opposite rail. For the center rail, create a rabbet along both edges.
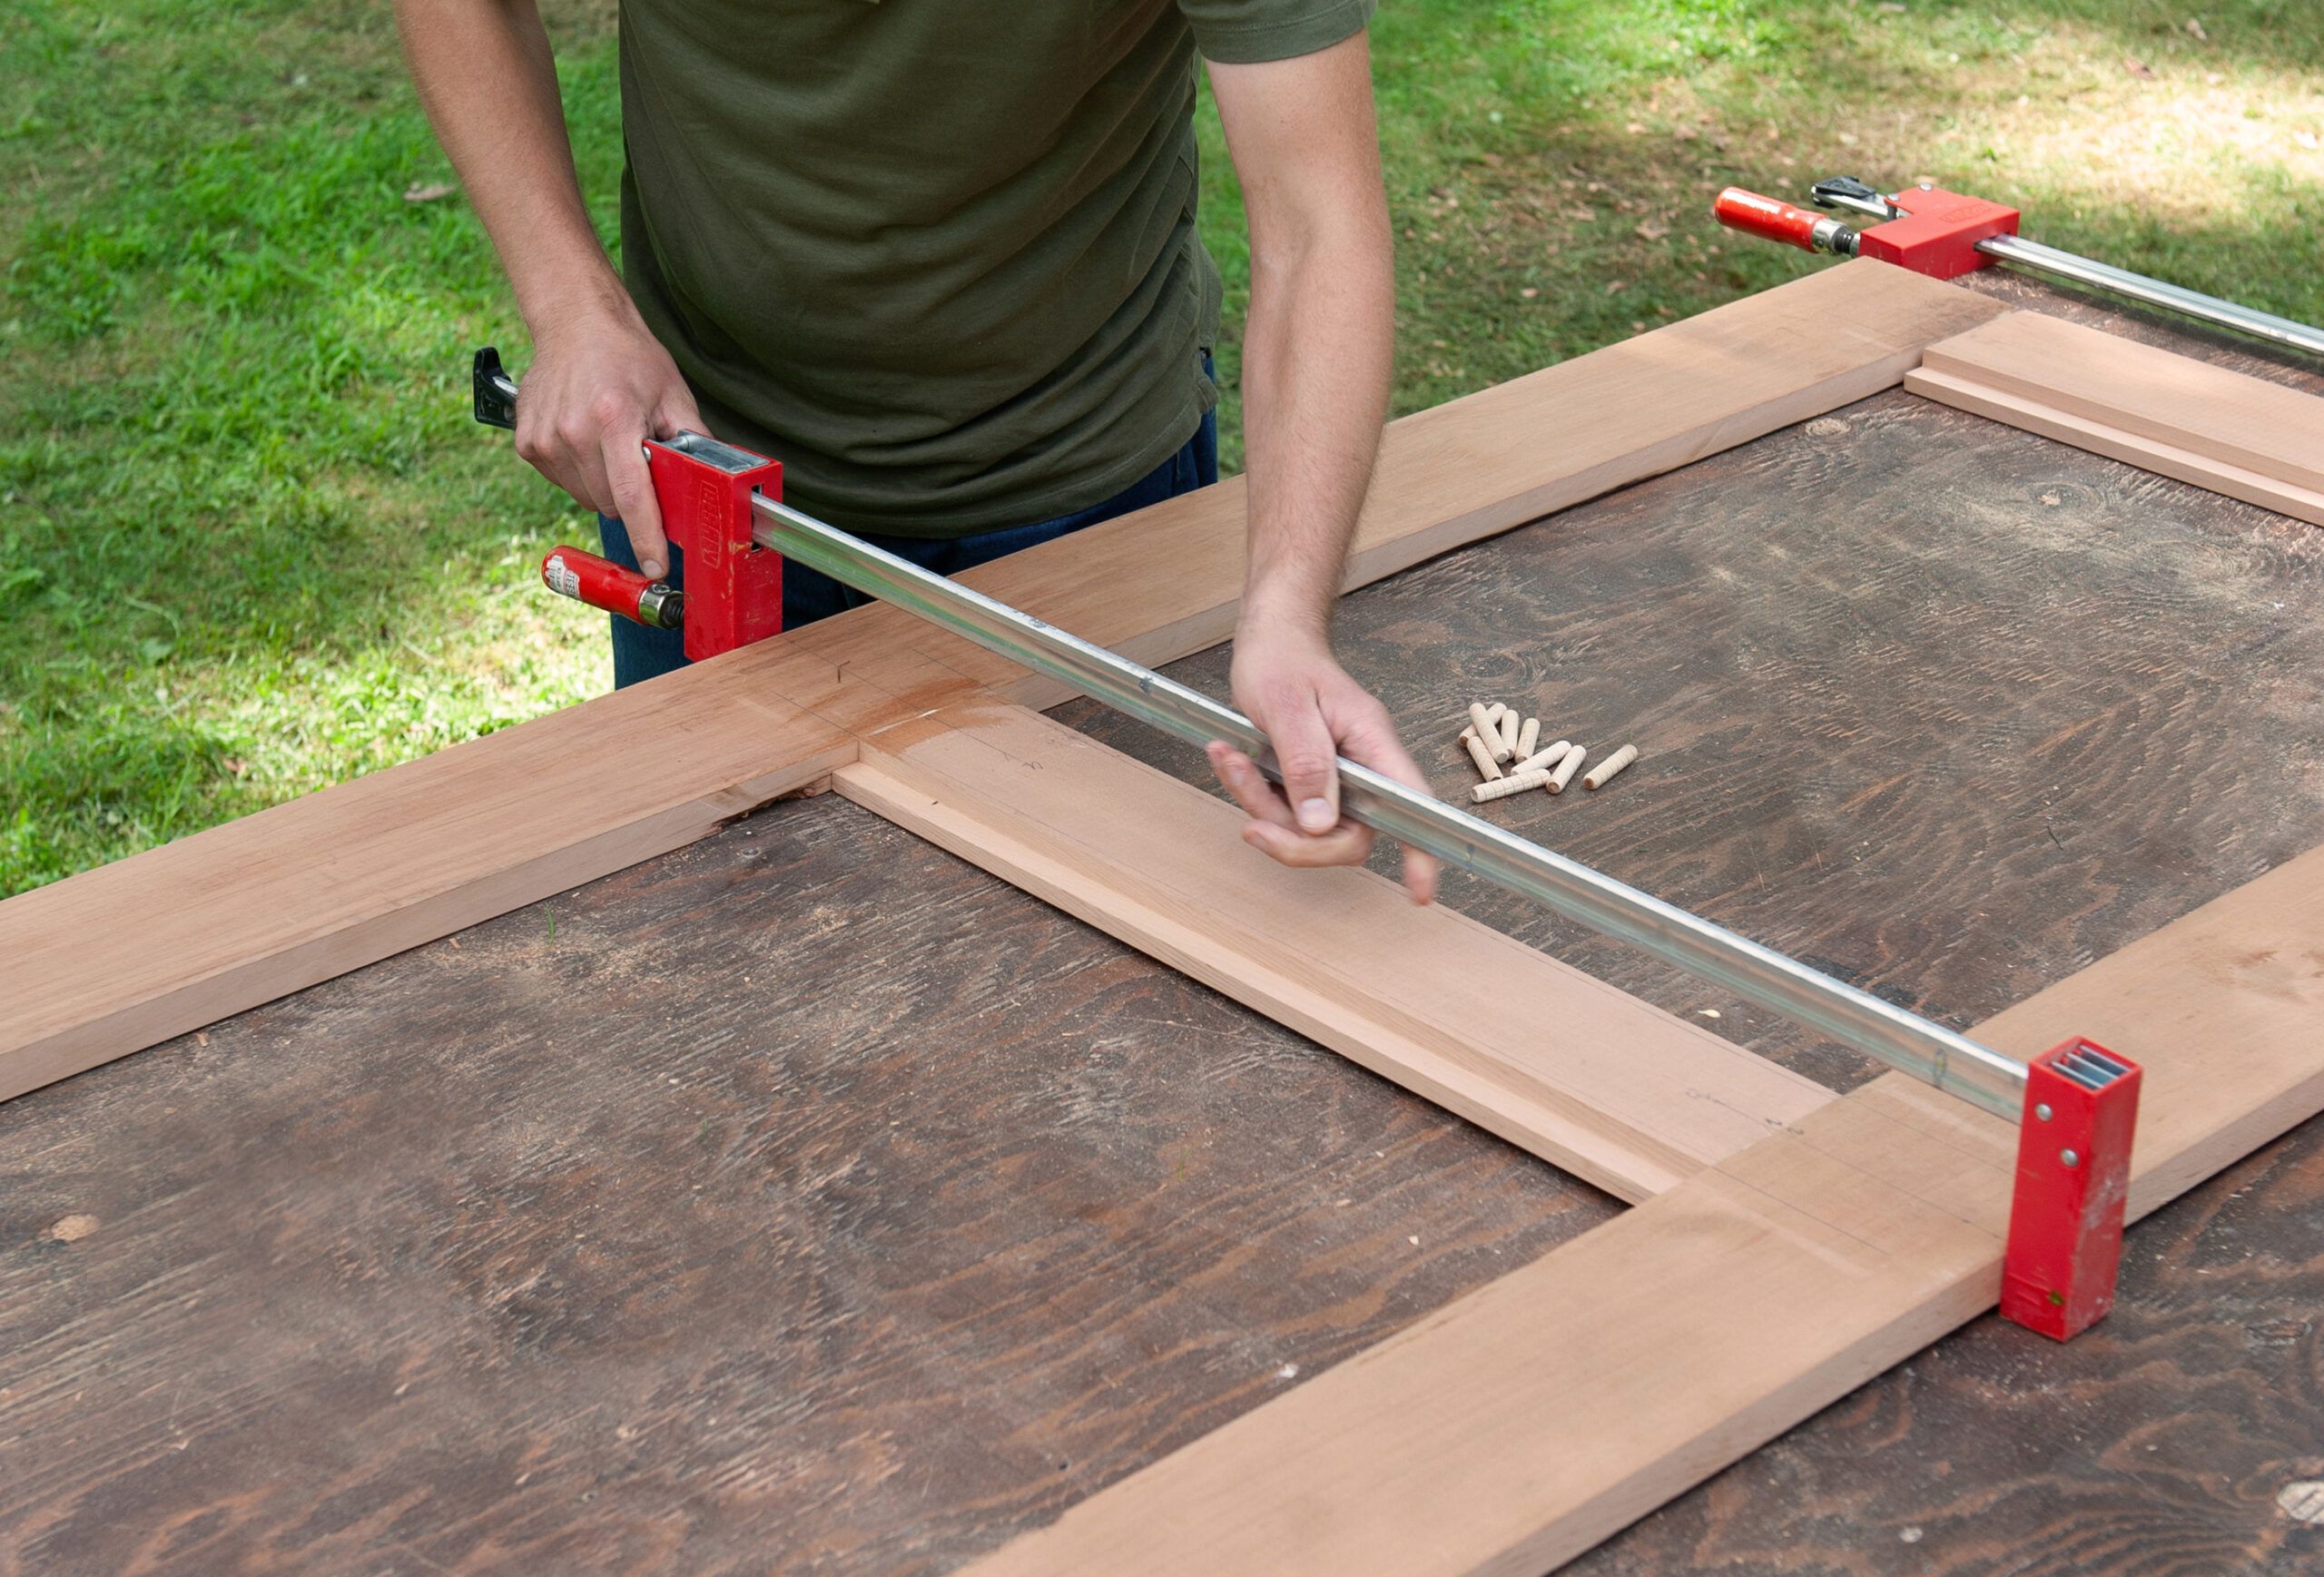
Arrange the rails and stiles on your work surface, as shown, and use bar clamps to hold them together.
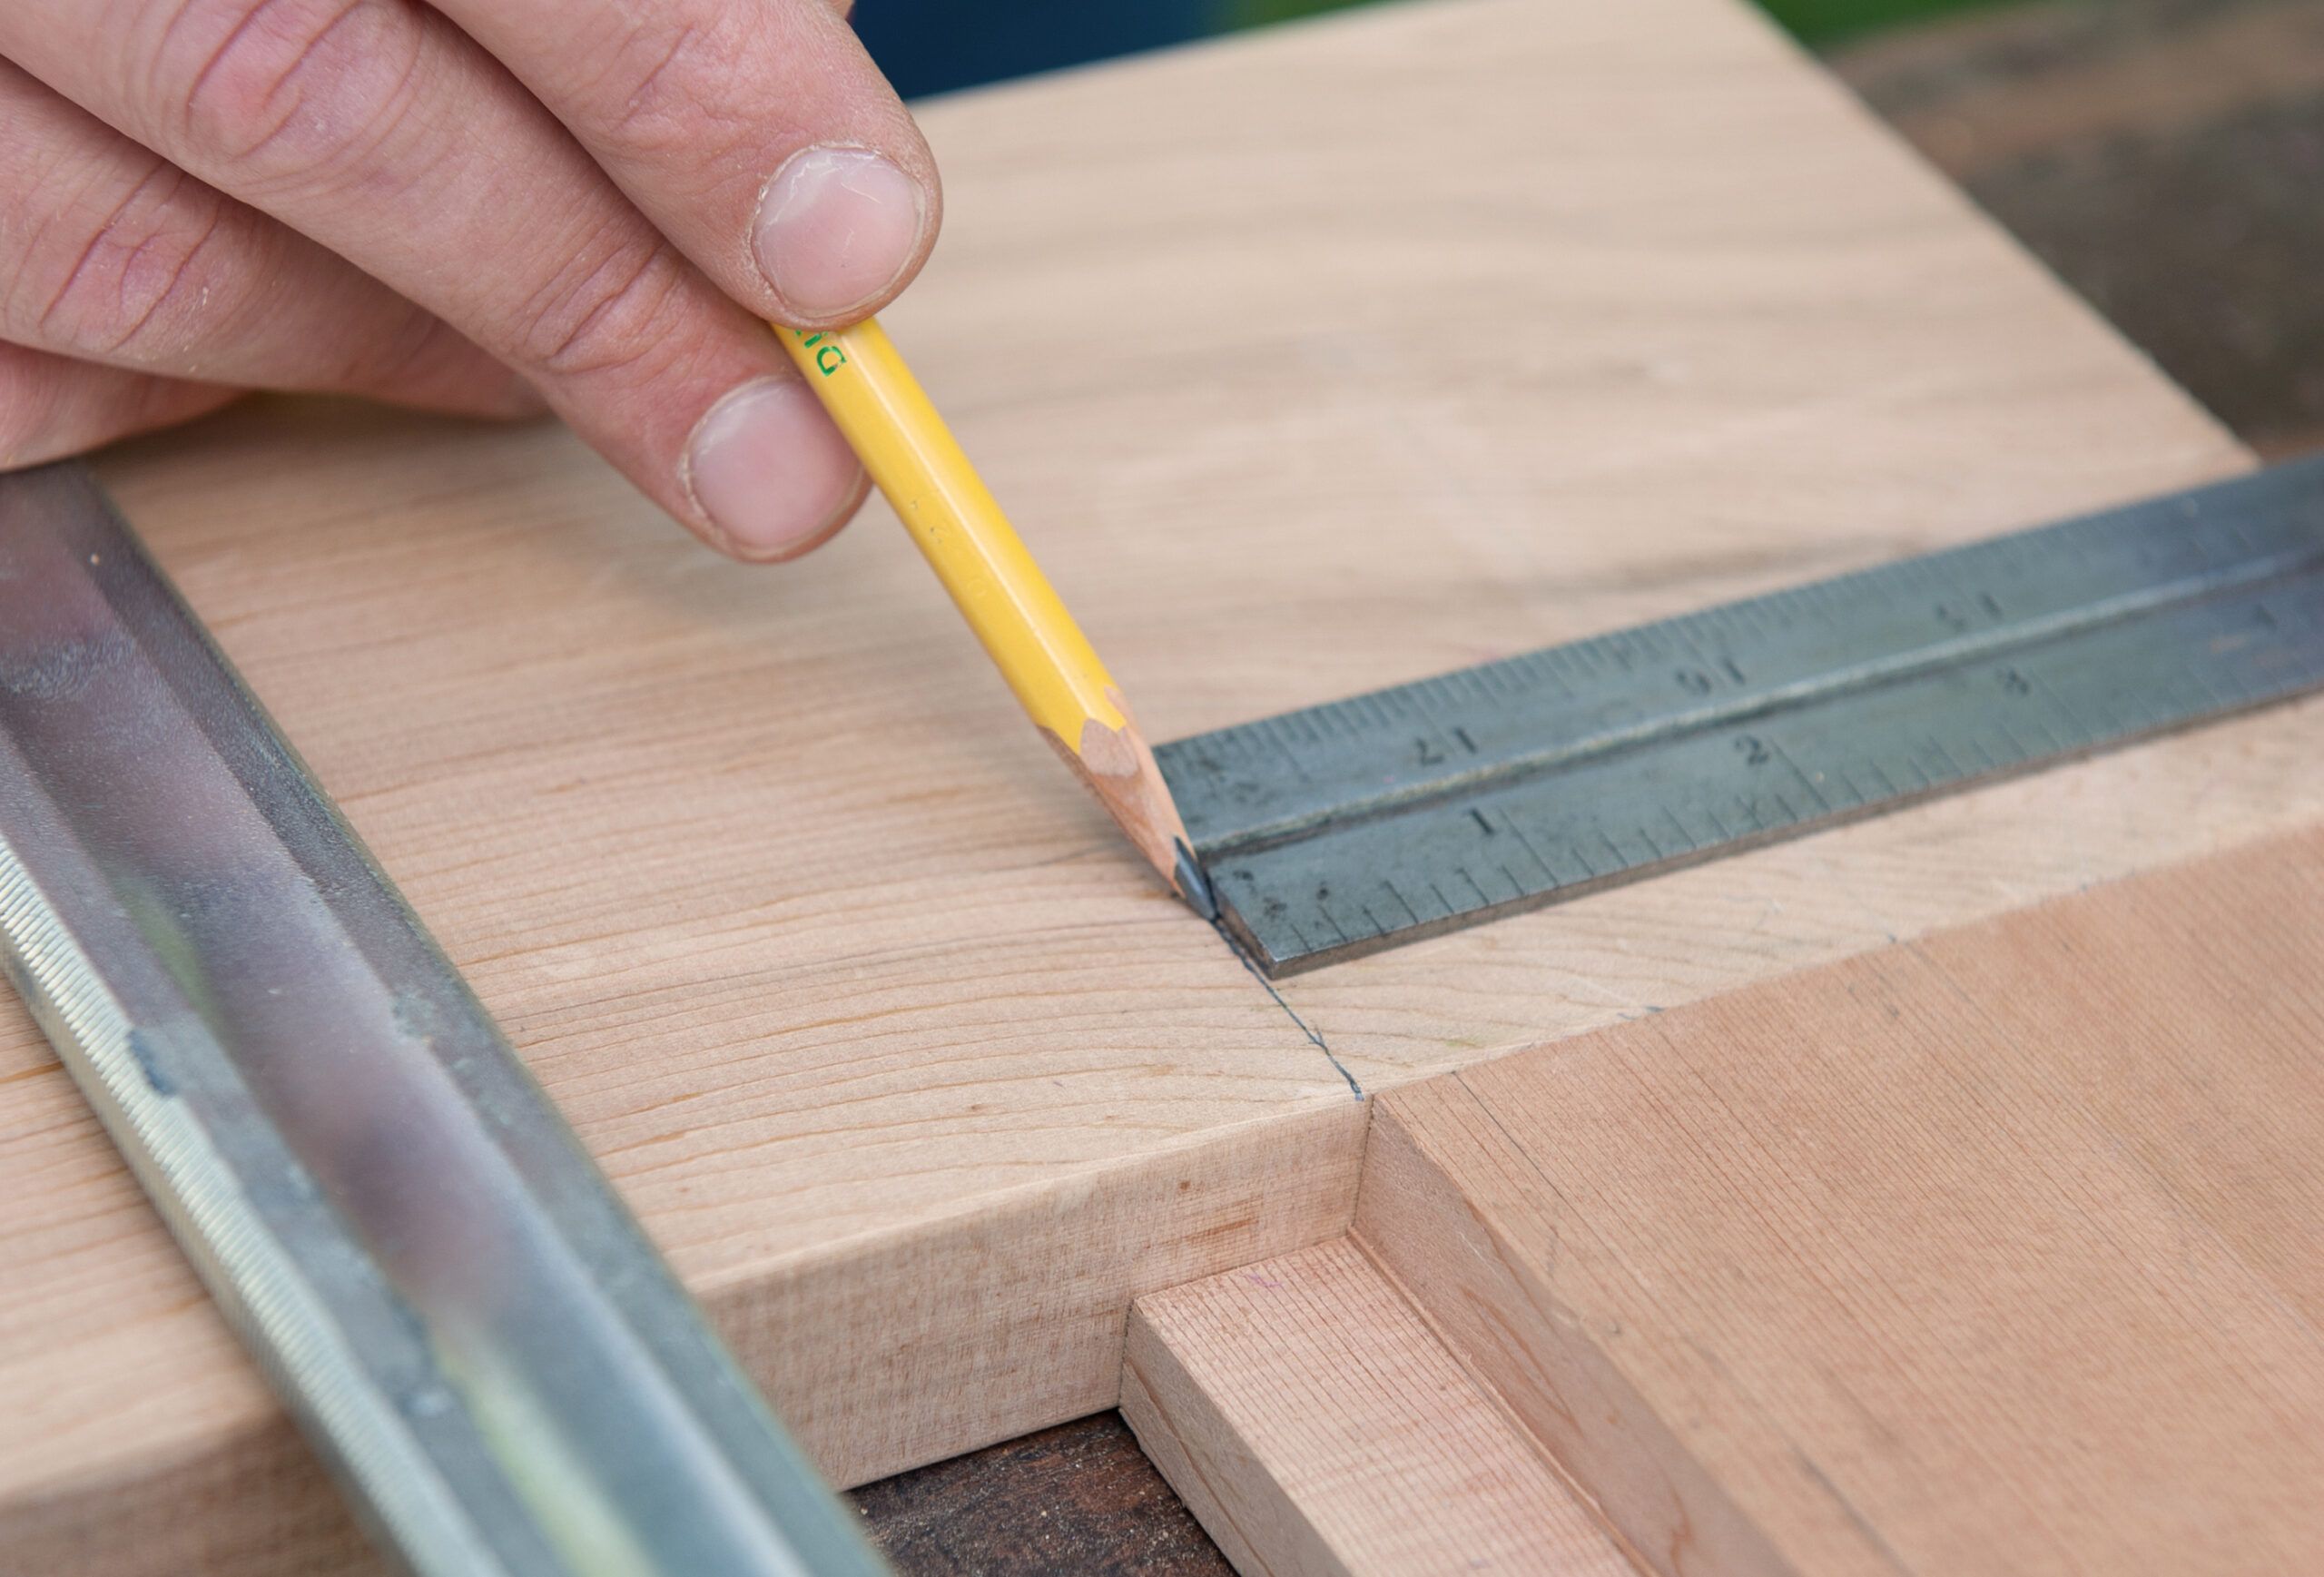
To create registration marks for your doweling jig, use a combination square to transfer the edges of the rails across the faces of the stiles, as shown, at each of the frame’s six joints.
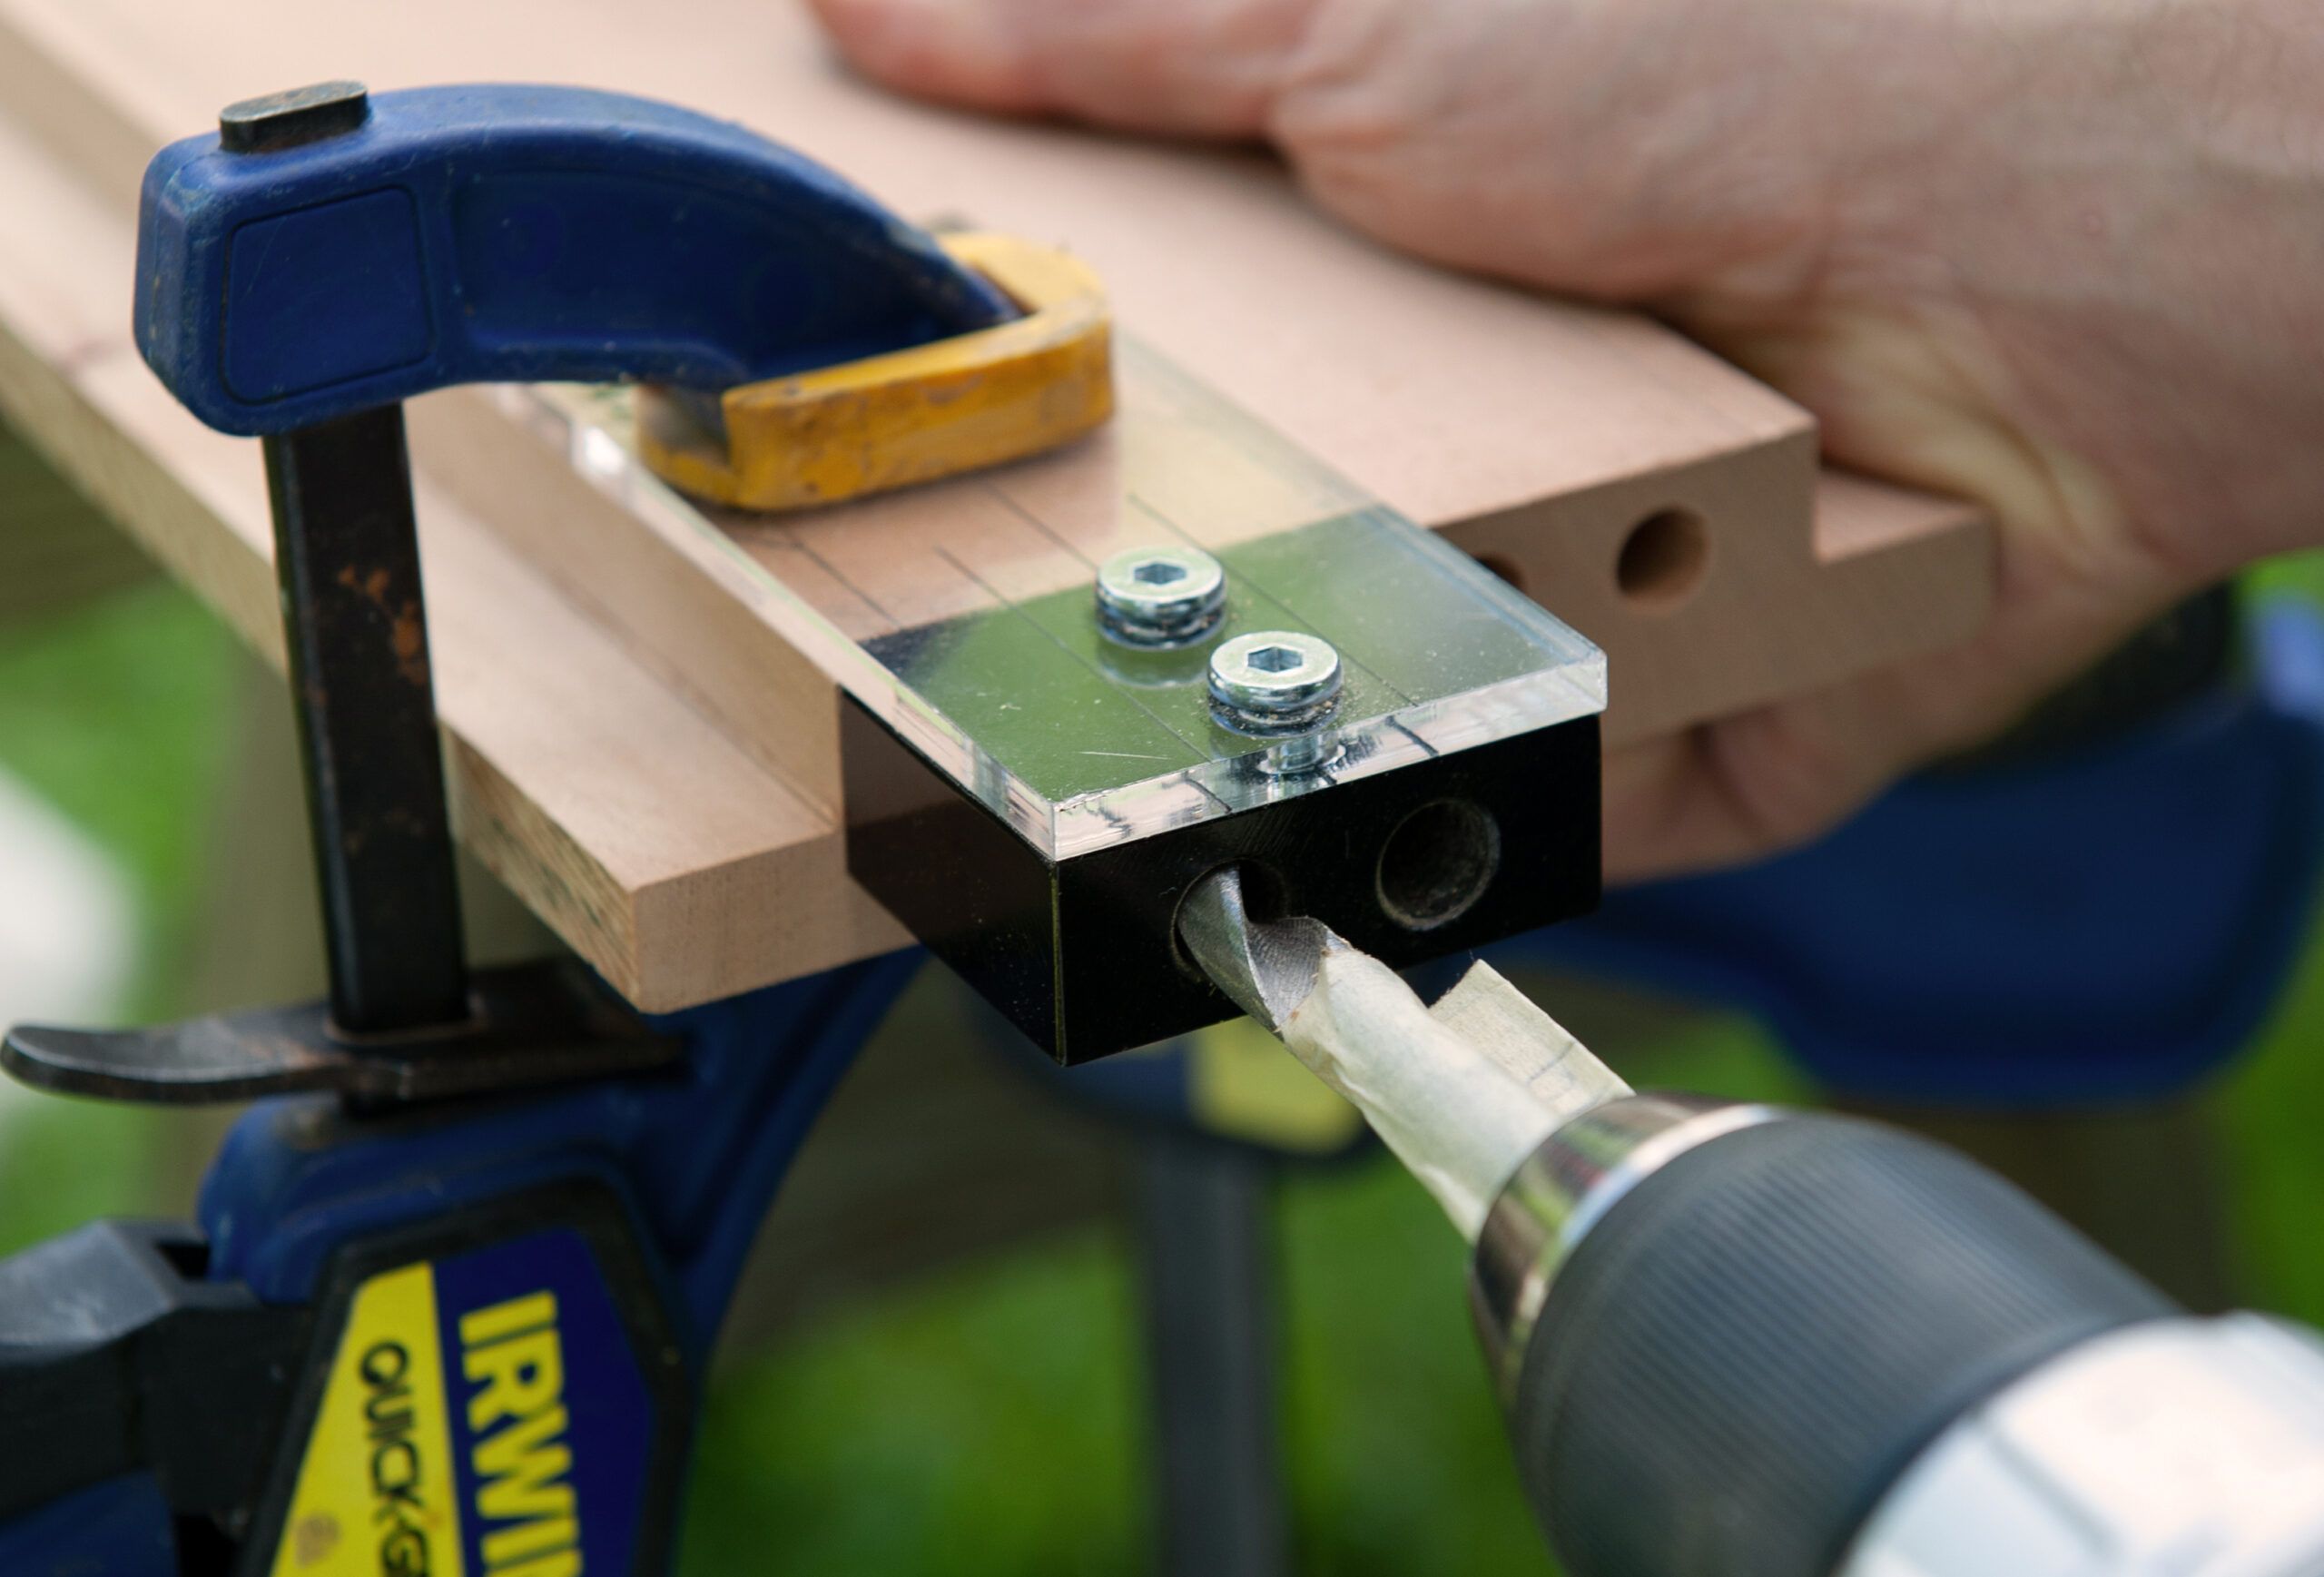
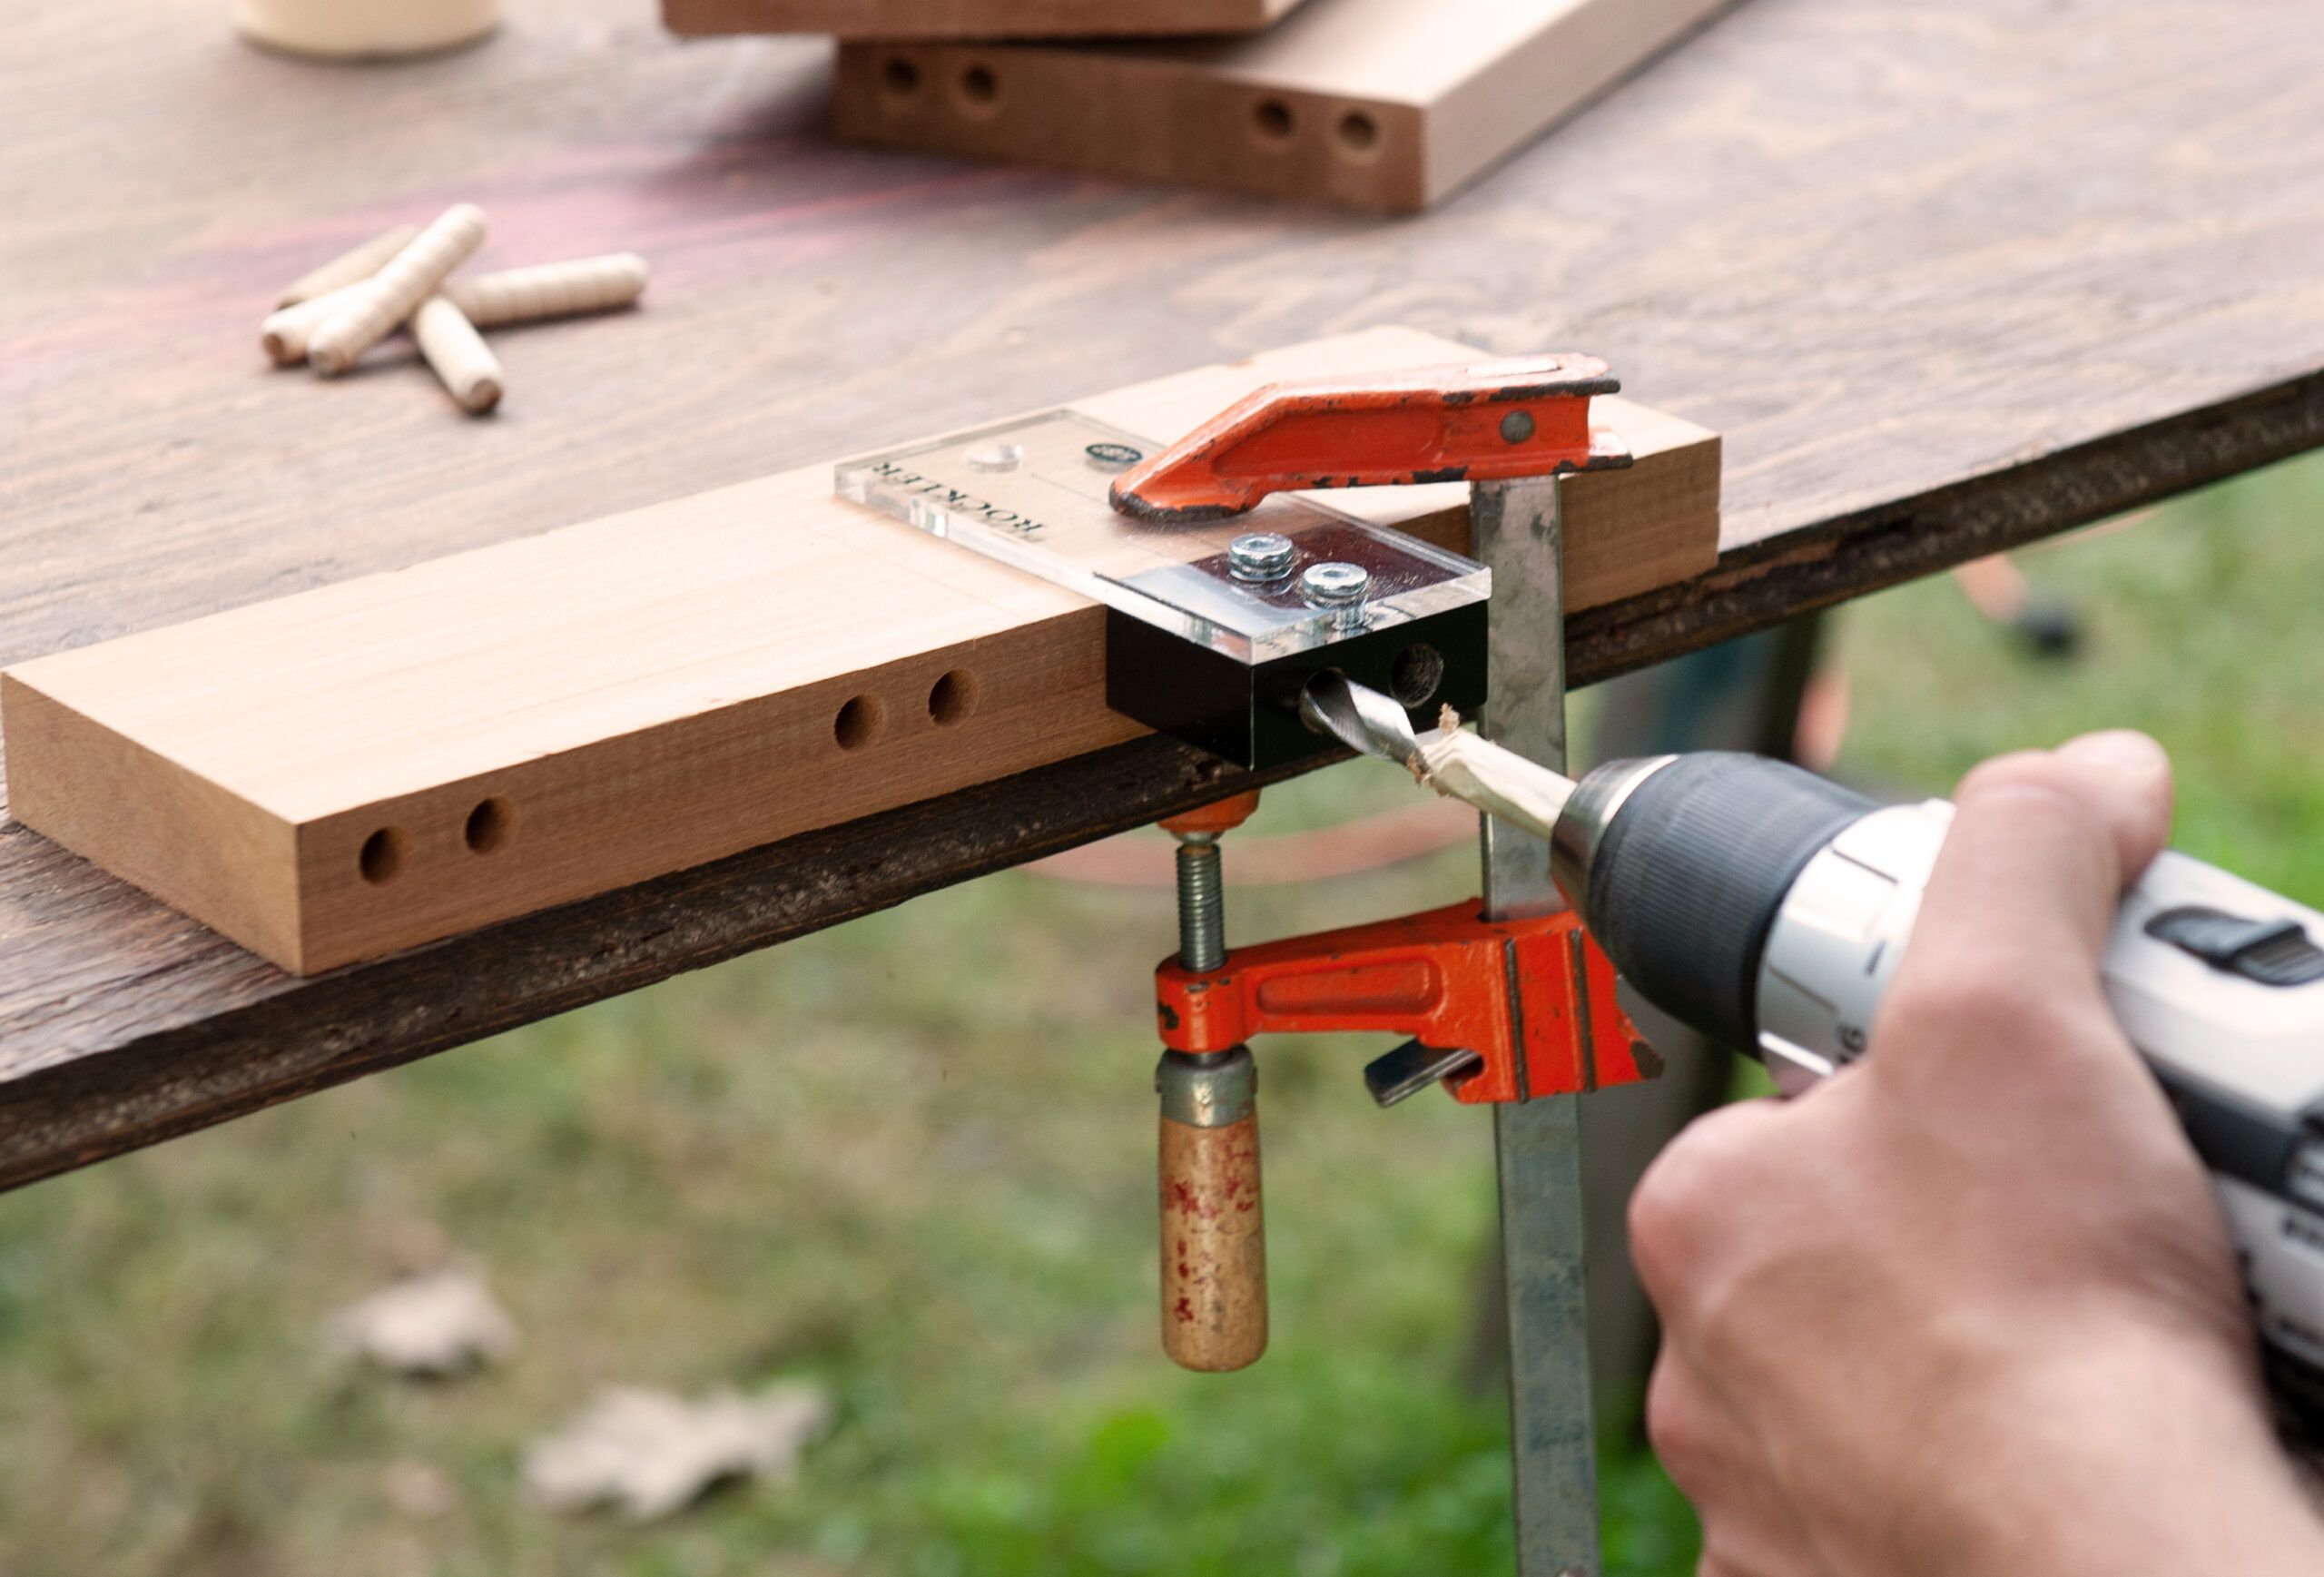
Clamp the center rail to your work surface, and clamp the jig to the rail, flush along one edge, as shown.
Mark a ⅜-inch twist bit with tape so that it will penetrate 1⅛-inch into the workpiece. Drill both holes, shift the jig to line up with the other edge, and drill another pair (each joint takes two pairs of dowels). Repeat the process on the ends of all the rails.
To drill matching dowel holes on the edges of the stiles, line up the jig flush with the end of each stile and just inside each register mark.
First, lay out the frame pieces on your work surface and dry-fit them to make sure the dowels line up with the holes; remember that the rail with rabbets along both edges goes in the center.
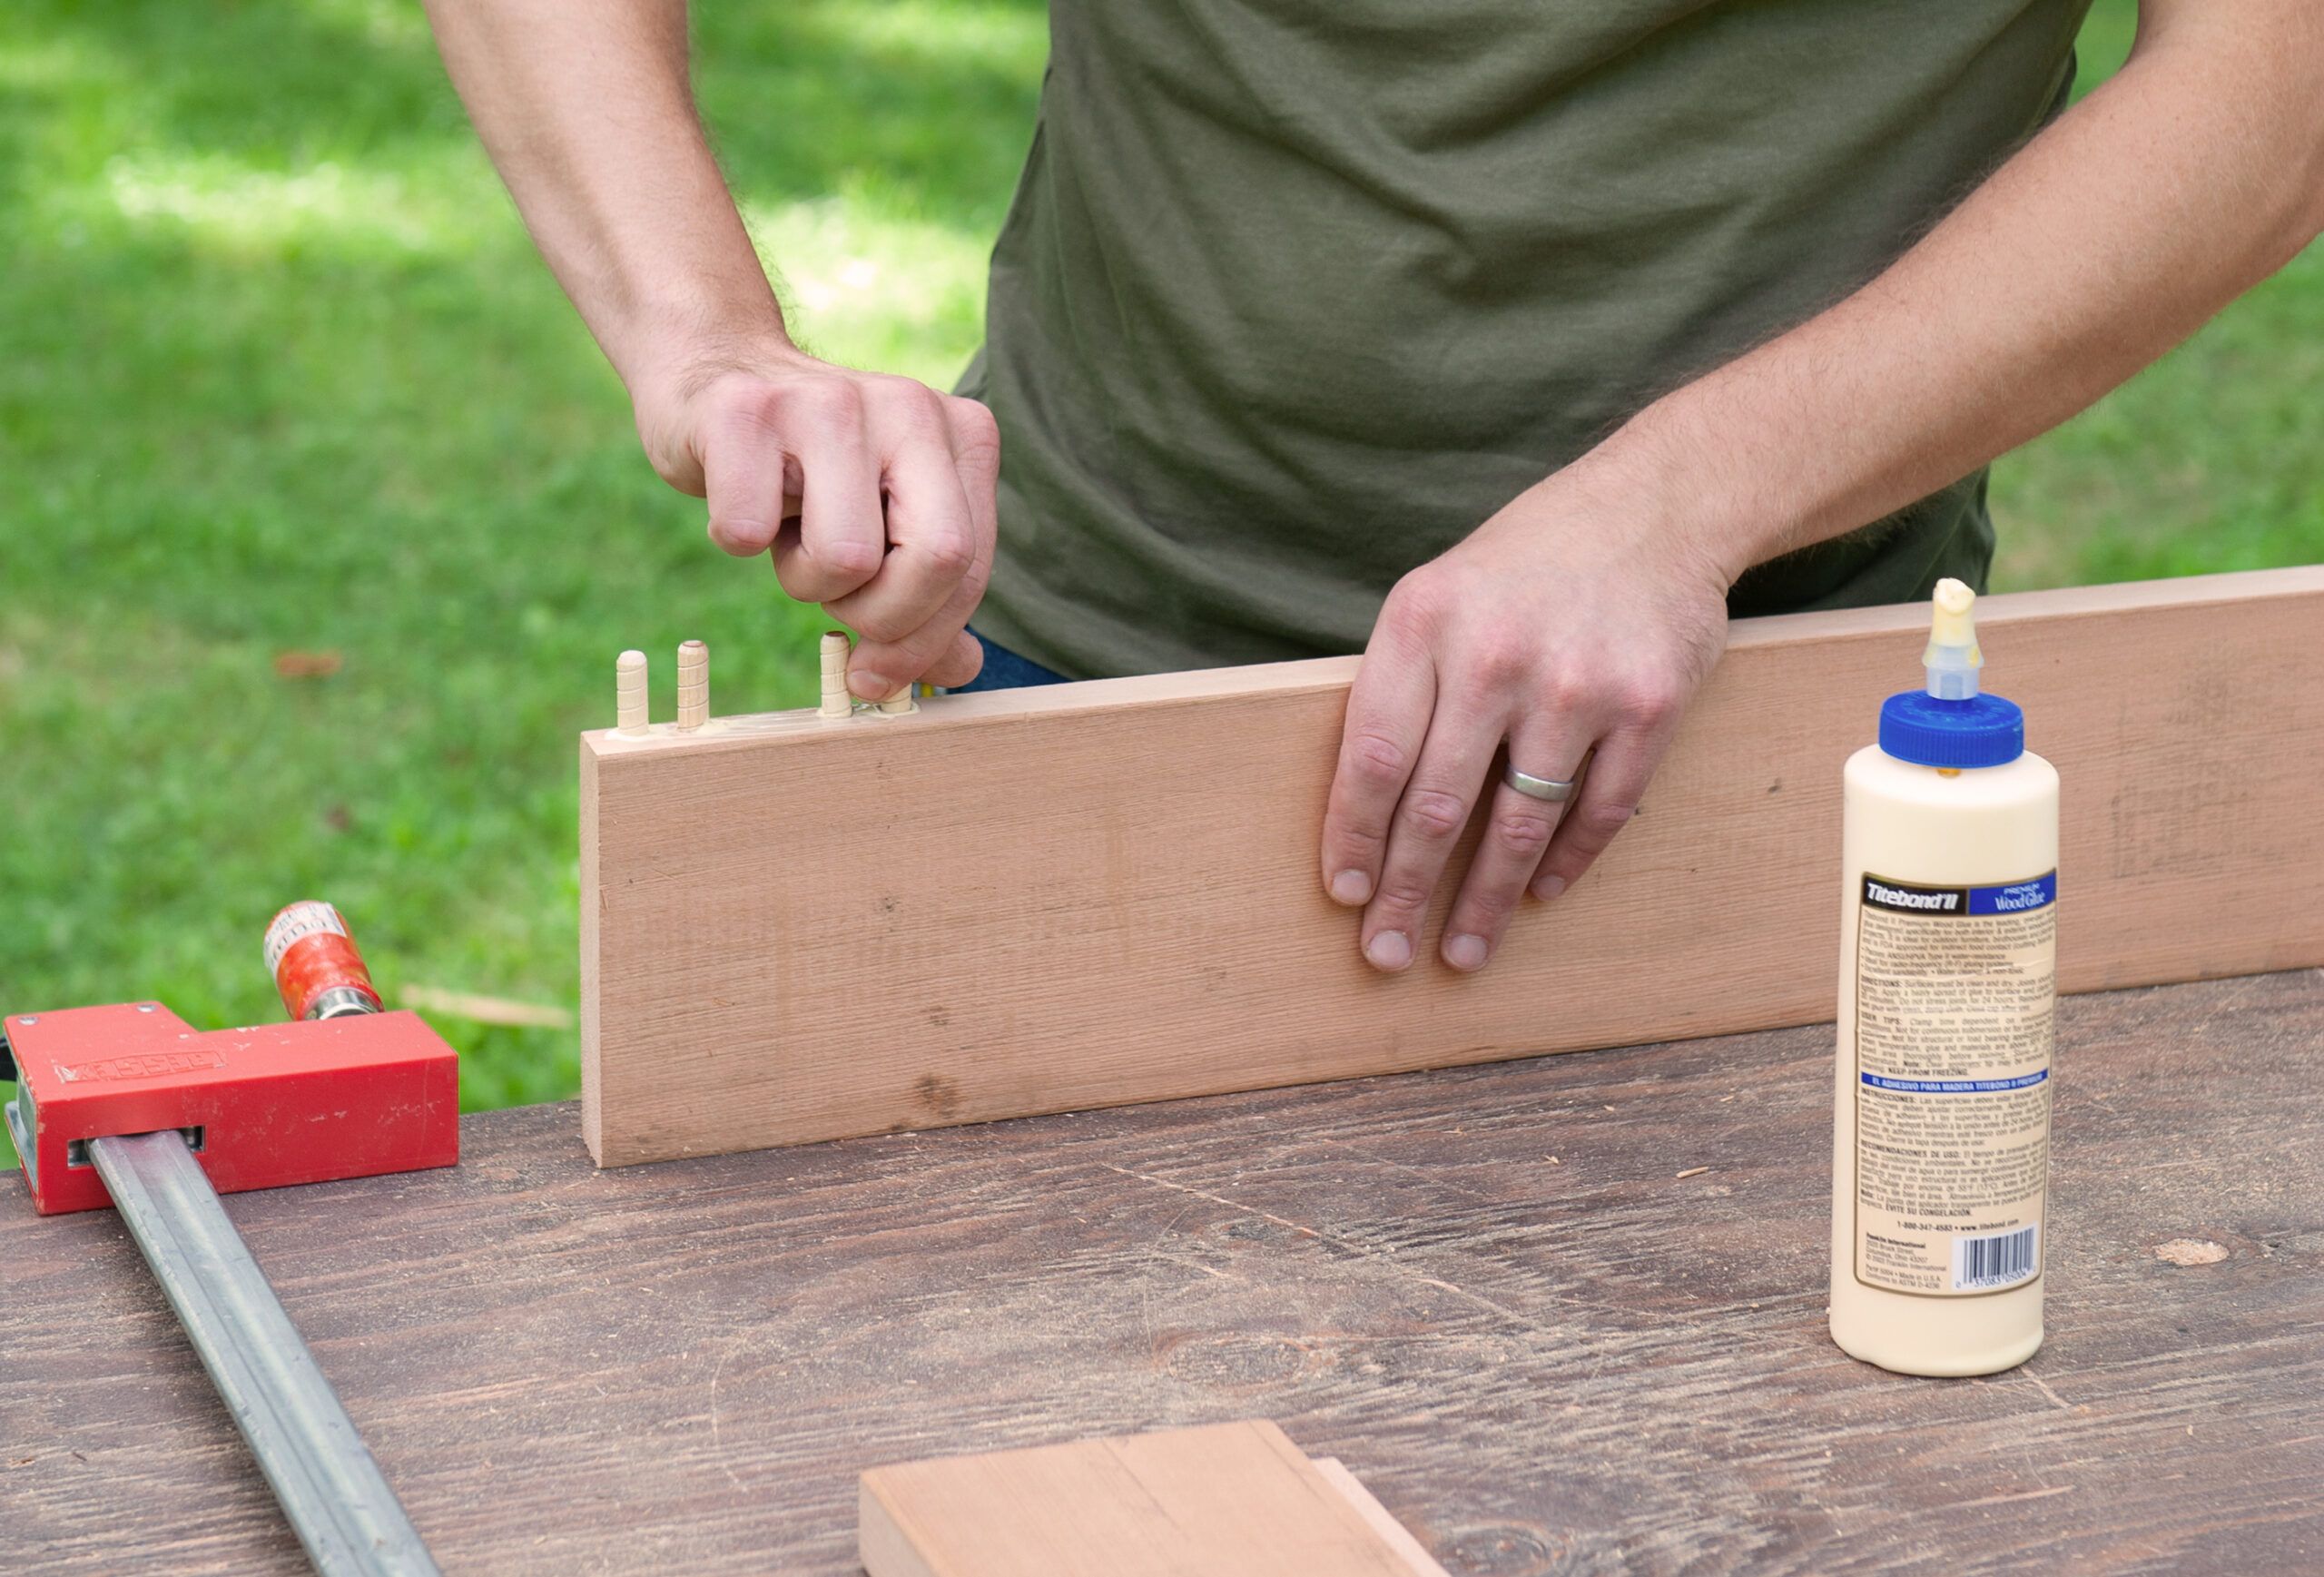
Next, back the pieces apart, apply wood glue to the holes of one stile, and insert the dowels, as shown.
Apply glue to the other stile and install the dowels, then apply glue to the matching rail holes and fit the rails in place.
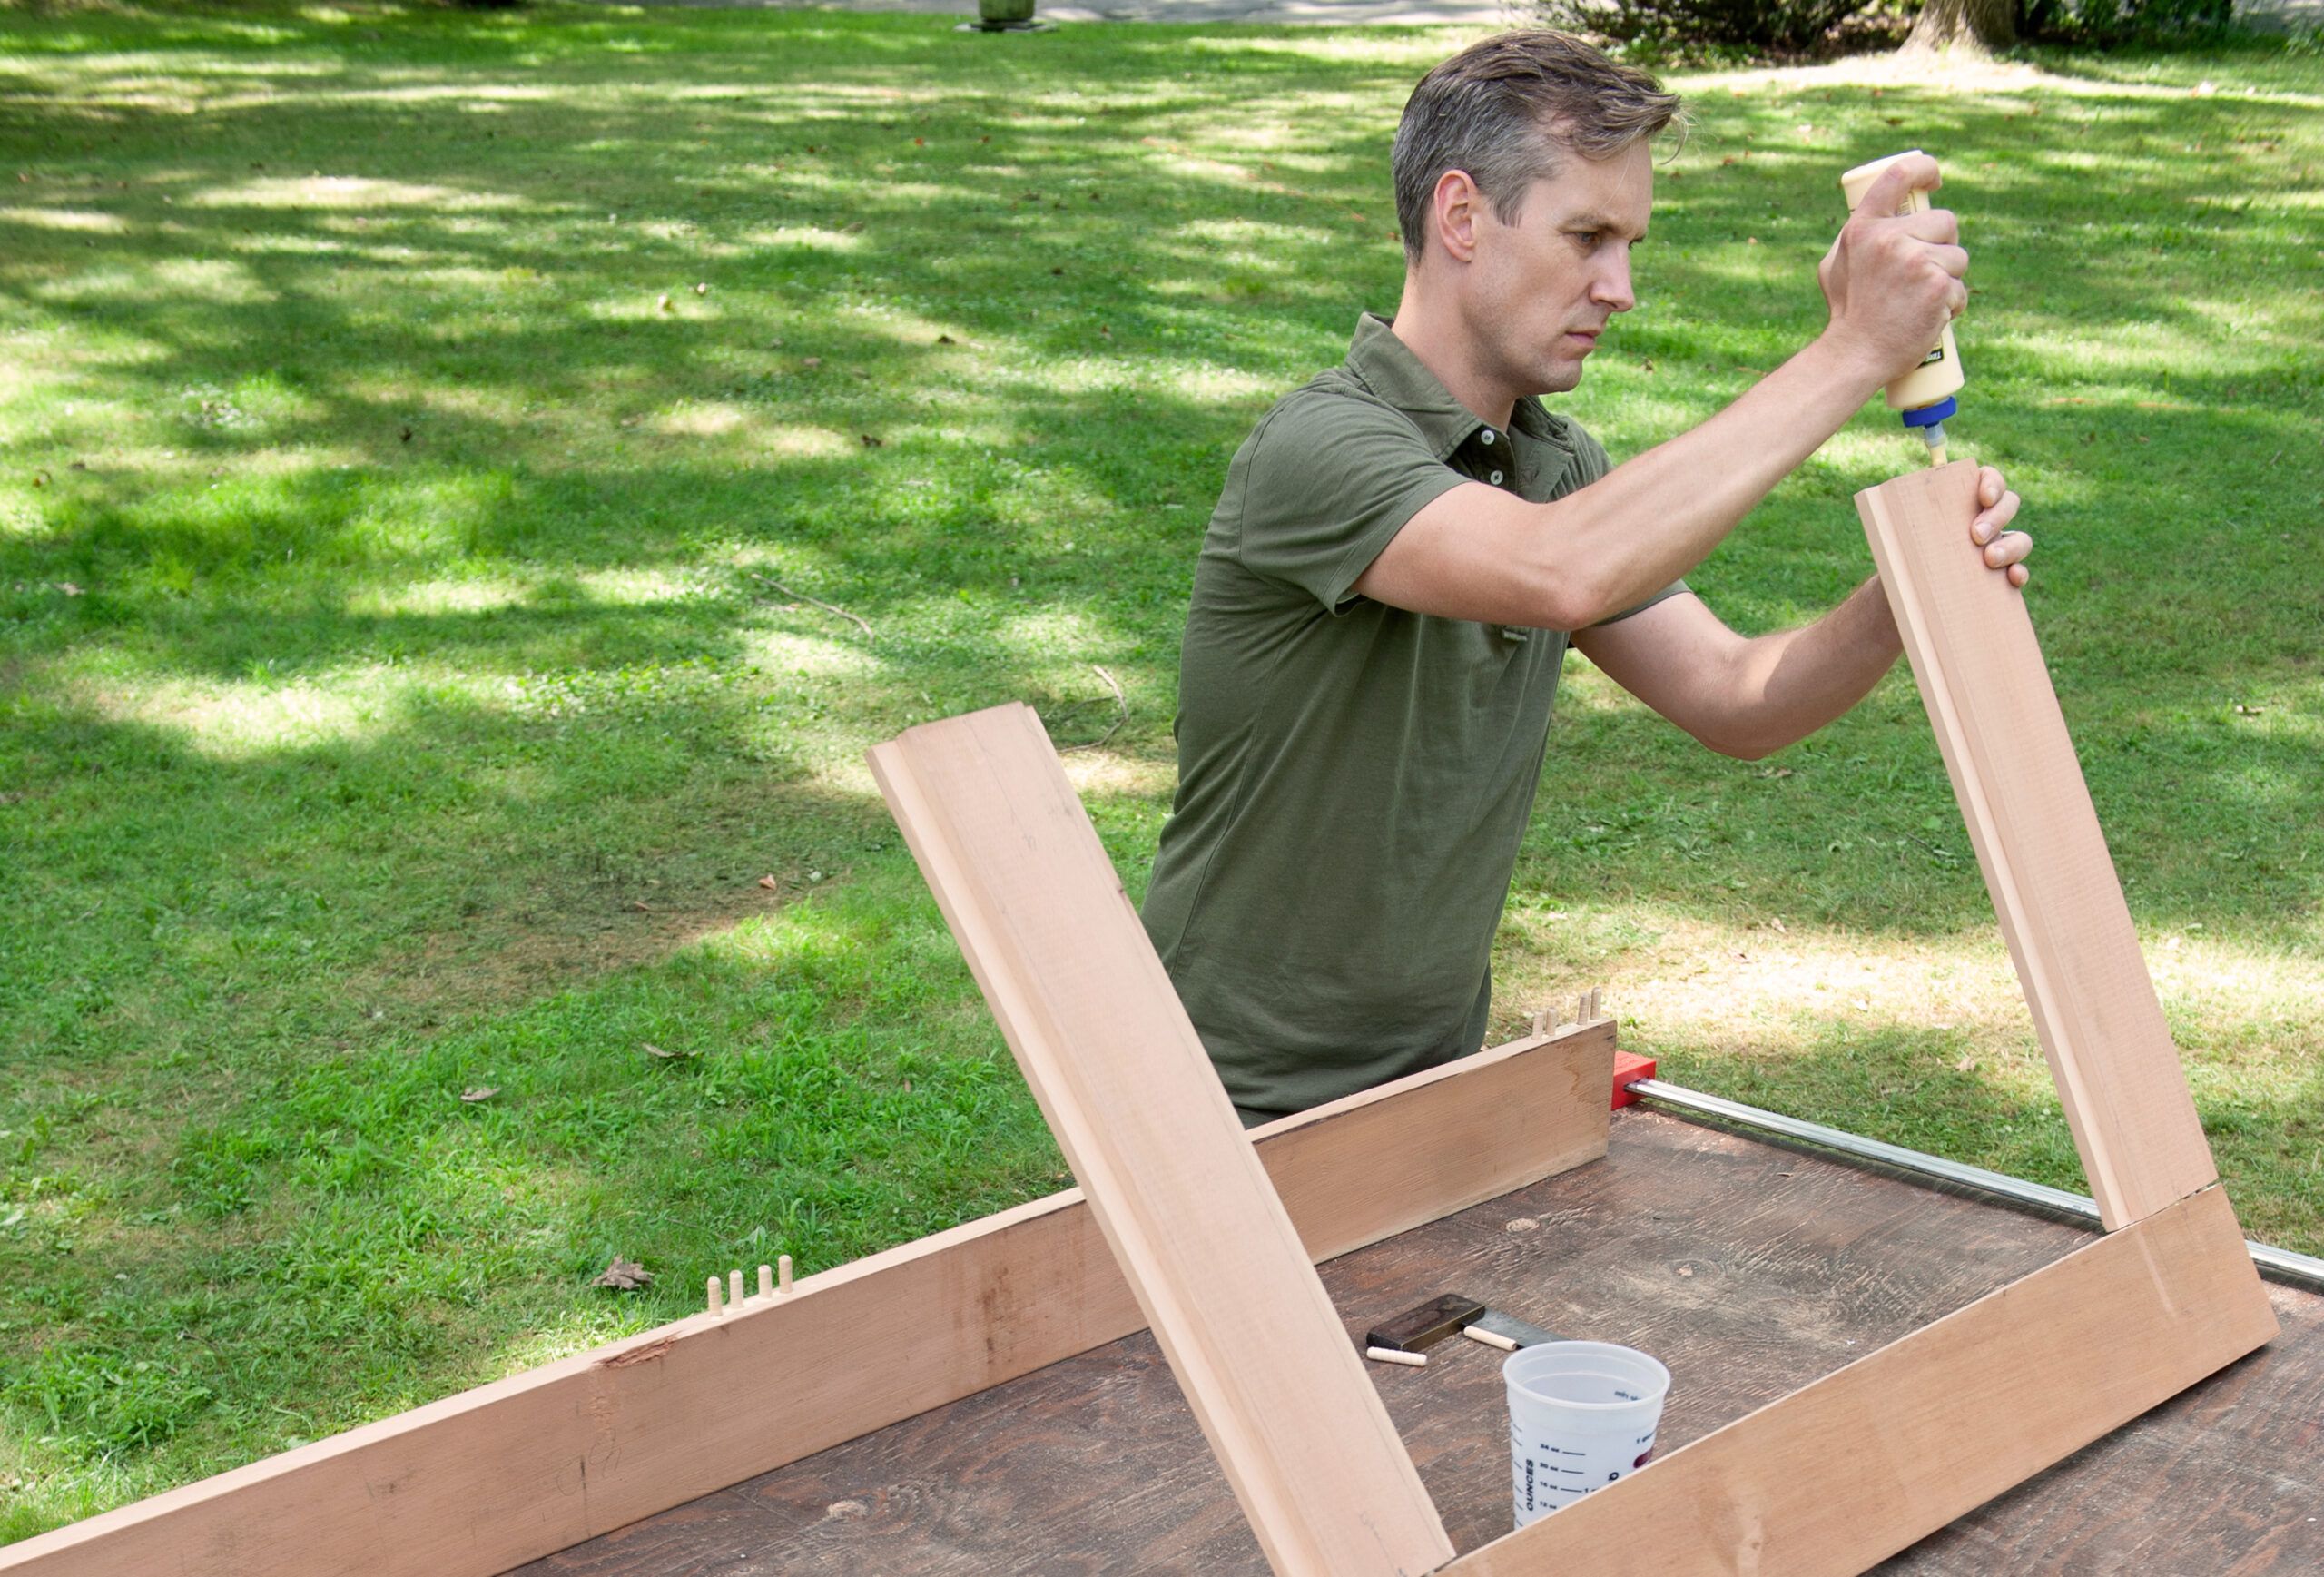
Next, apply glue to the exposed rail holes, as shown, and fit the other stile against the three rails. Check the frame alignment with your square, and use bar clamps to snug the pieces together. Wipe off any excess glue with a damp rag, and let the glue cure for at least one hour.
Measure the openings in the tabletop frame, rabbet to rabbet, and cut the slats to length.
Clamp four of the eight slats together edge to edge, then clamp the assembly to your work surface, as shown. Use the router to cut a ¾-inch-wide by ½-inch-deep rabbet across the ends of the slats. Rabbet the other end of the assembly as well as the other set of slats.
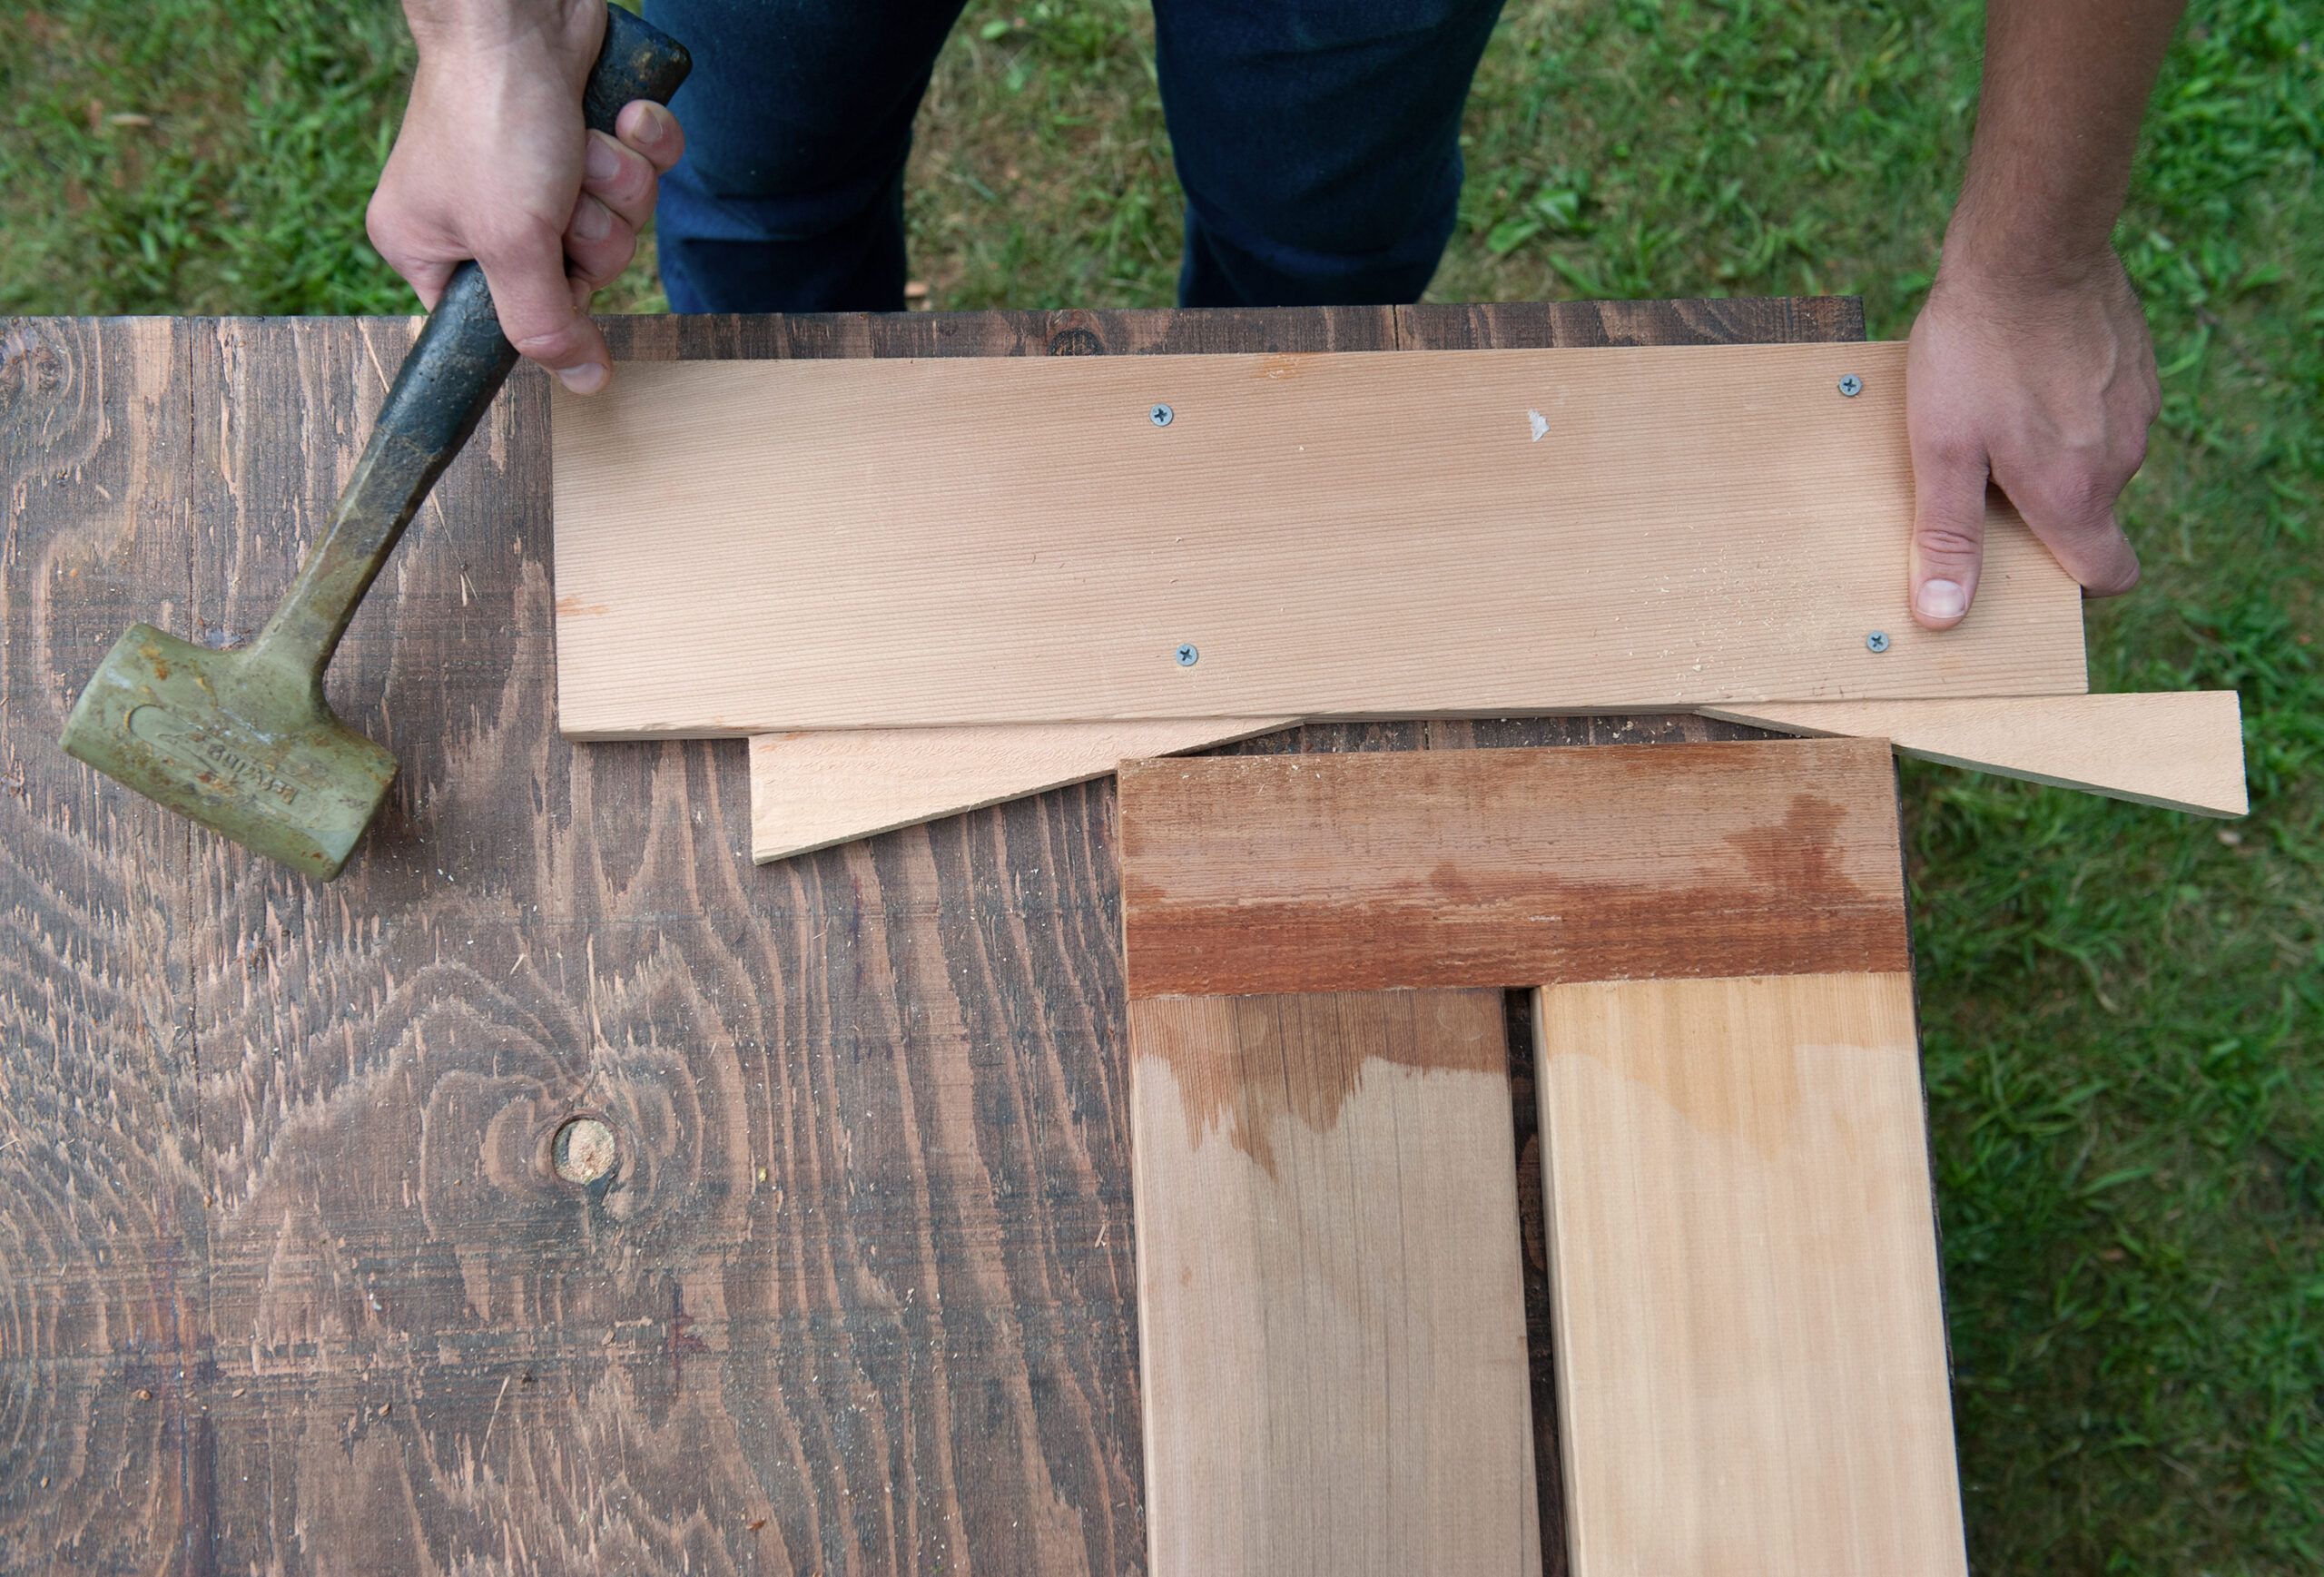
In order to hide the fasteners, lay the slats rabbet-side-up on your work surface, then nestle the frame, upside down, on top of them. You may need to place scrap pieces under the slats to keep them pressed against the frame.
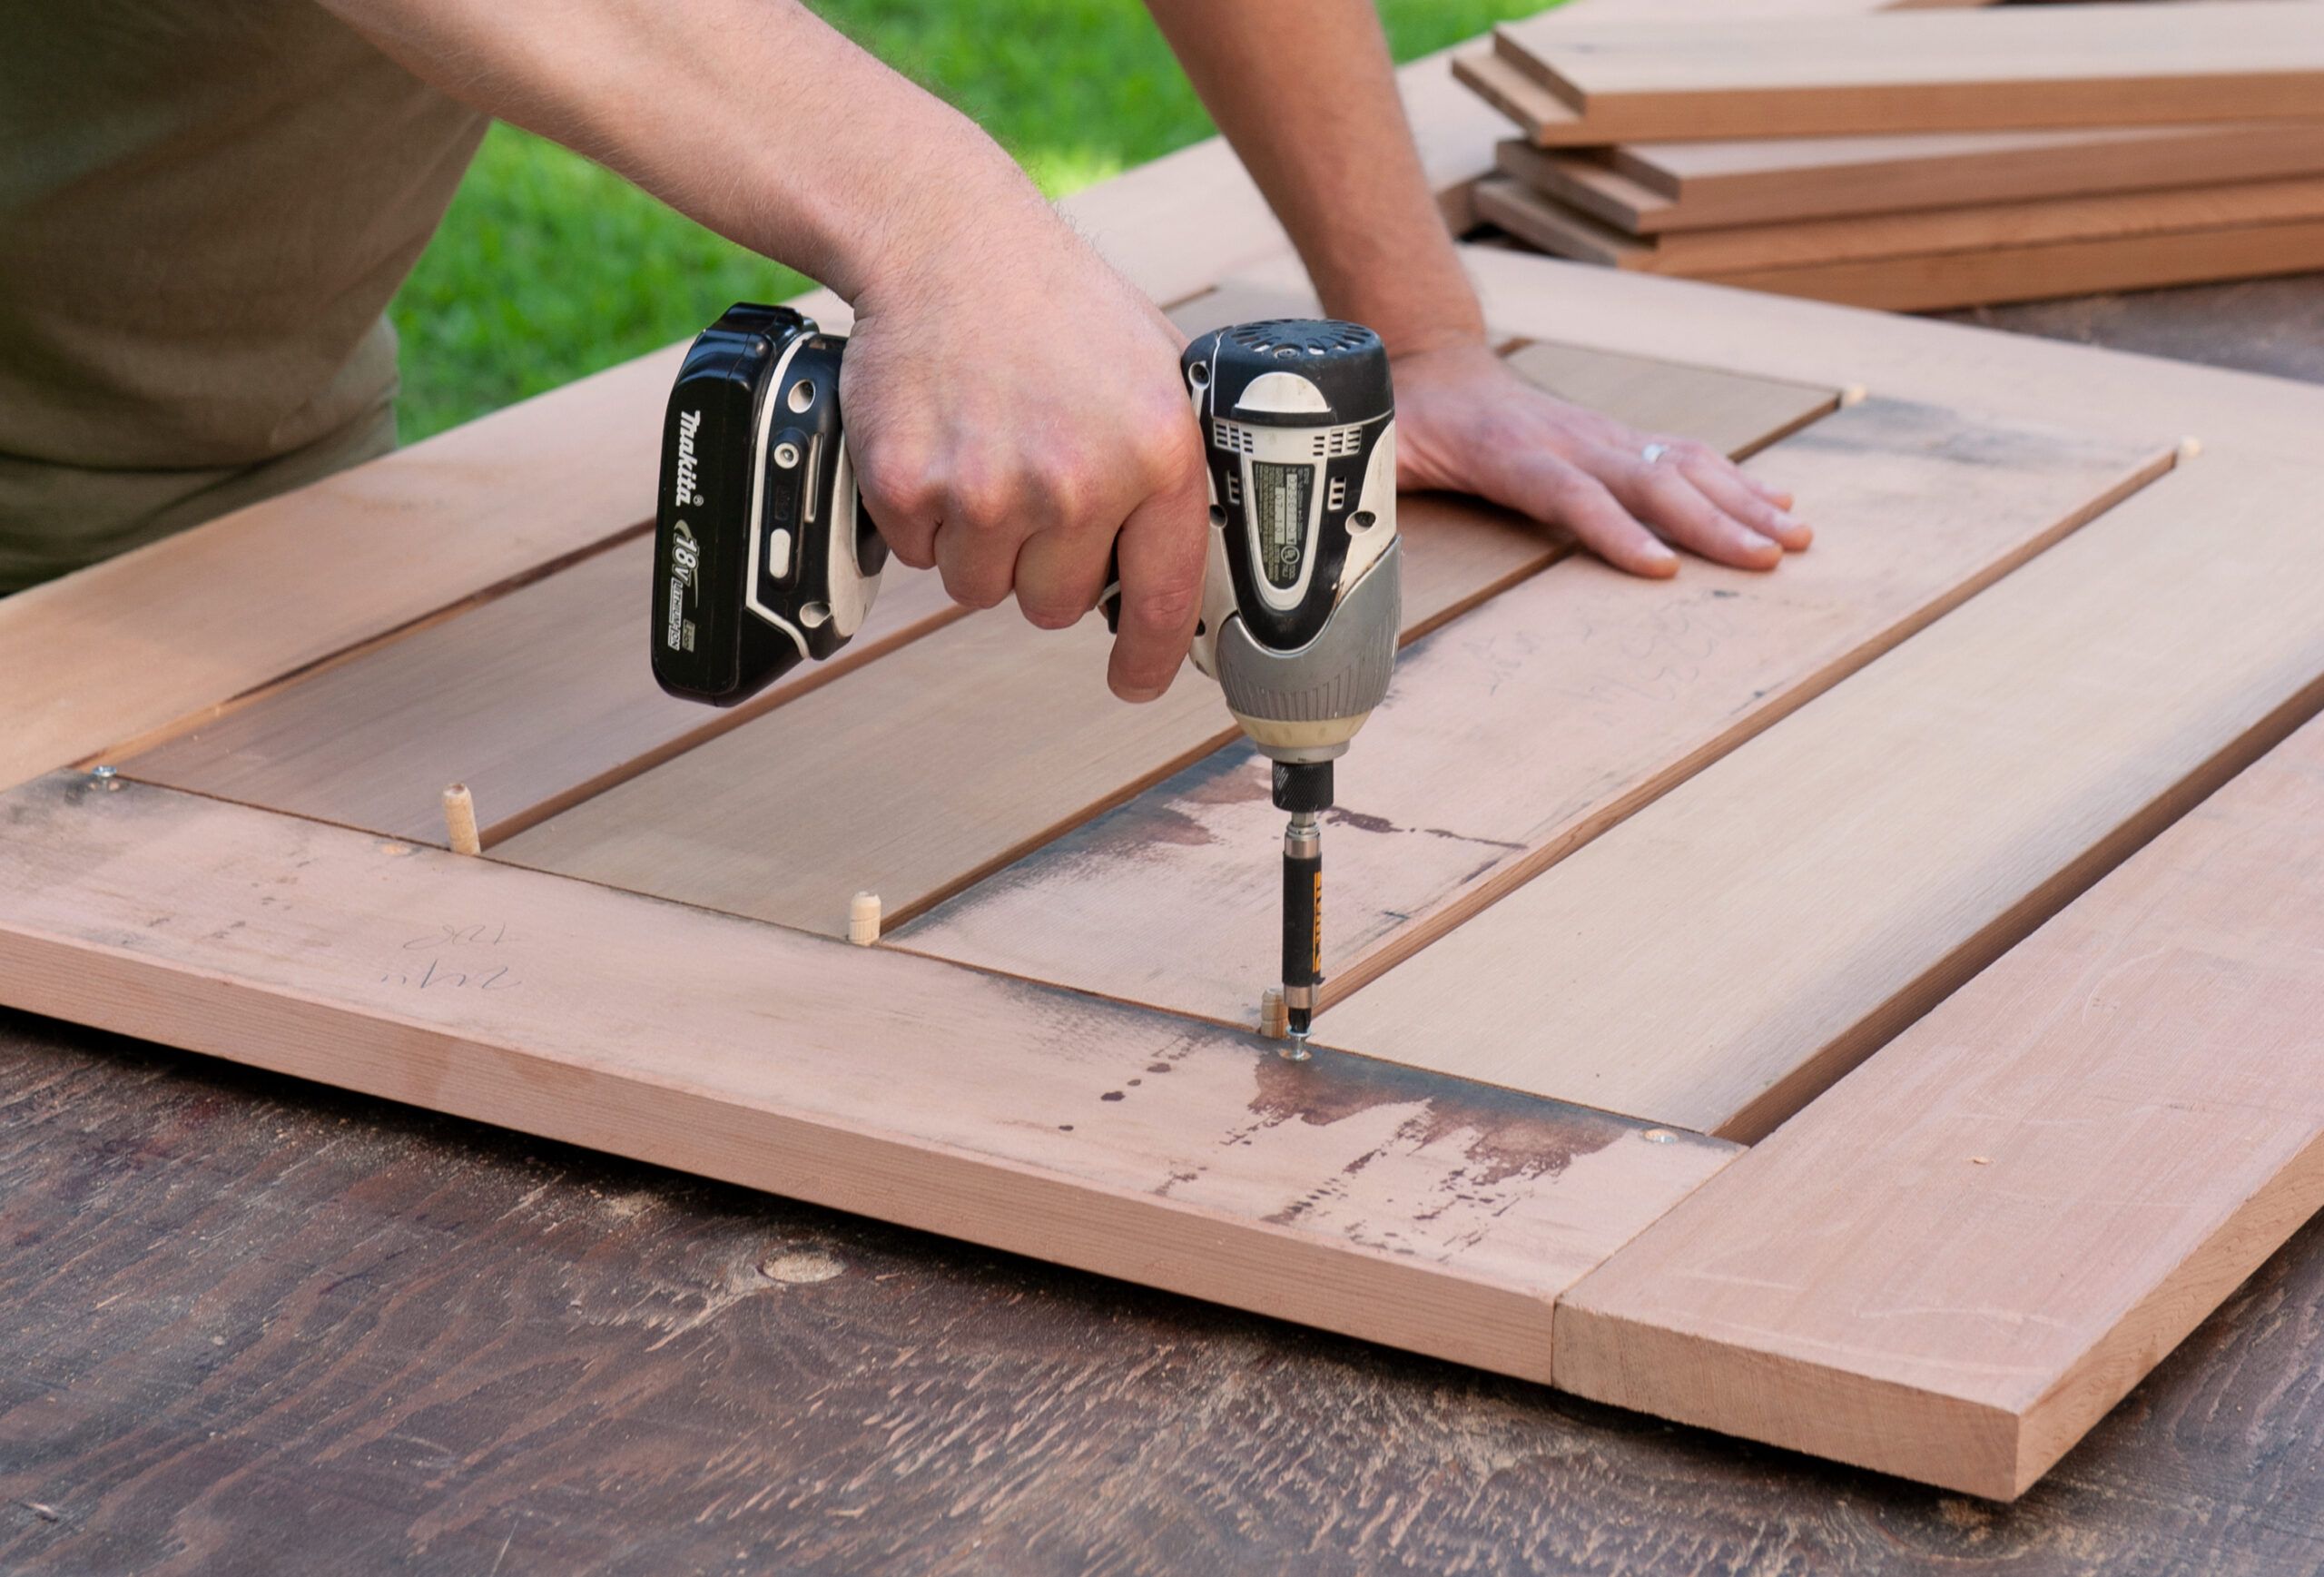
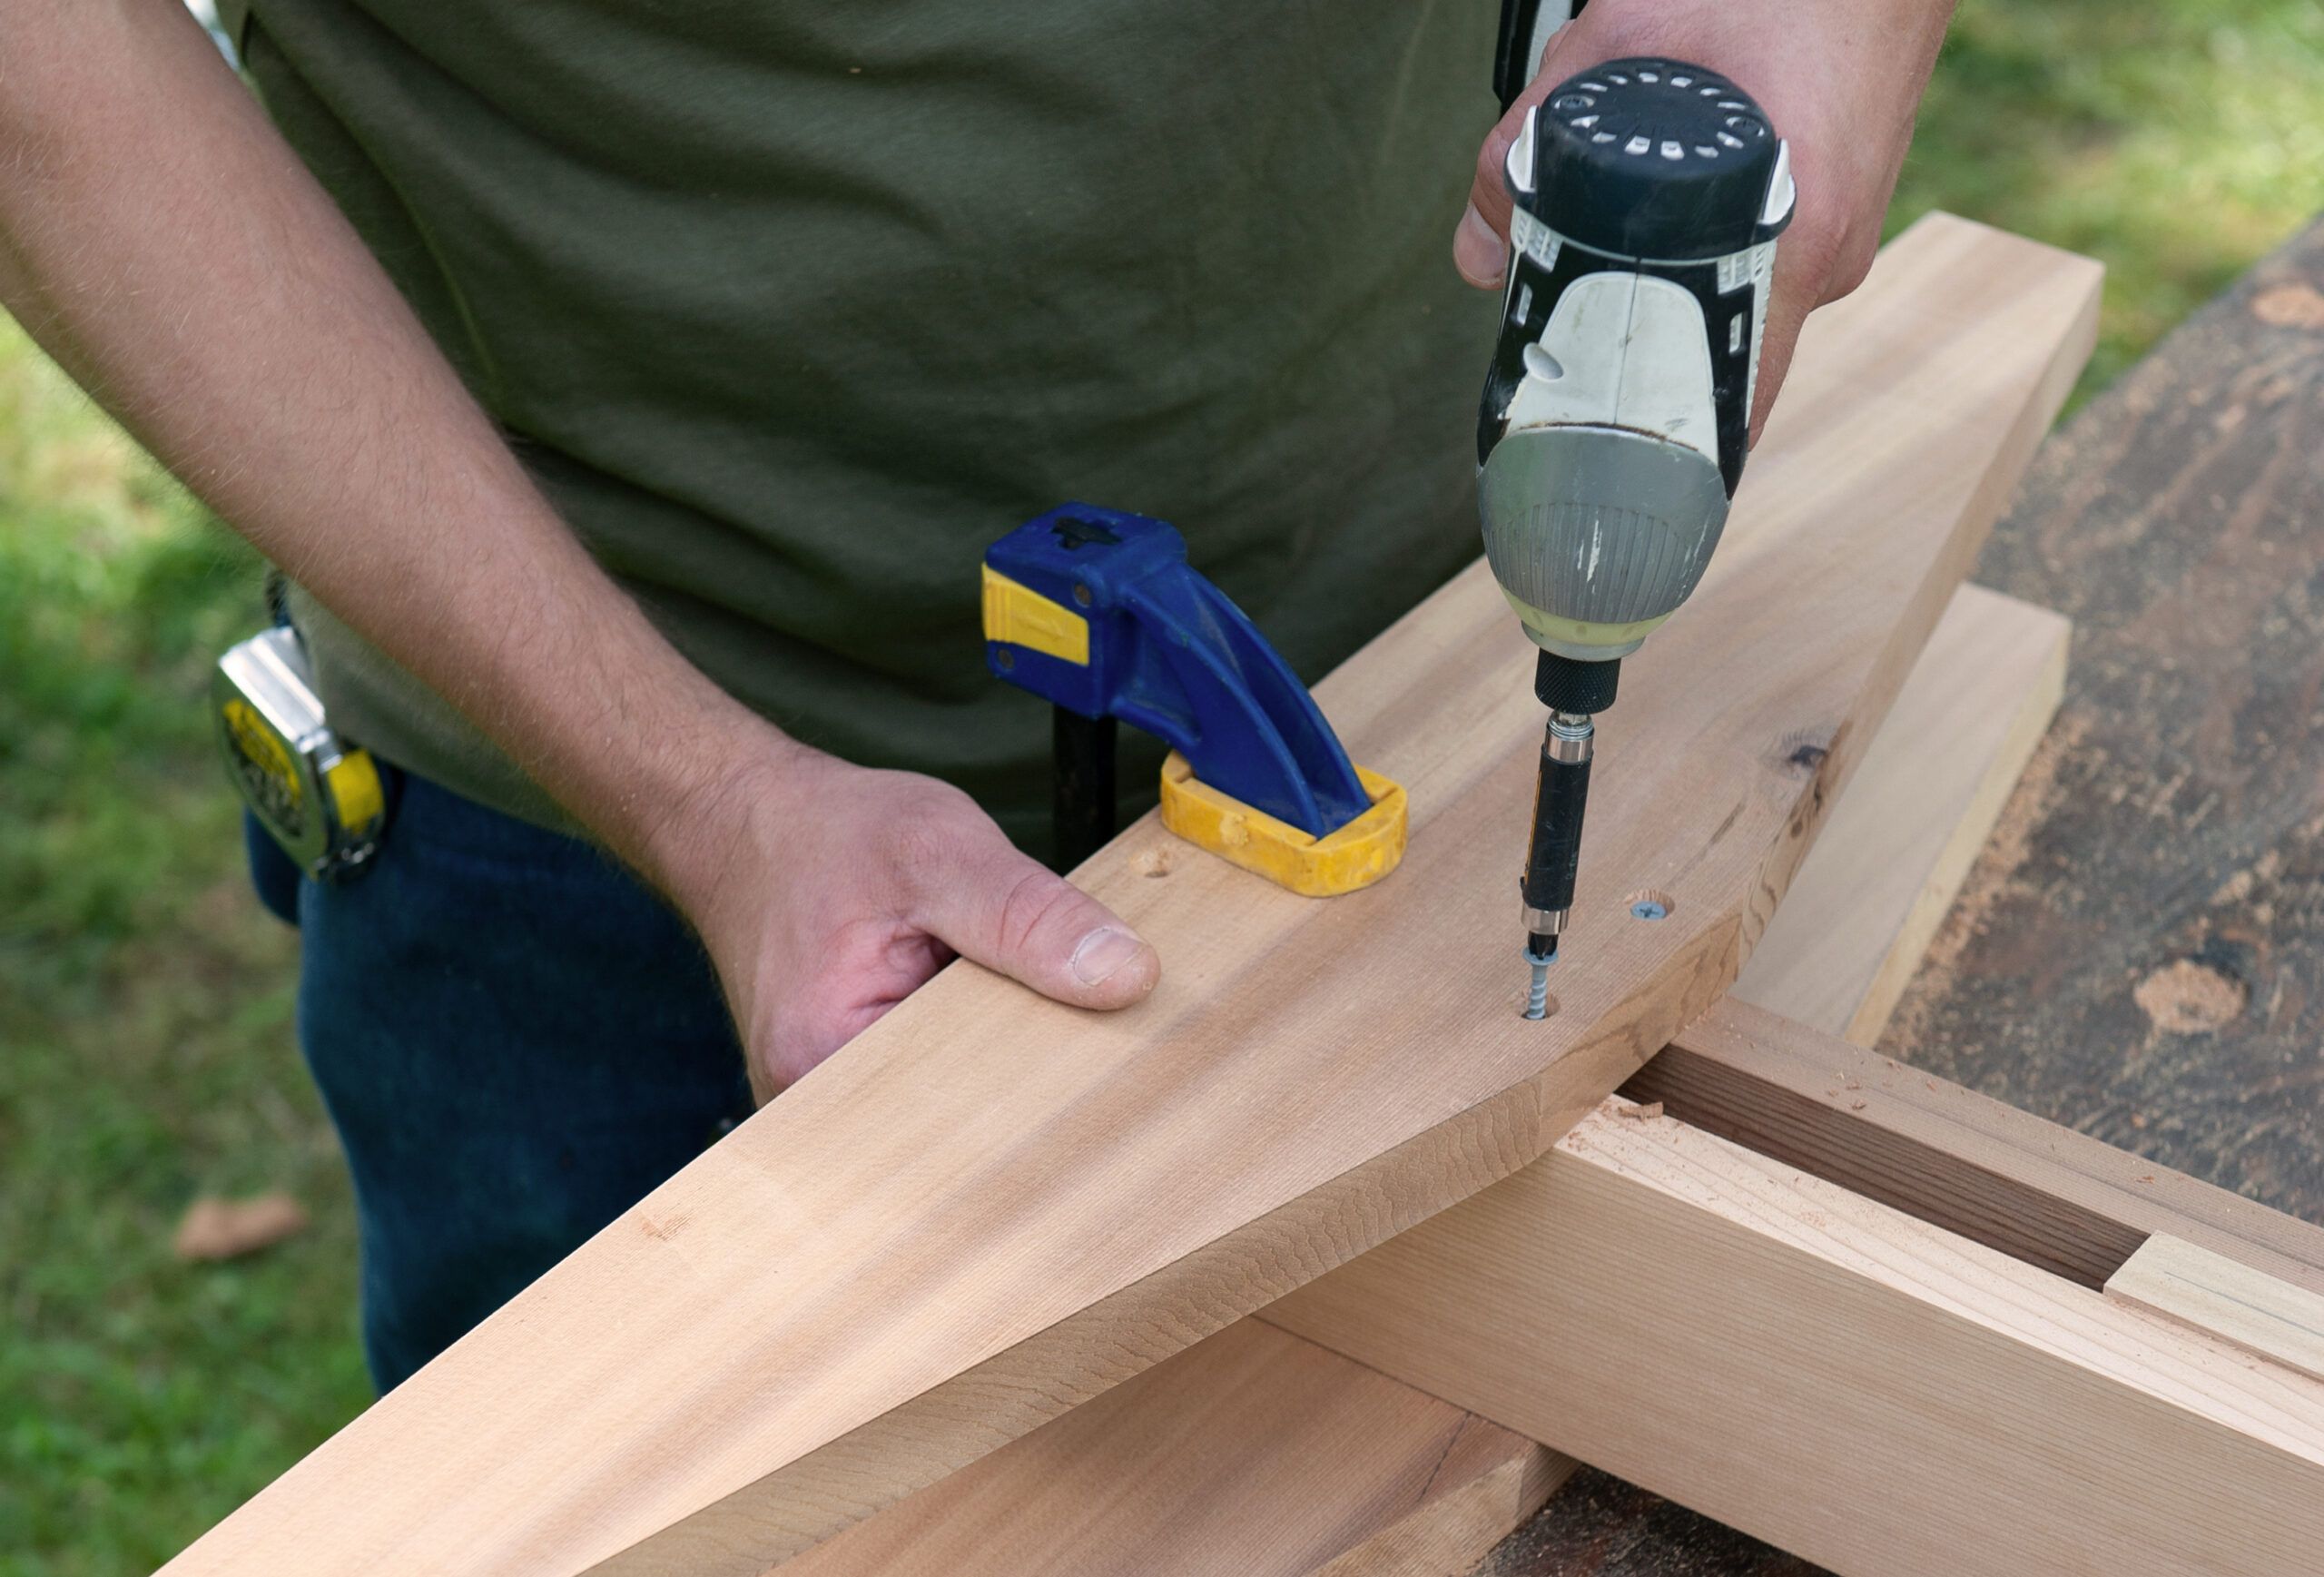
Use spacers (we used dowels) to keep the slats a uniform distance apart. Countersink two pilot holes through each rail and into the joint at the ends of each slat. Secure the slats with ¾-inch brass or stainless-steel screws.
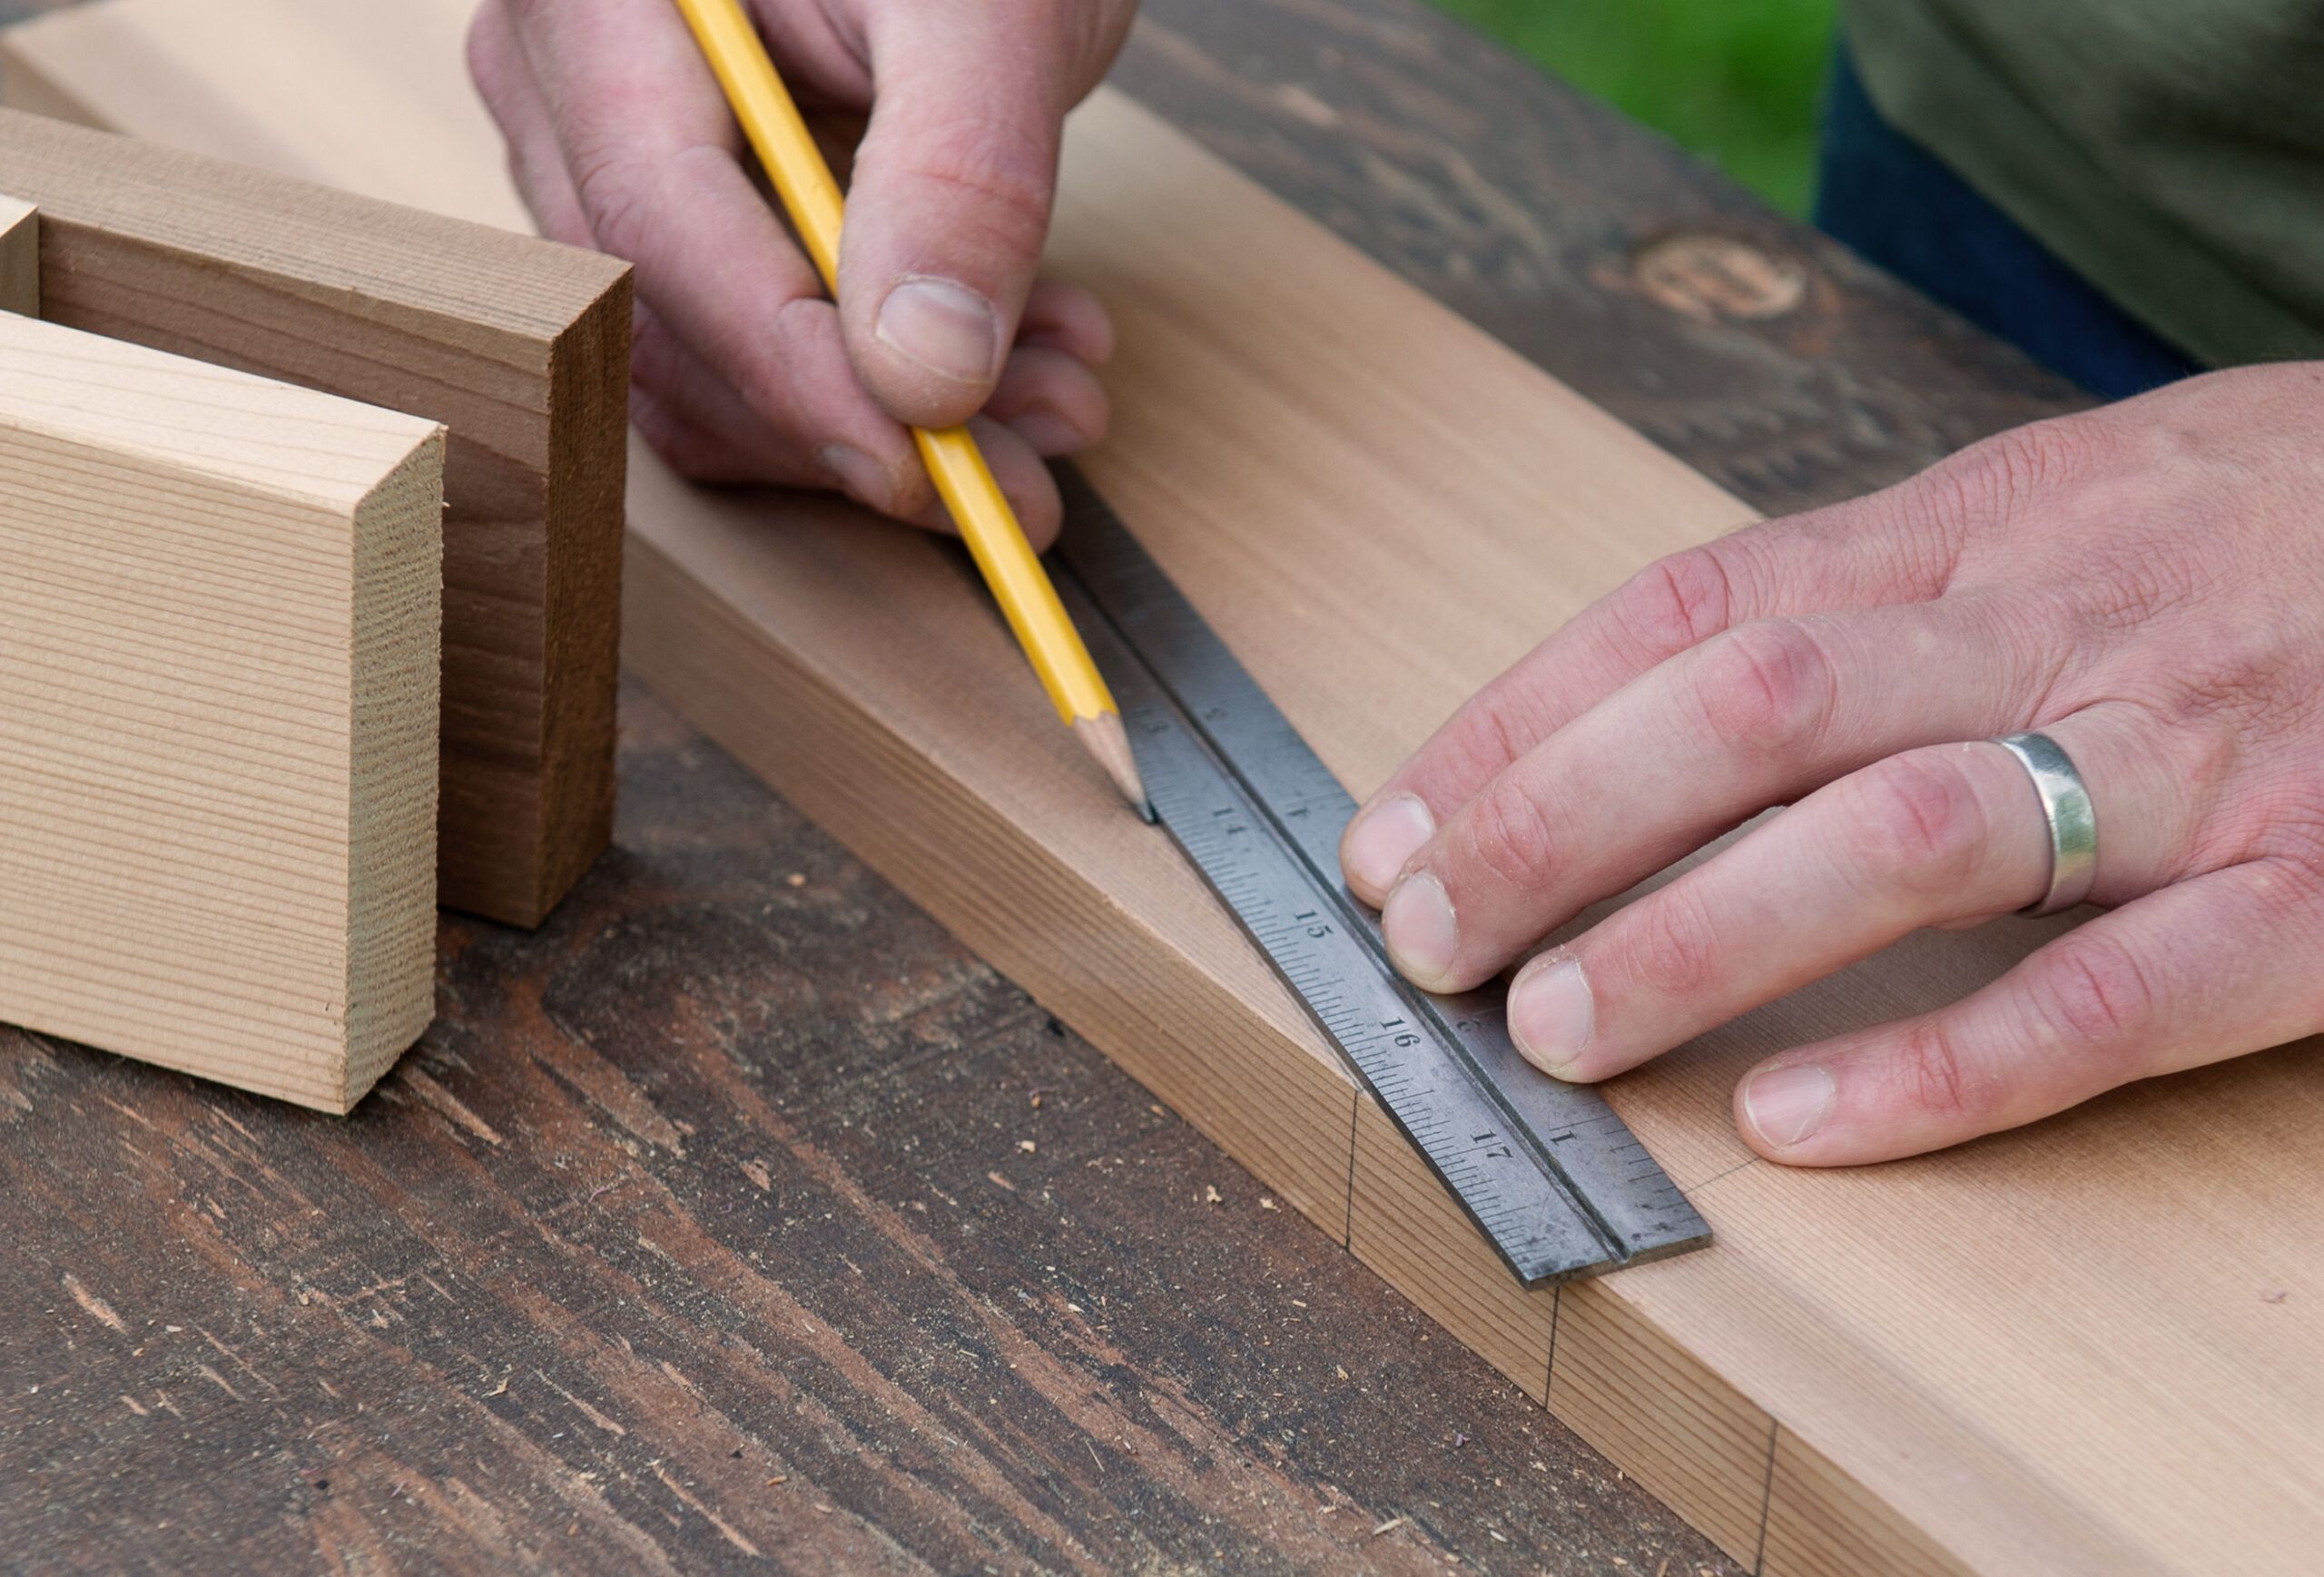
On the top edge of a blank, find the center point and mark 1½ inches out to each side.
Then measure 2 inches up from the bottom corners of the blank. Use a straightedge to mark diagonal cutlines between the top points and the side points, as shown.
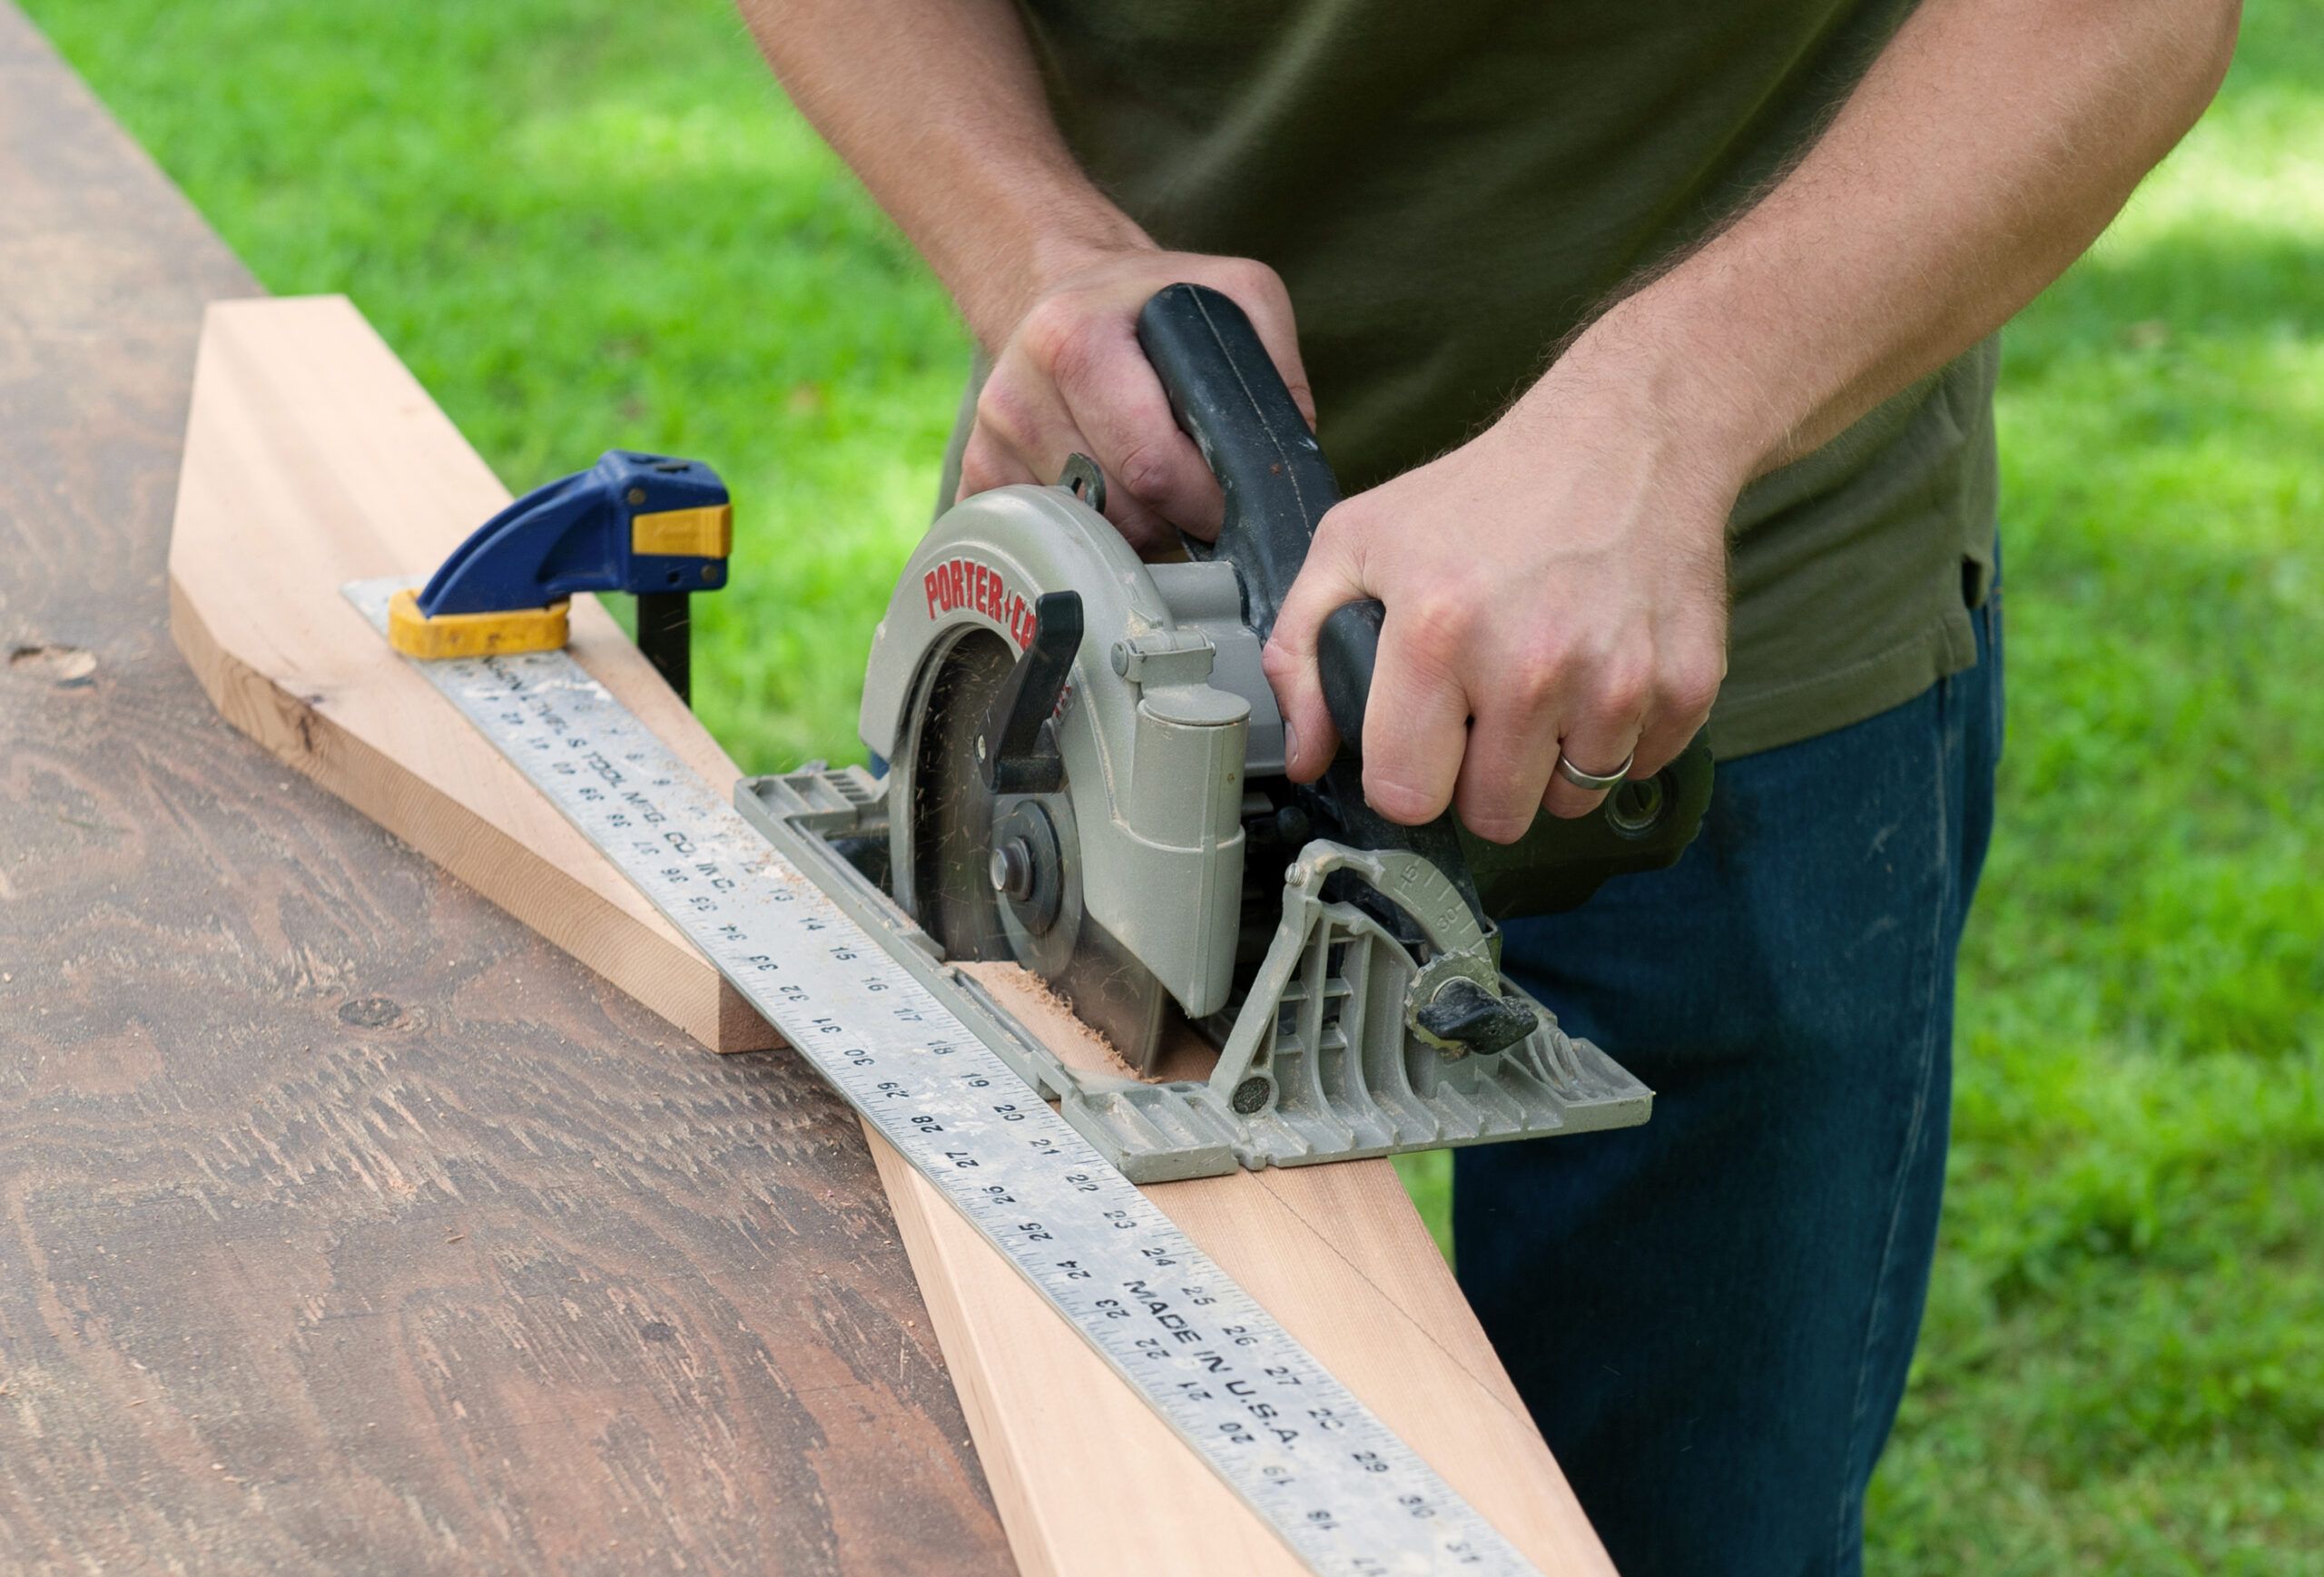
Position the piece with one corner off the table. Clamp a straightedge in place, and use a circular saw to cut along the line, as shown.
Cut along the other line. Use the piece as a template to mark the other seven blanks, and cut those, too.
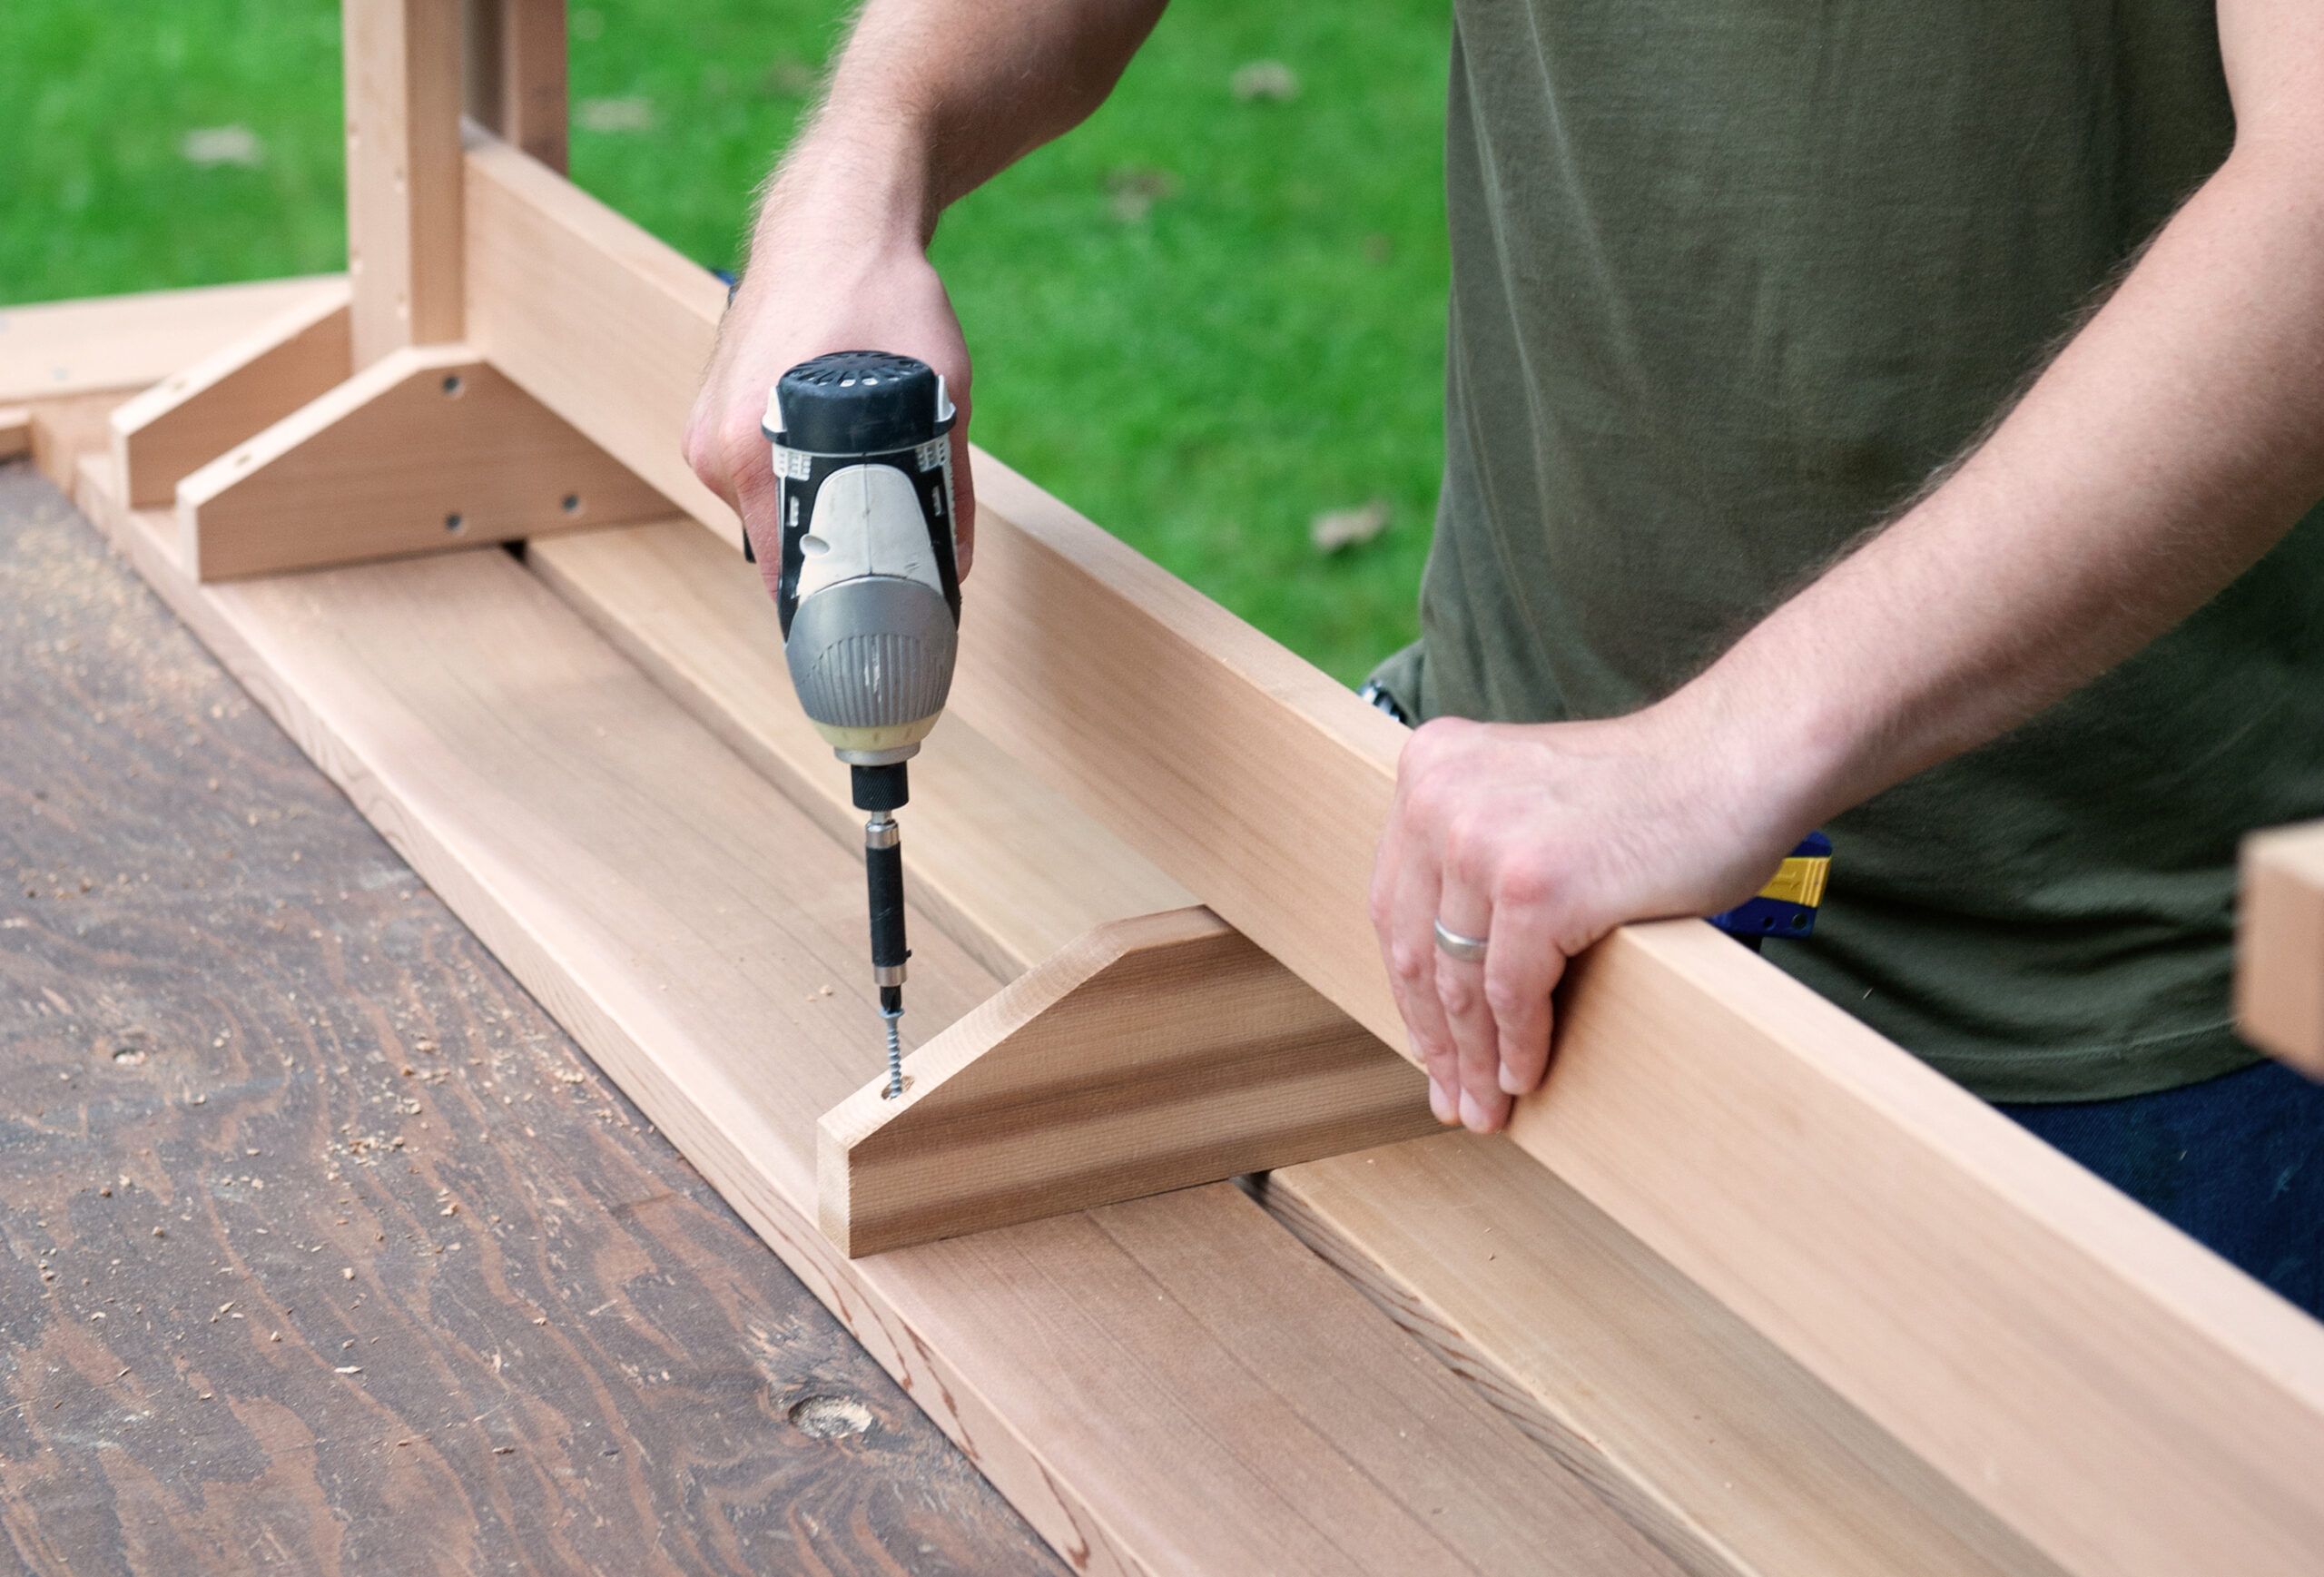
Clamp two leg boards around a 5⁄4 spacer, then clamp a foot to the assembly. Countersink pilot holes in the foot and attach it with deck screws. Attach the other feet, and attach the tabletop brackets at the top of the legs.
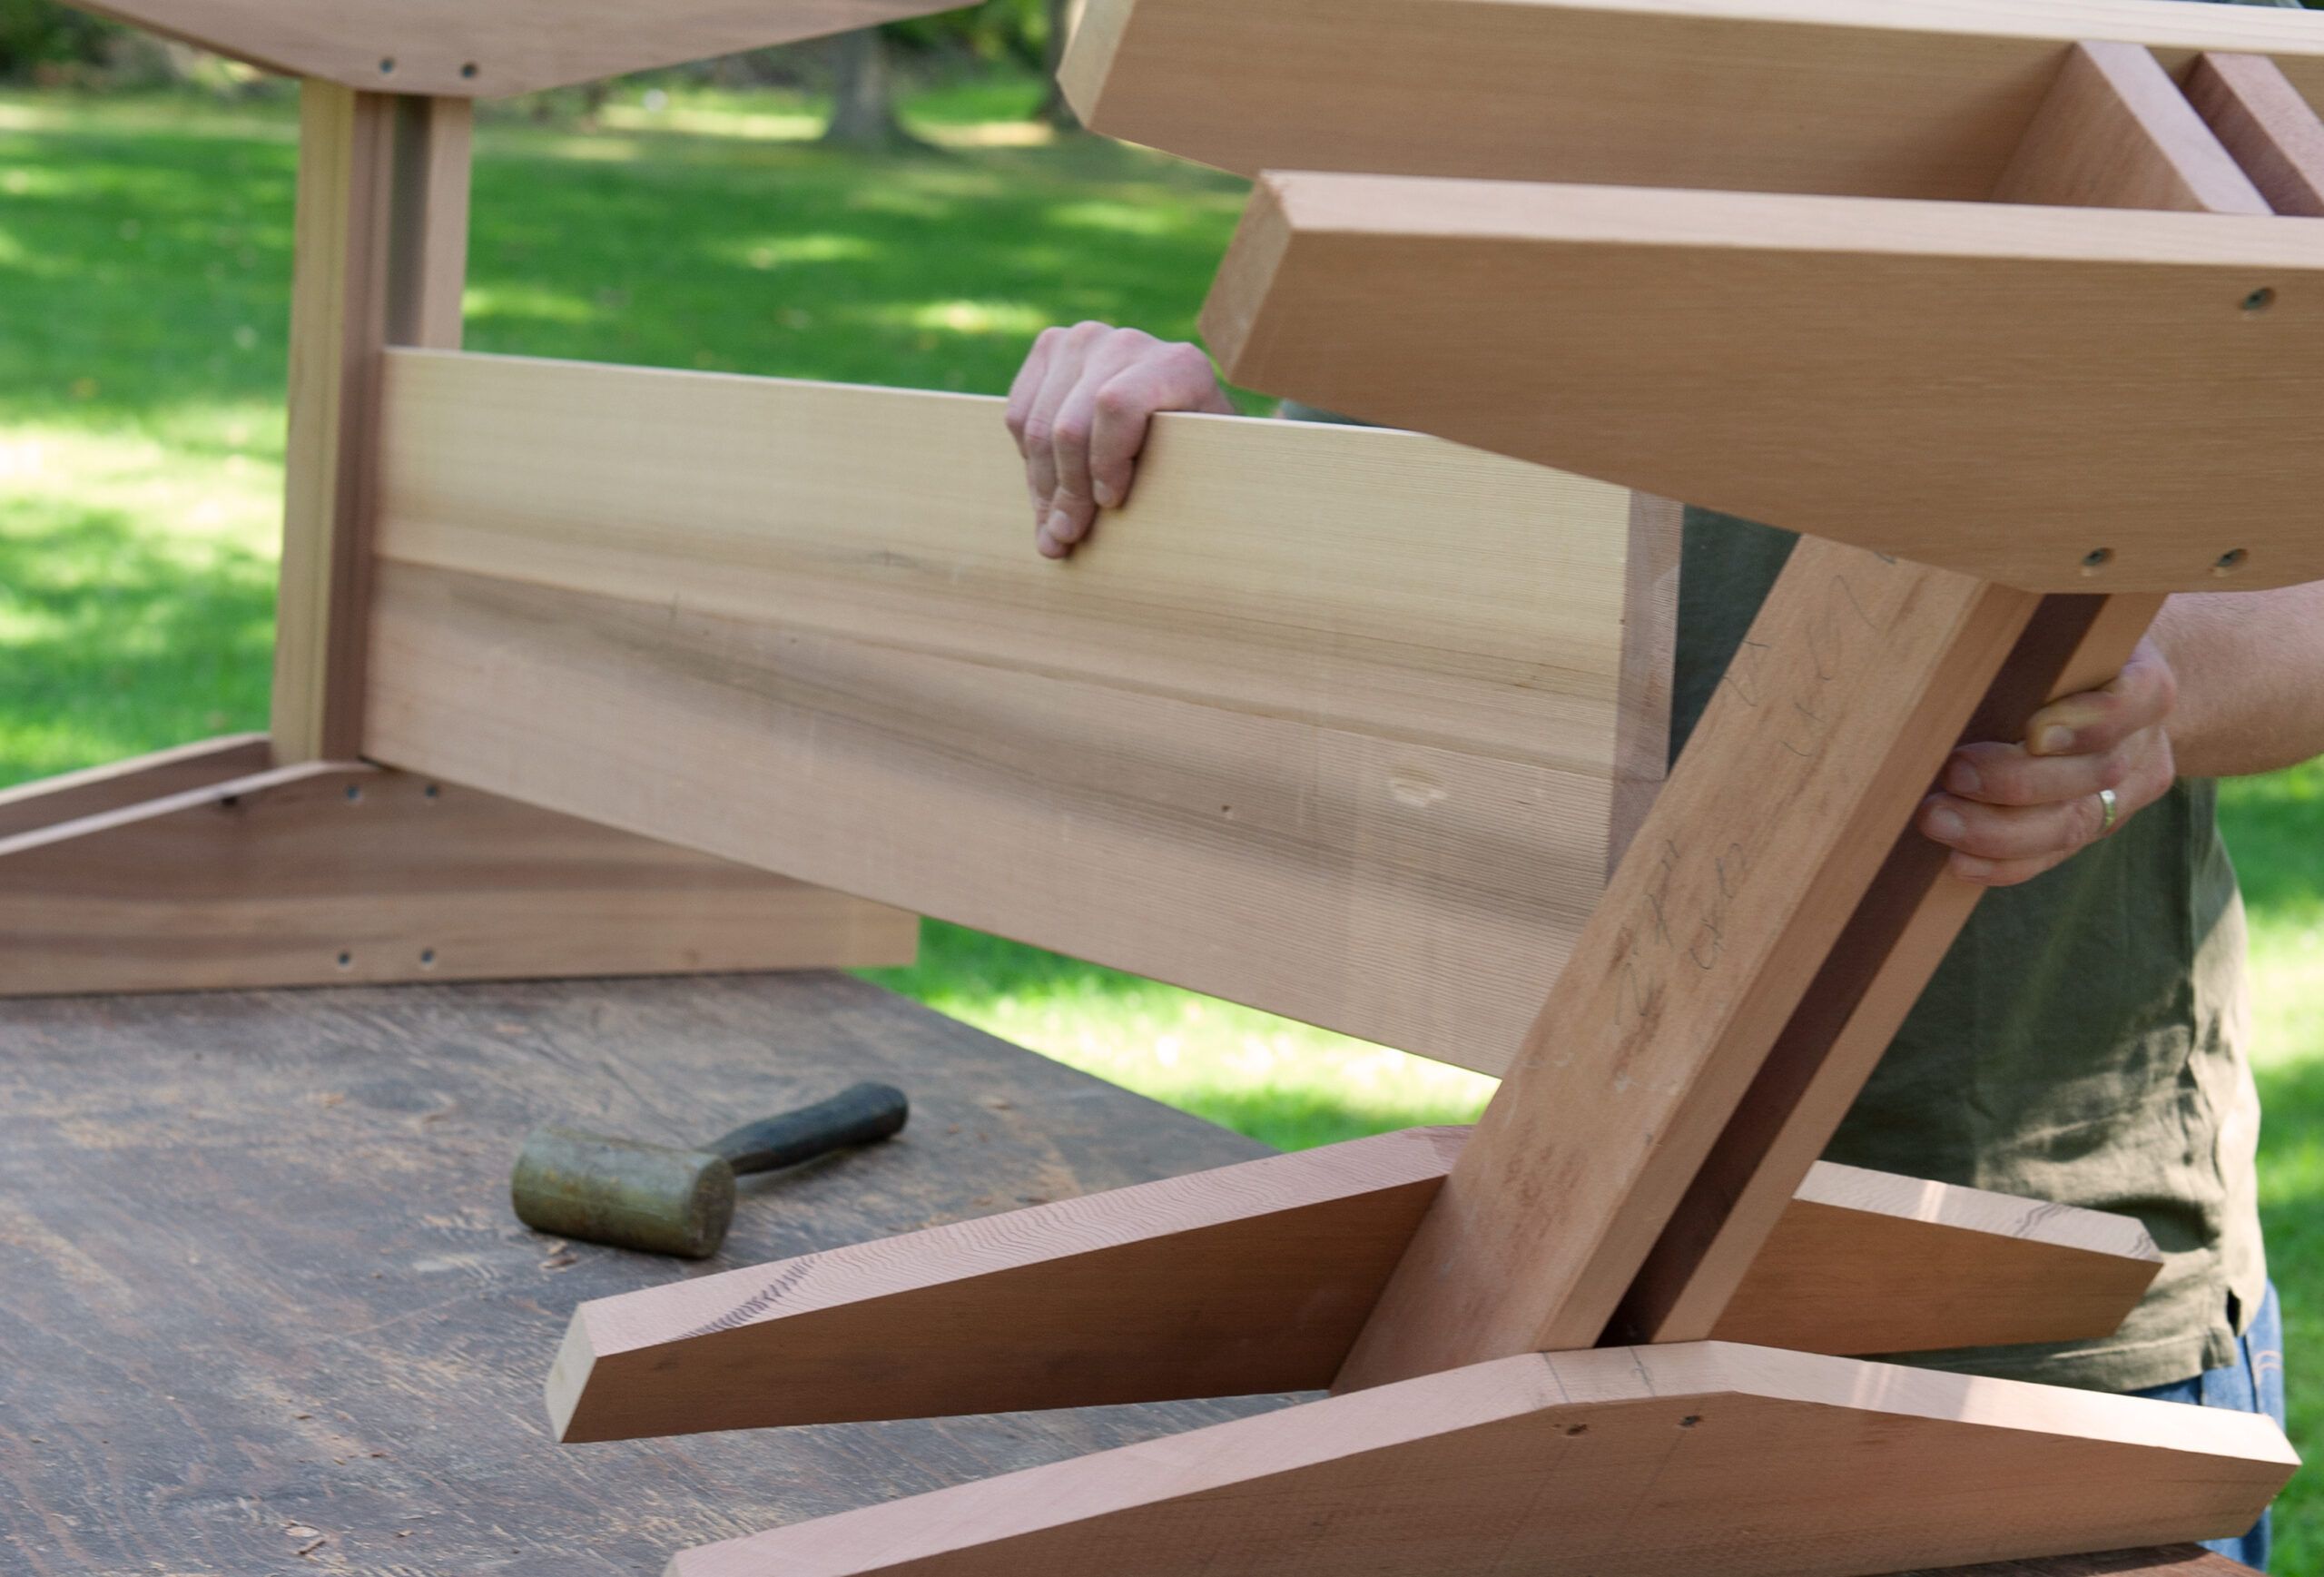
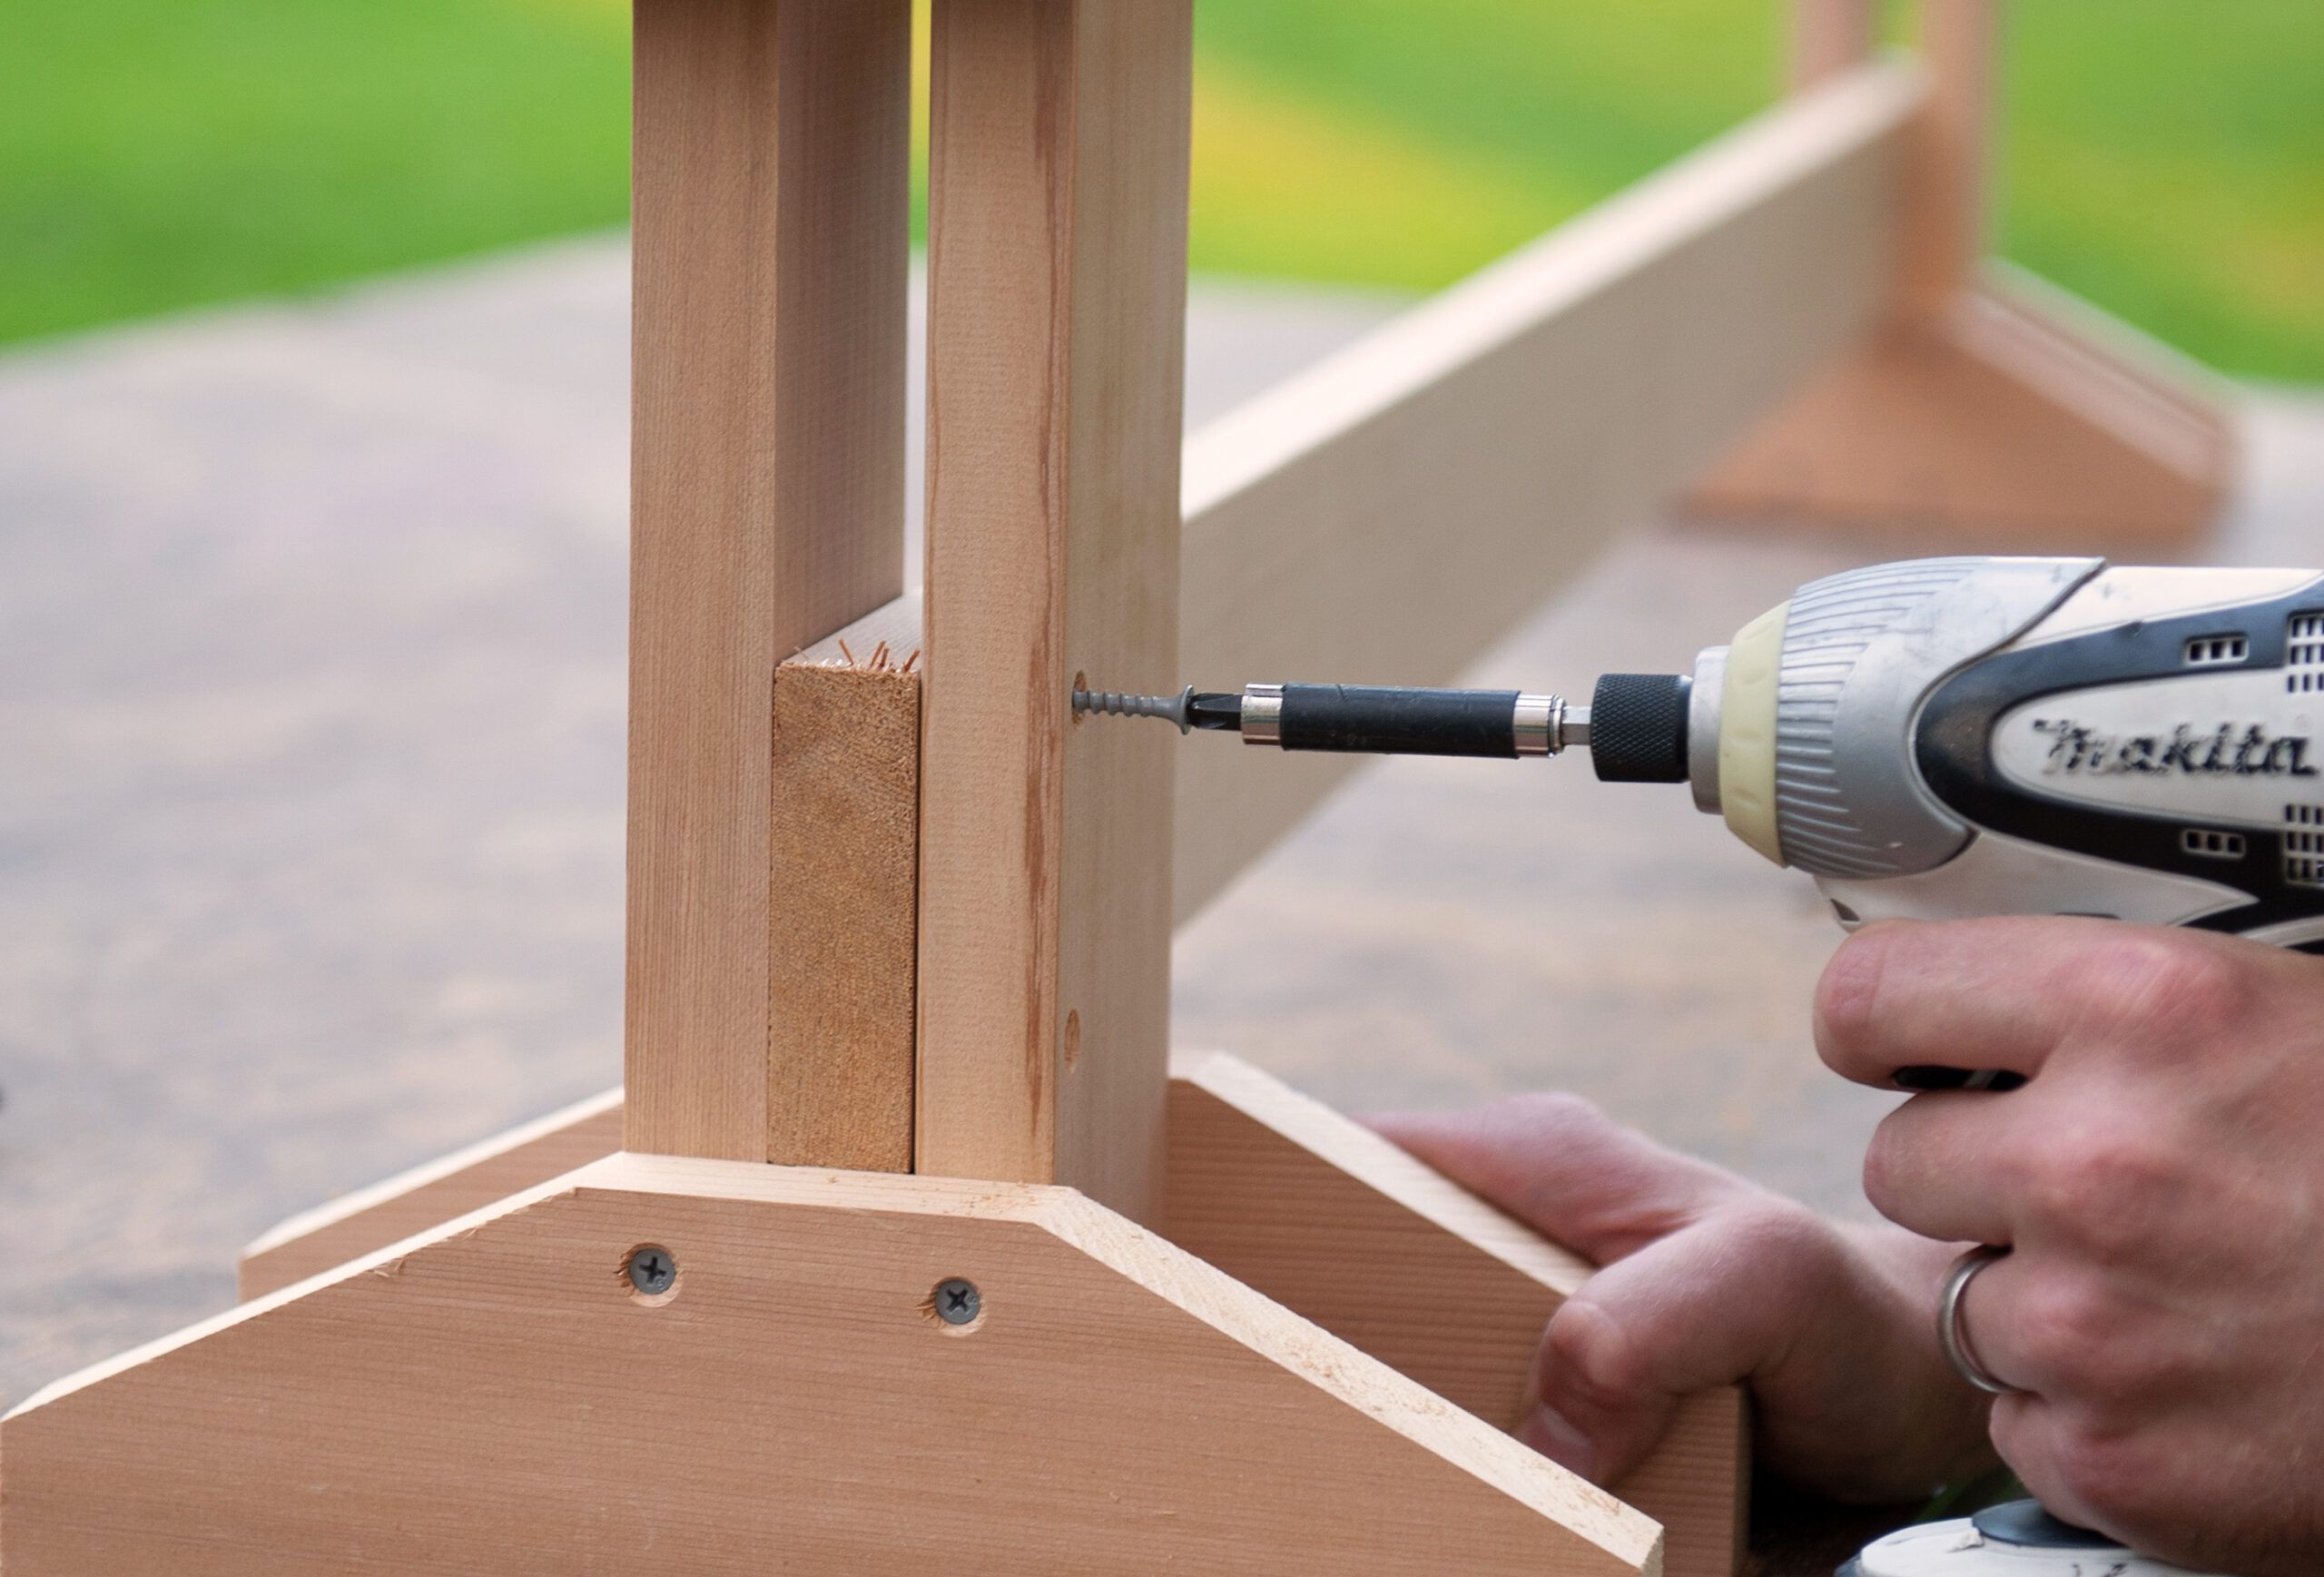
Stand the leg assemblies upside down on your work surface. Insert the stretcher between the leg boards and position it against the tabletop brackets and flush with the legs at each end.
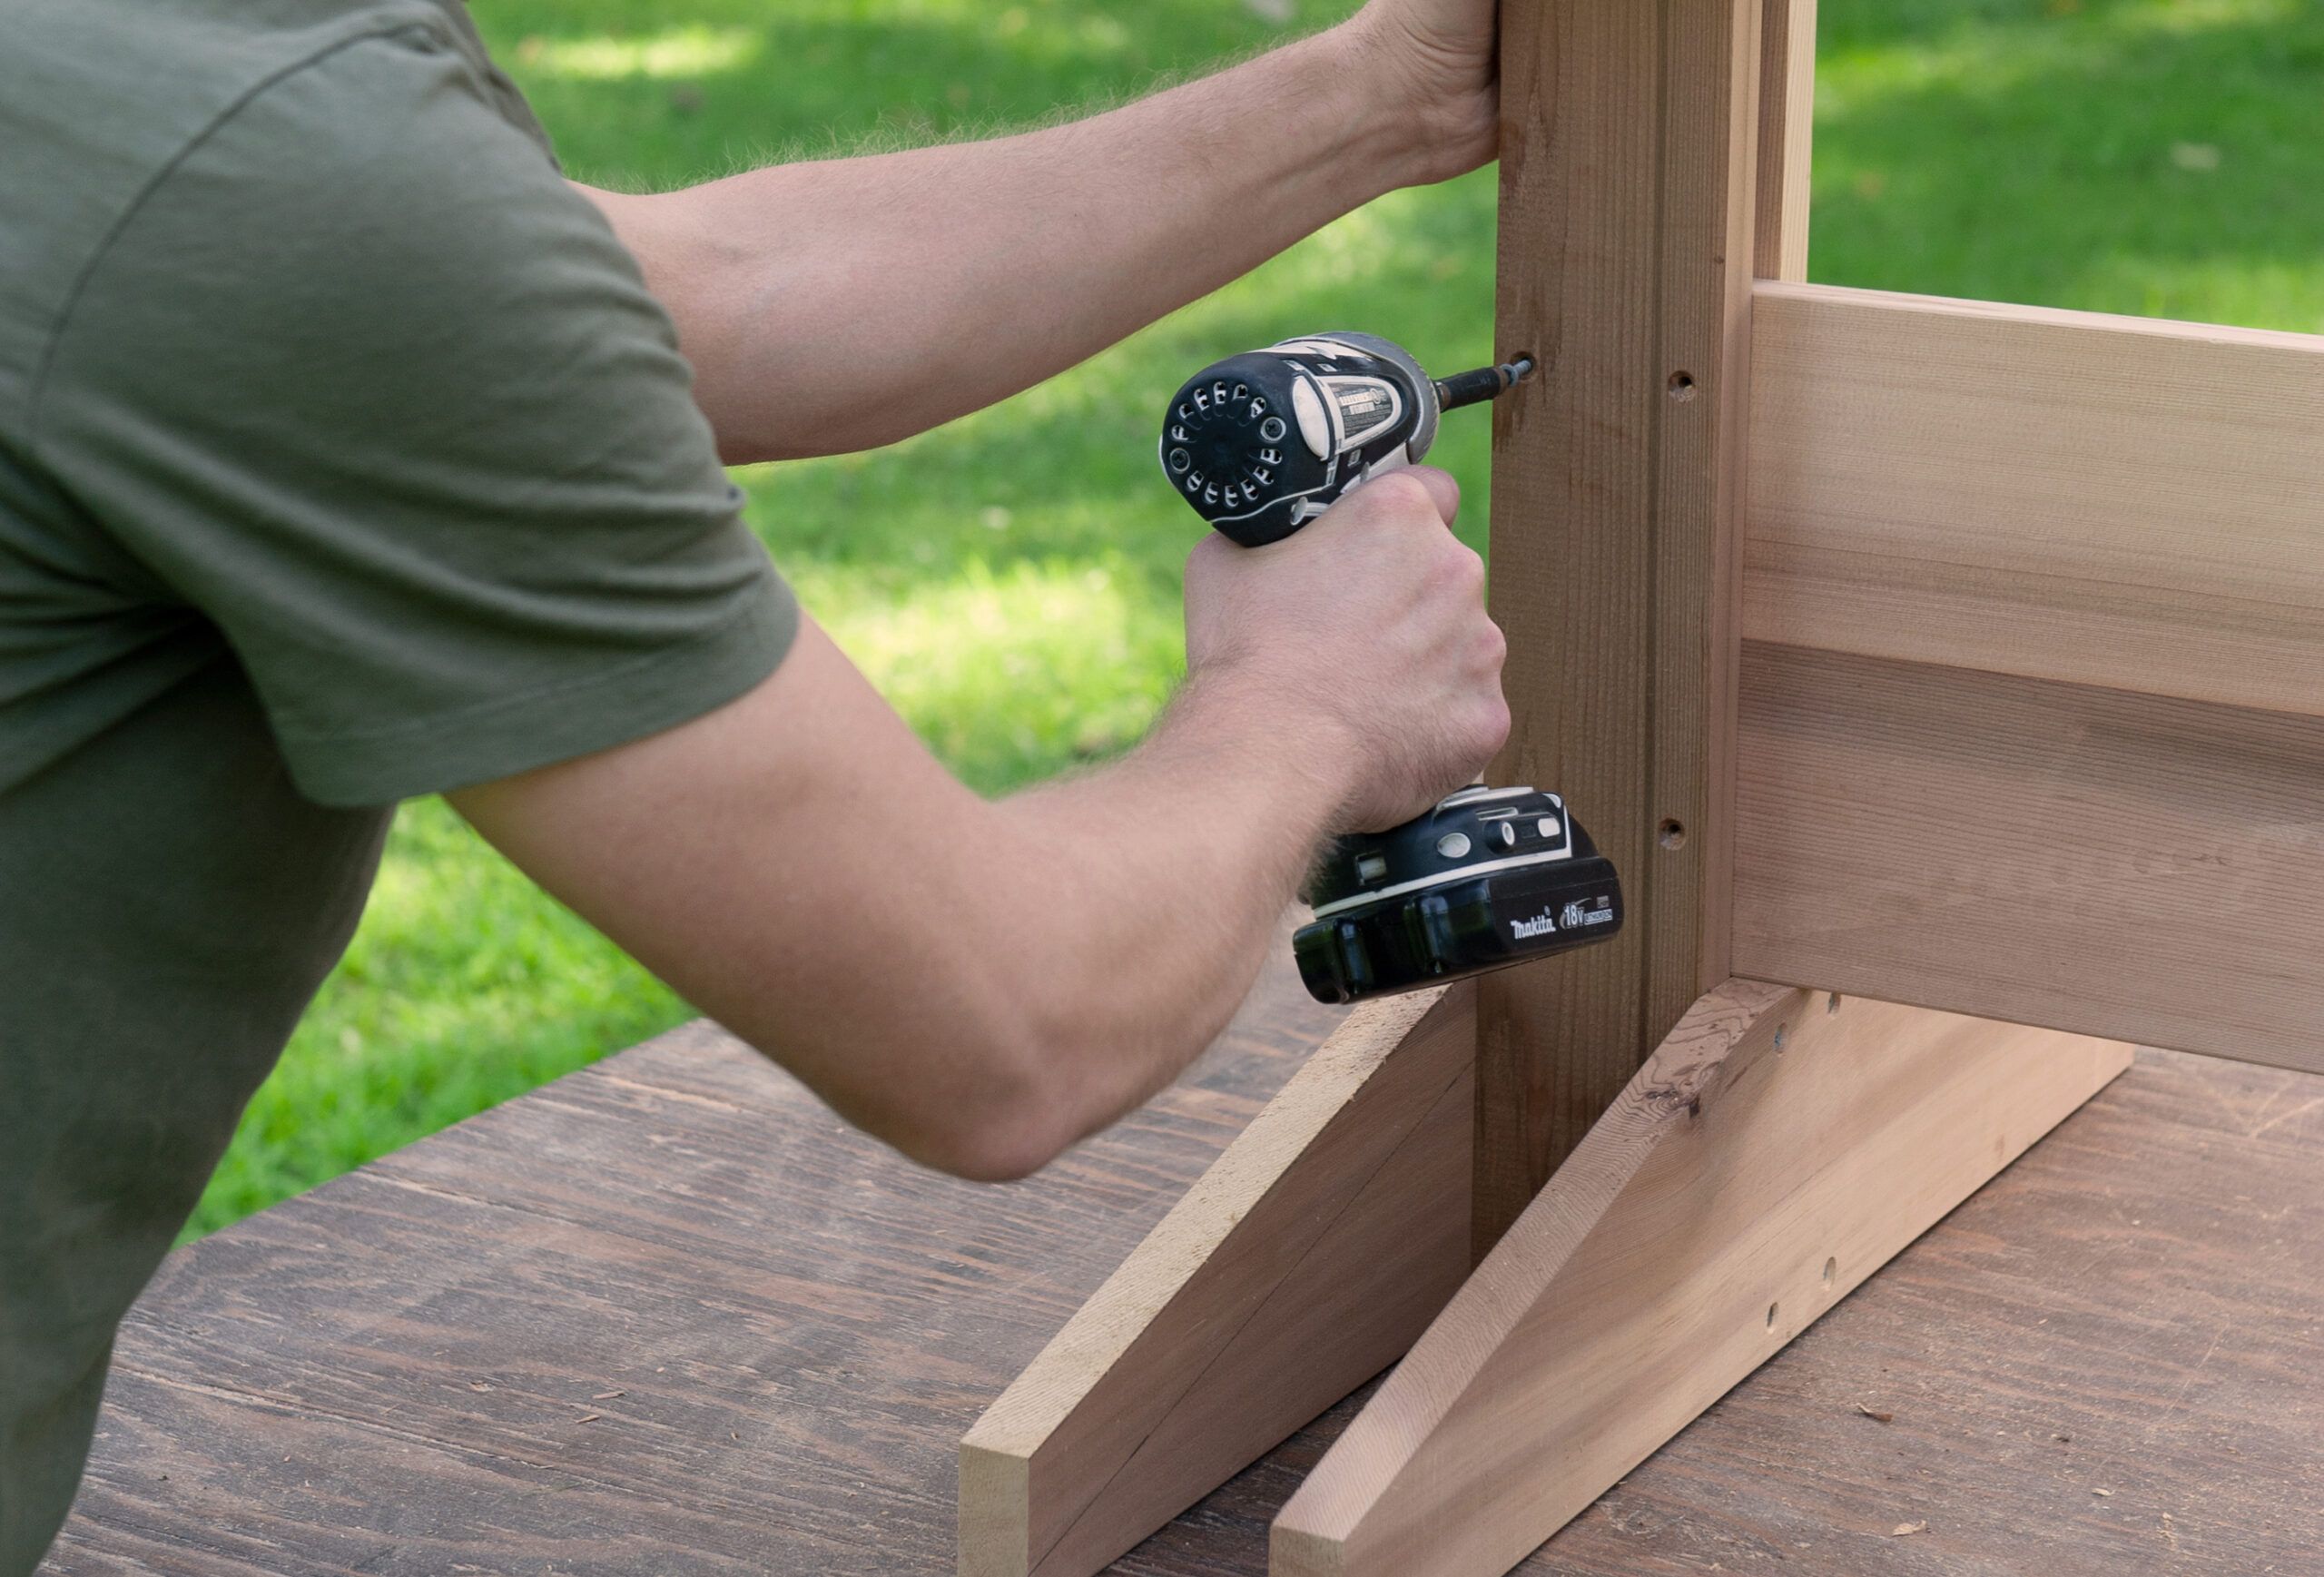
Countersink pilot holes through the legs and into the stretcher. Then secure it with deck screws, as shown.
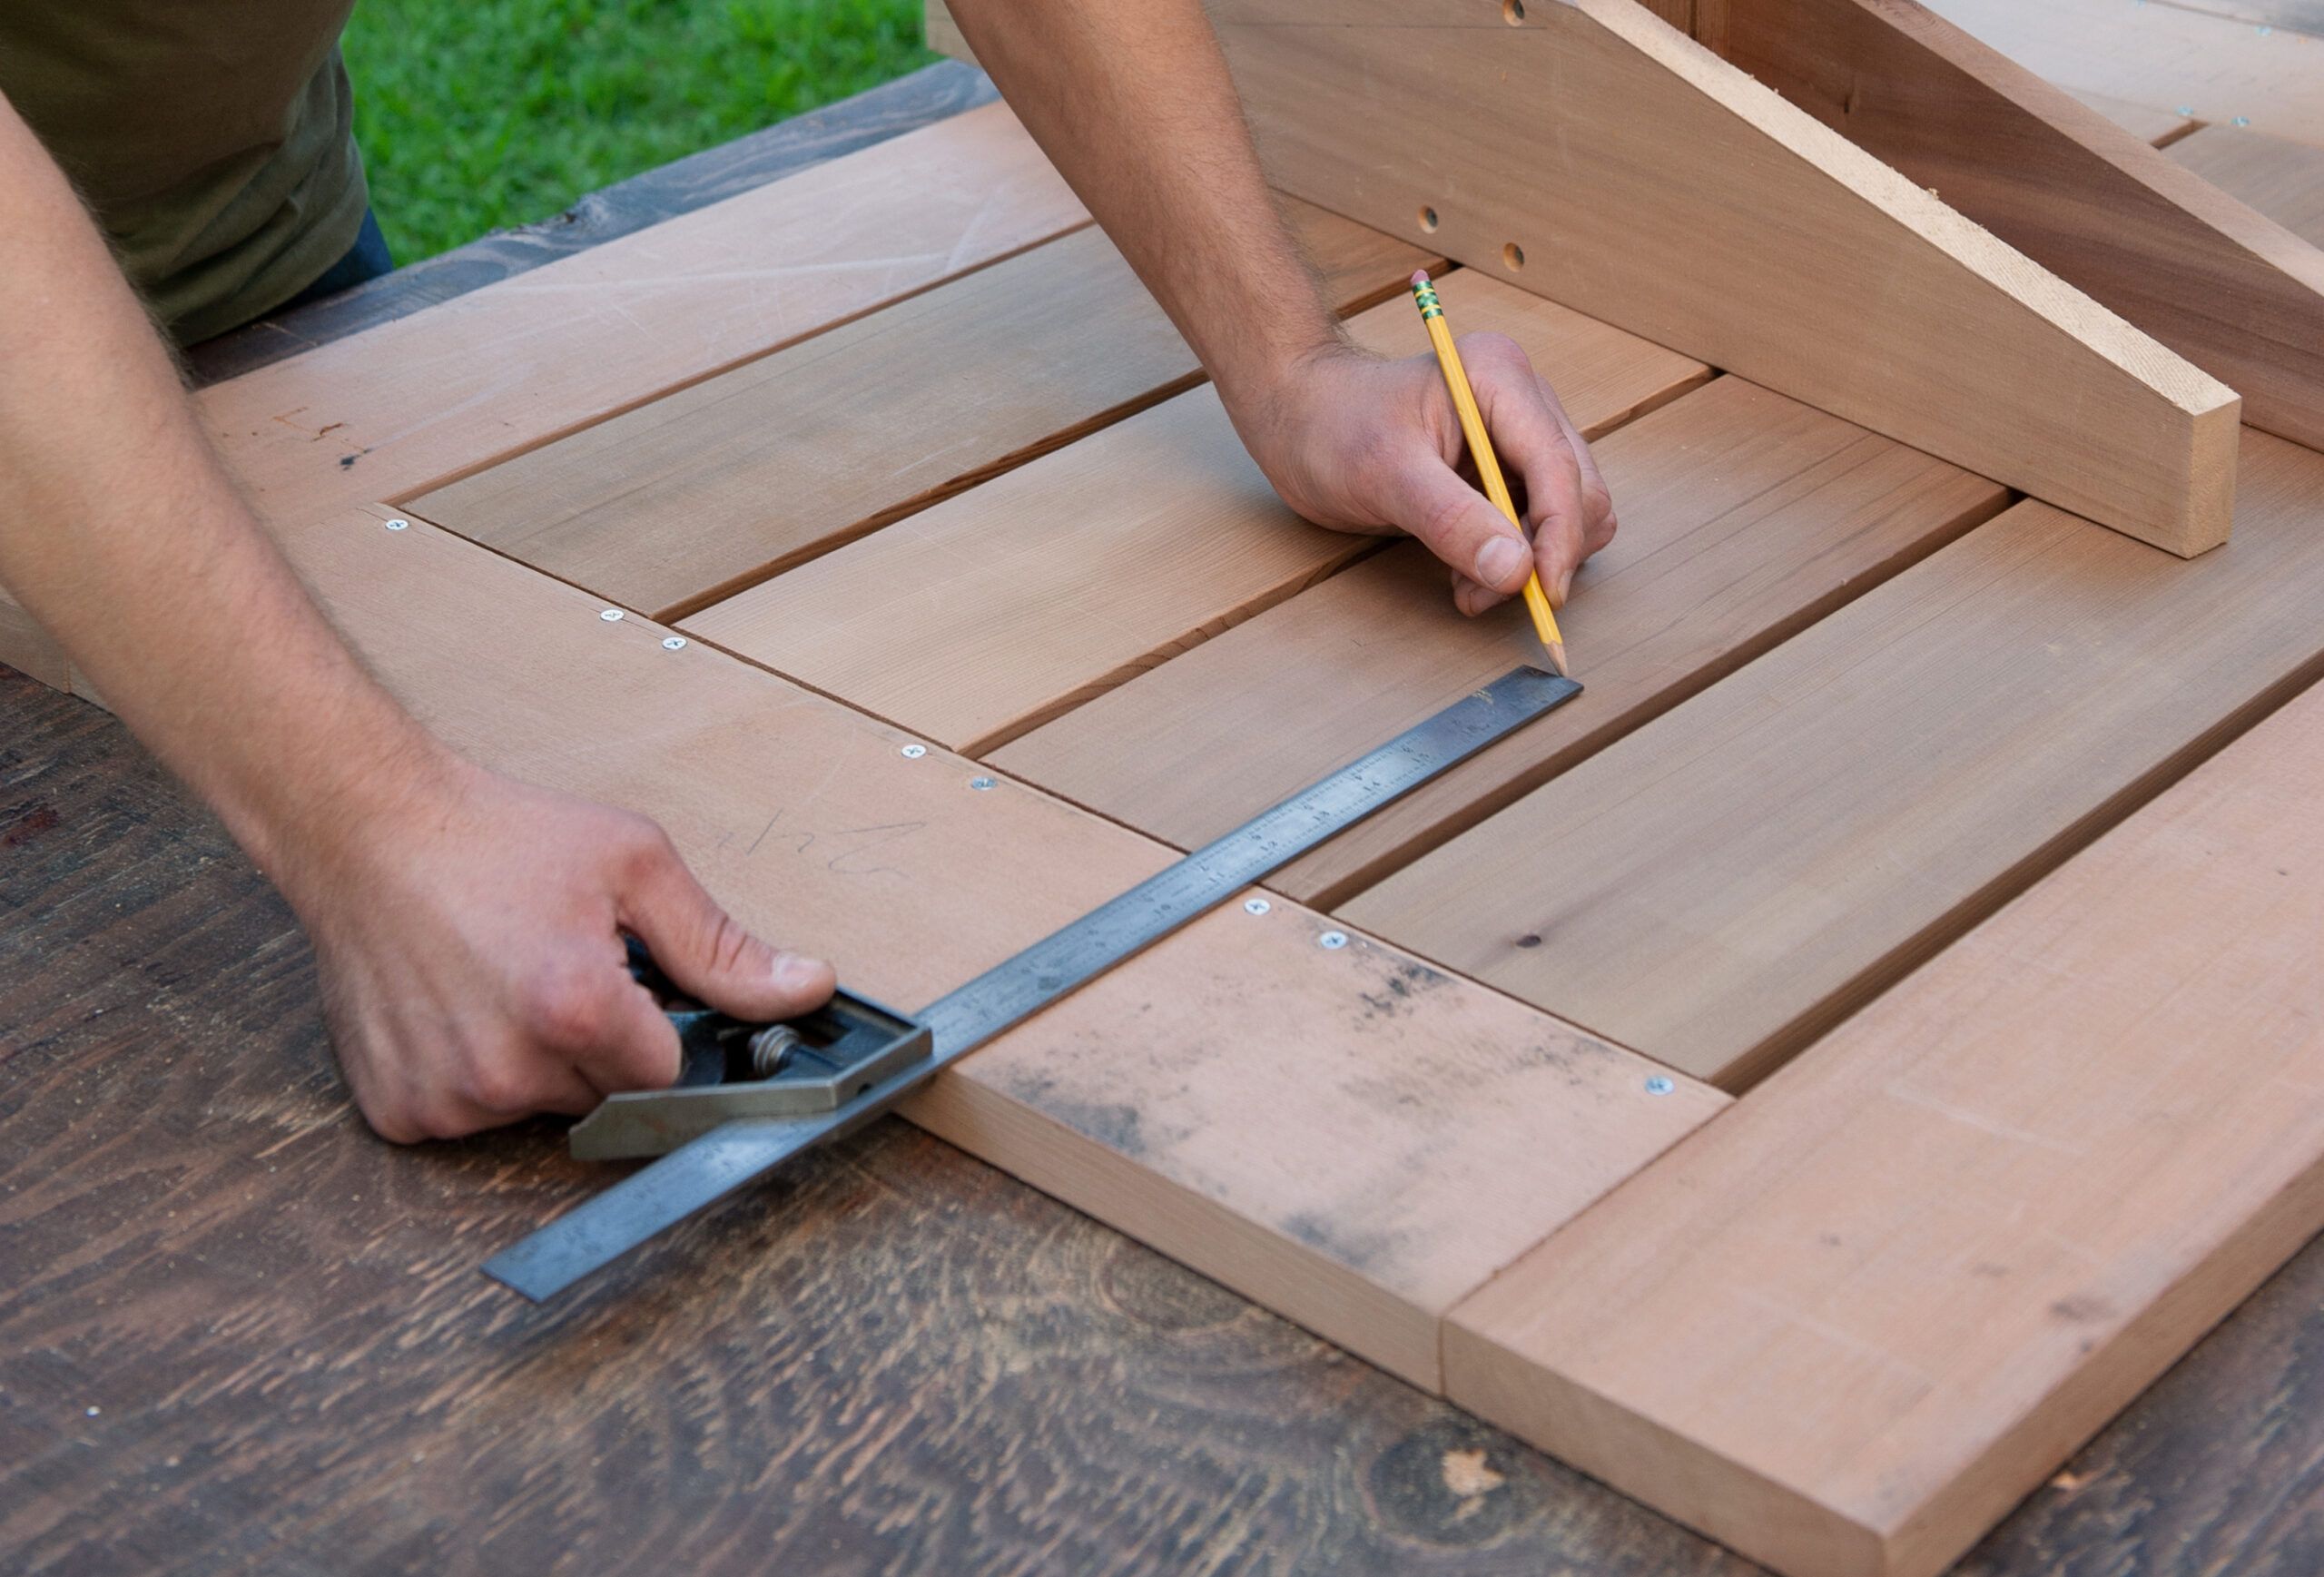
Lay the tabletop facedown on your work surface, and stand the base upside down on top of it. Using a combination square, measure from all four edges of the tabletop to center the base.
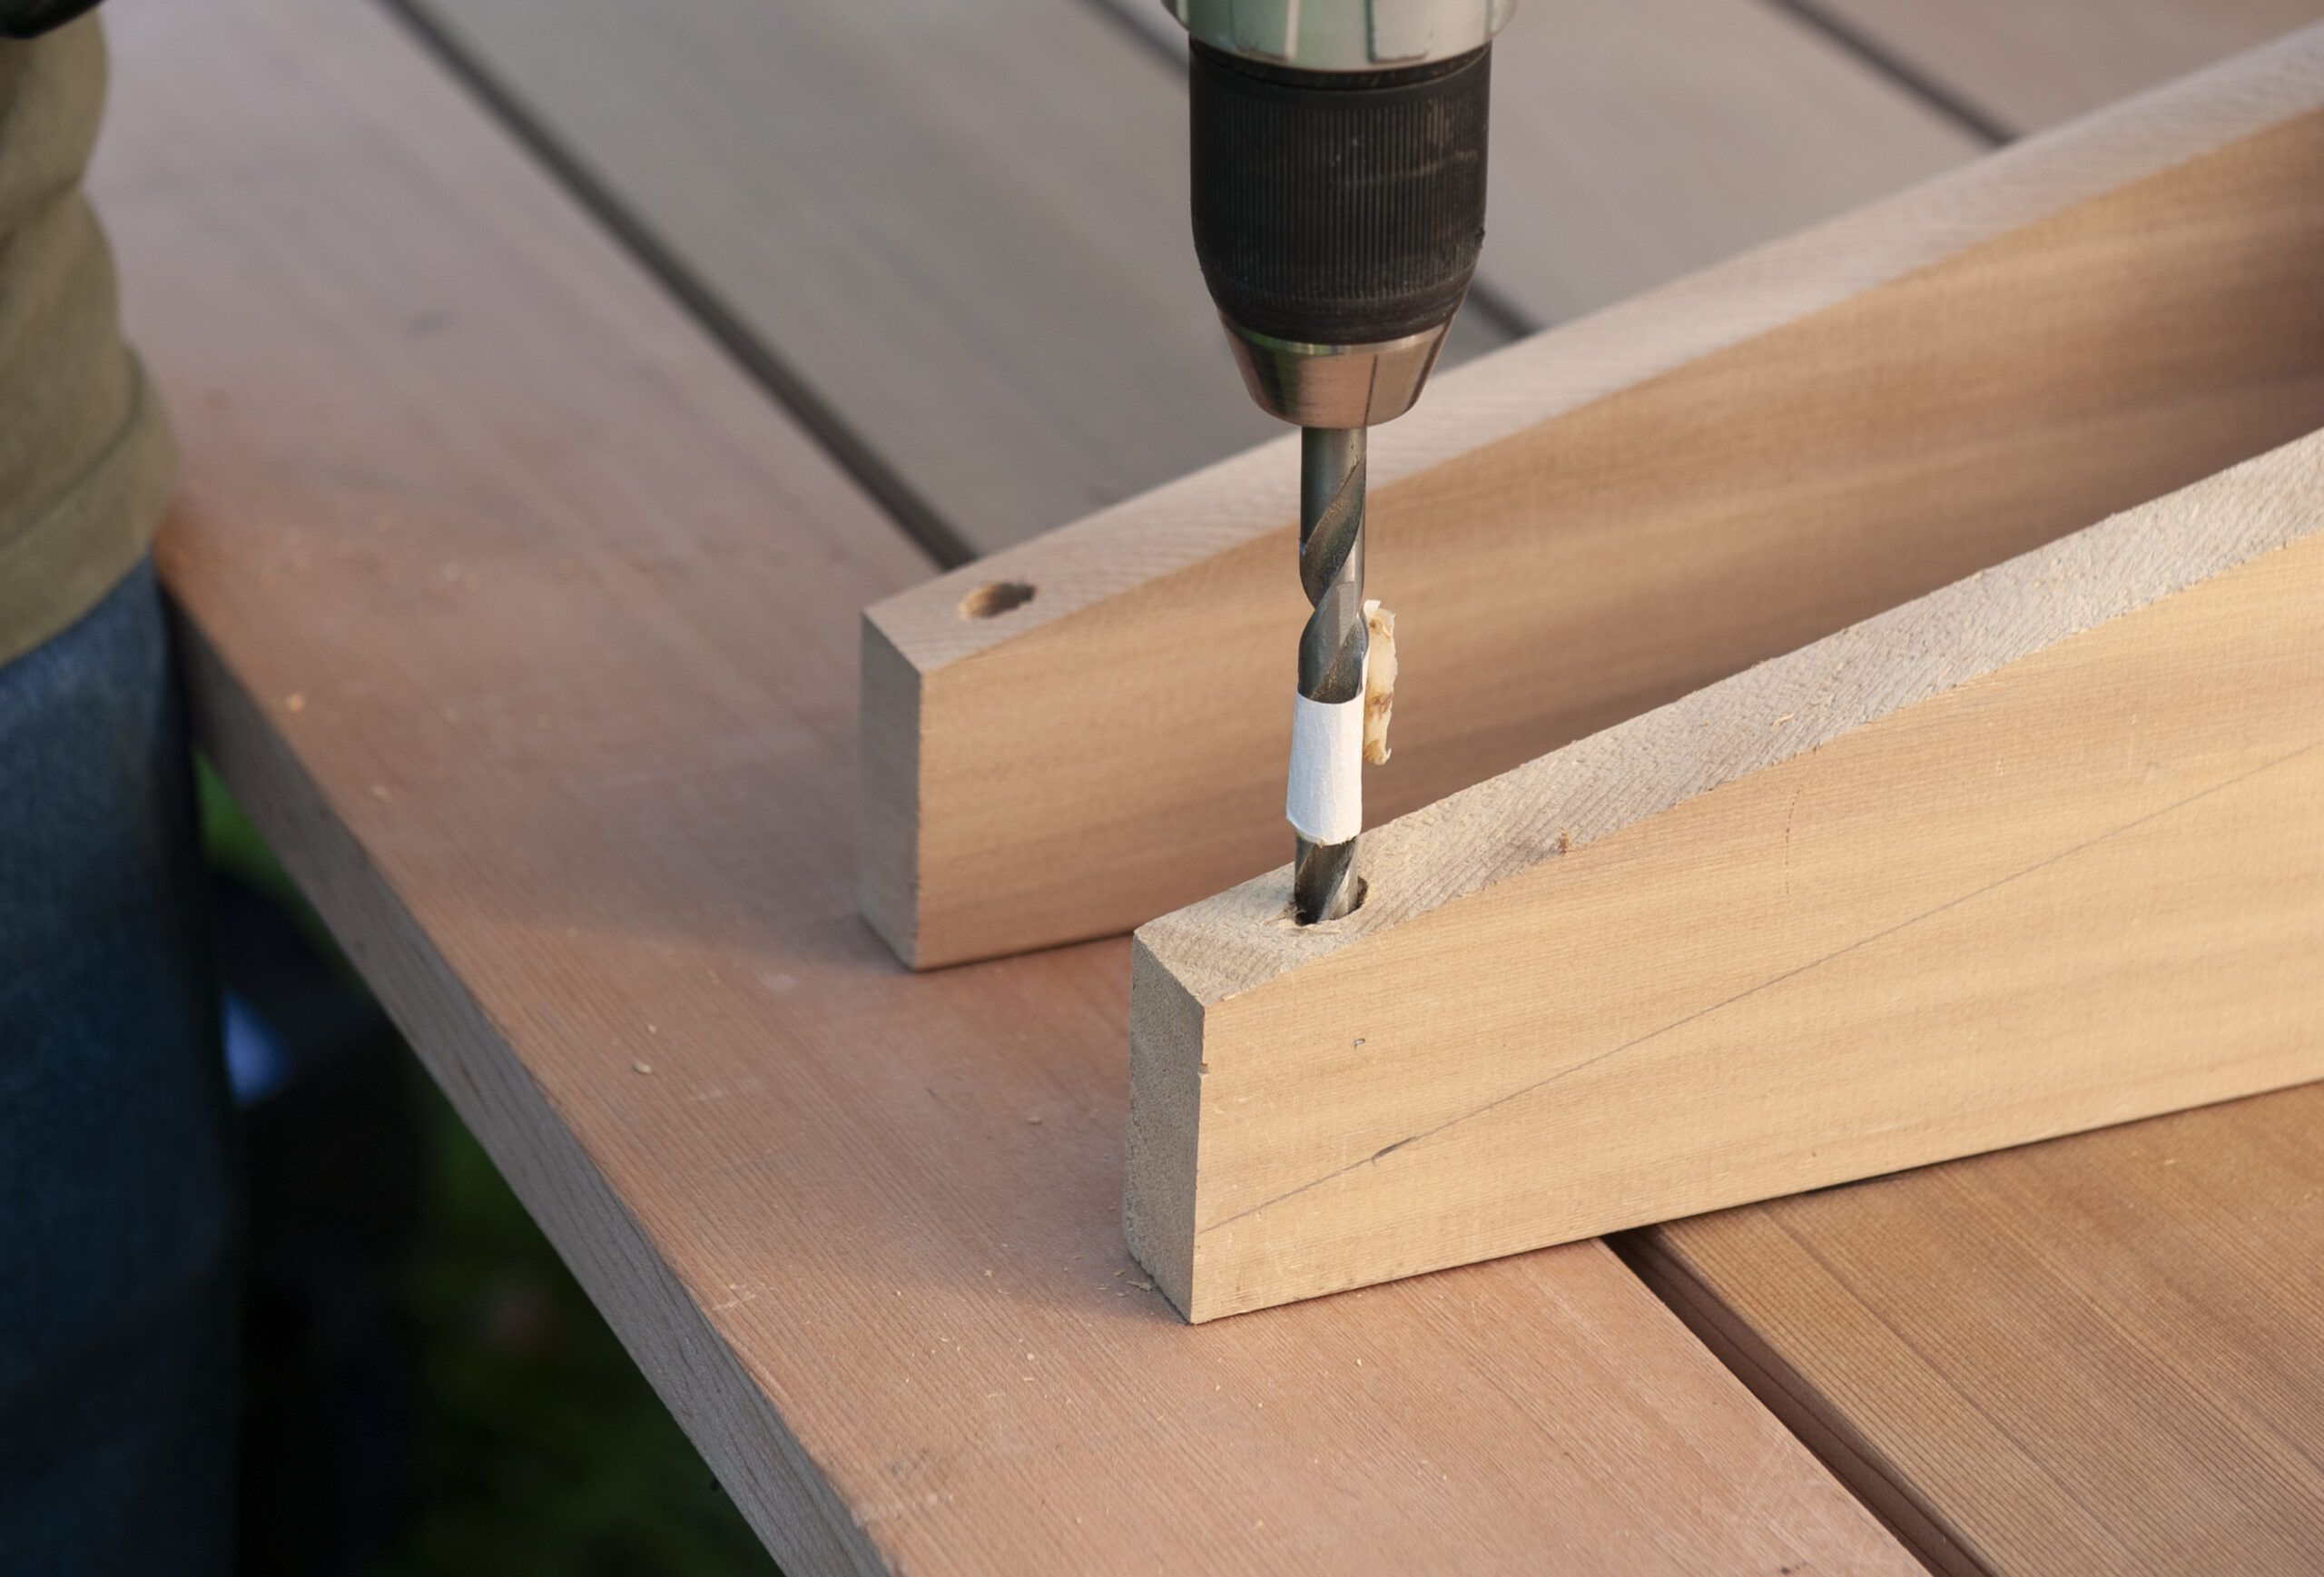
Wrap a piece of tape around a ⅜-inch twist bit 1½ inches from the tip, to mark the depth. Drill one countersink hole 1½ inches from the ends of each of the eight brackets, as shown, to hide the screwhead.
Next, put a ⅛-inch twist bit in your drill and make a pilot hole though the belly of each countersink hole and into the stiles. Drive a deck screw through each countersink hole and into the tabletop.
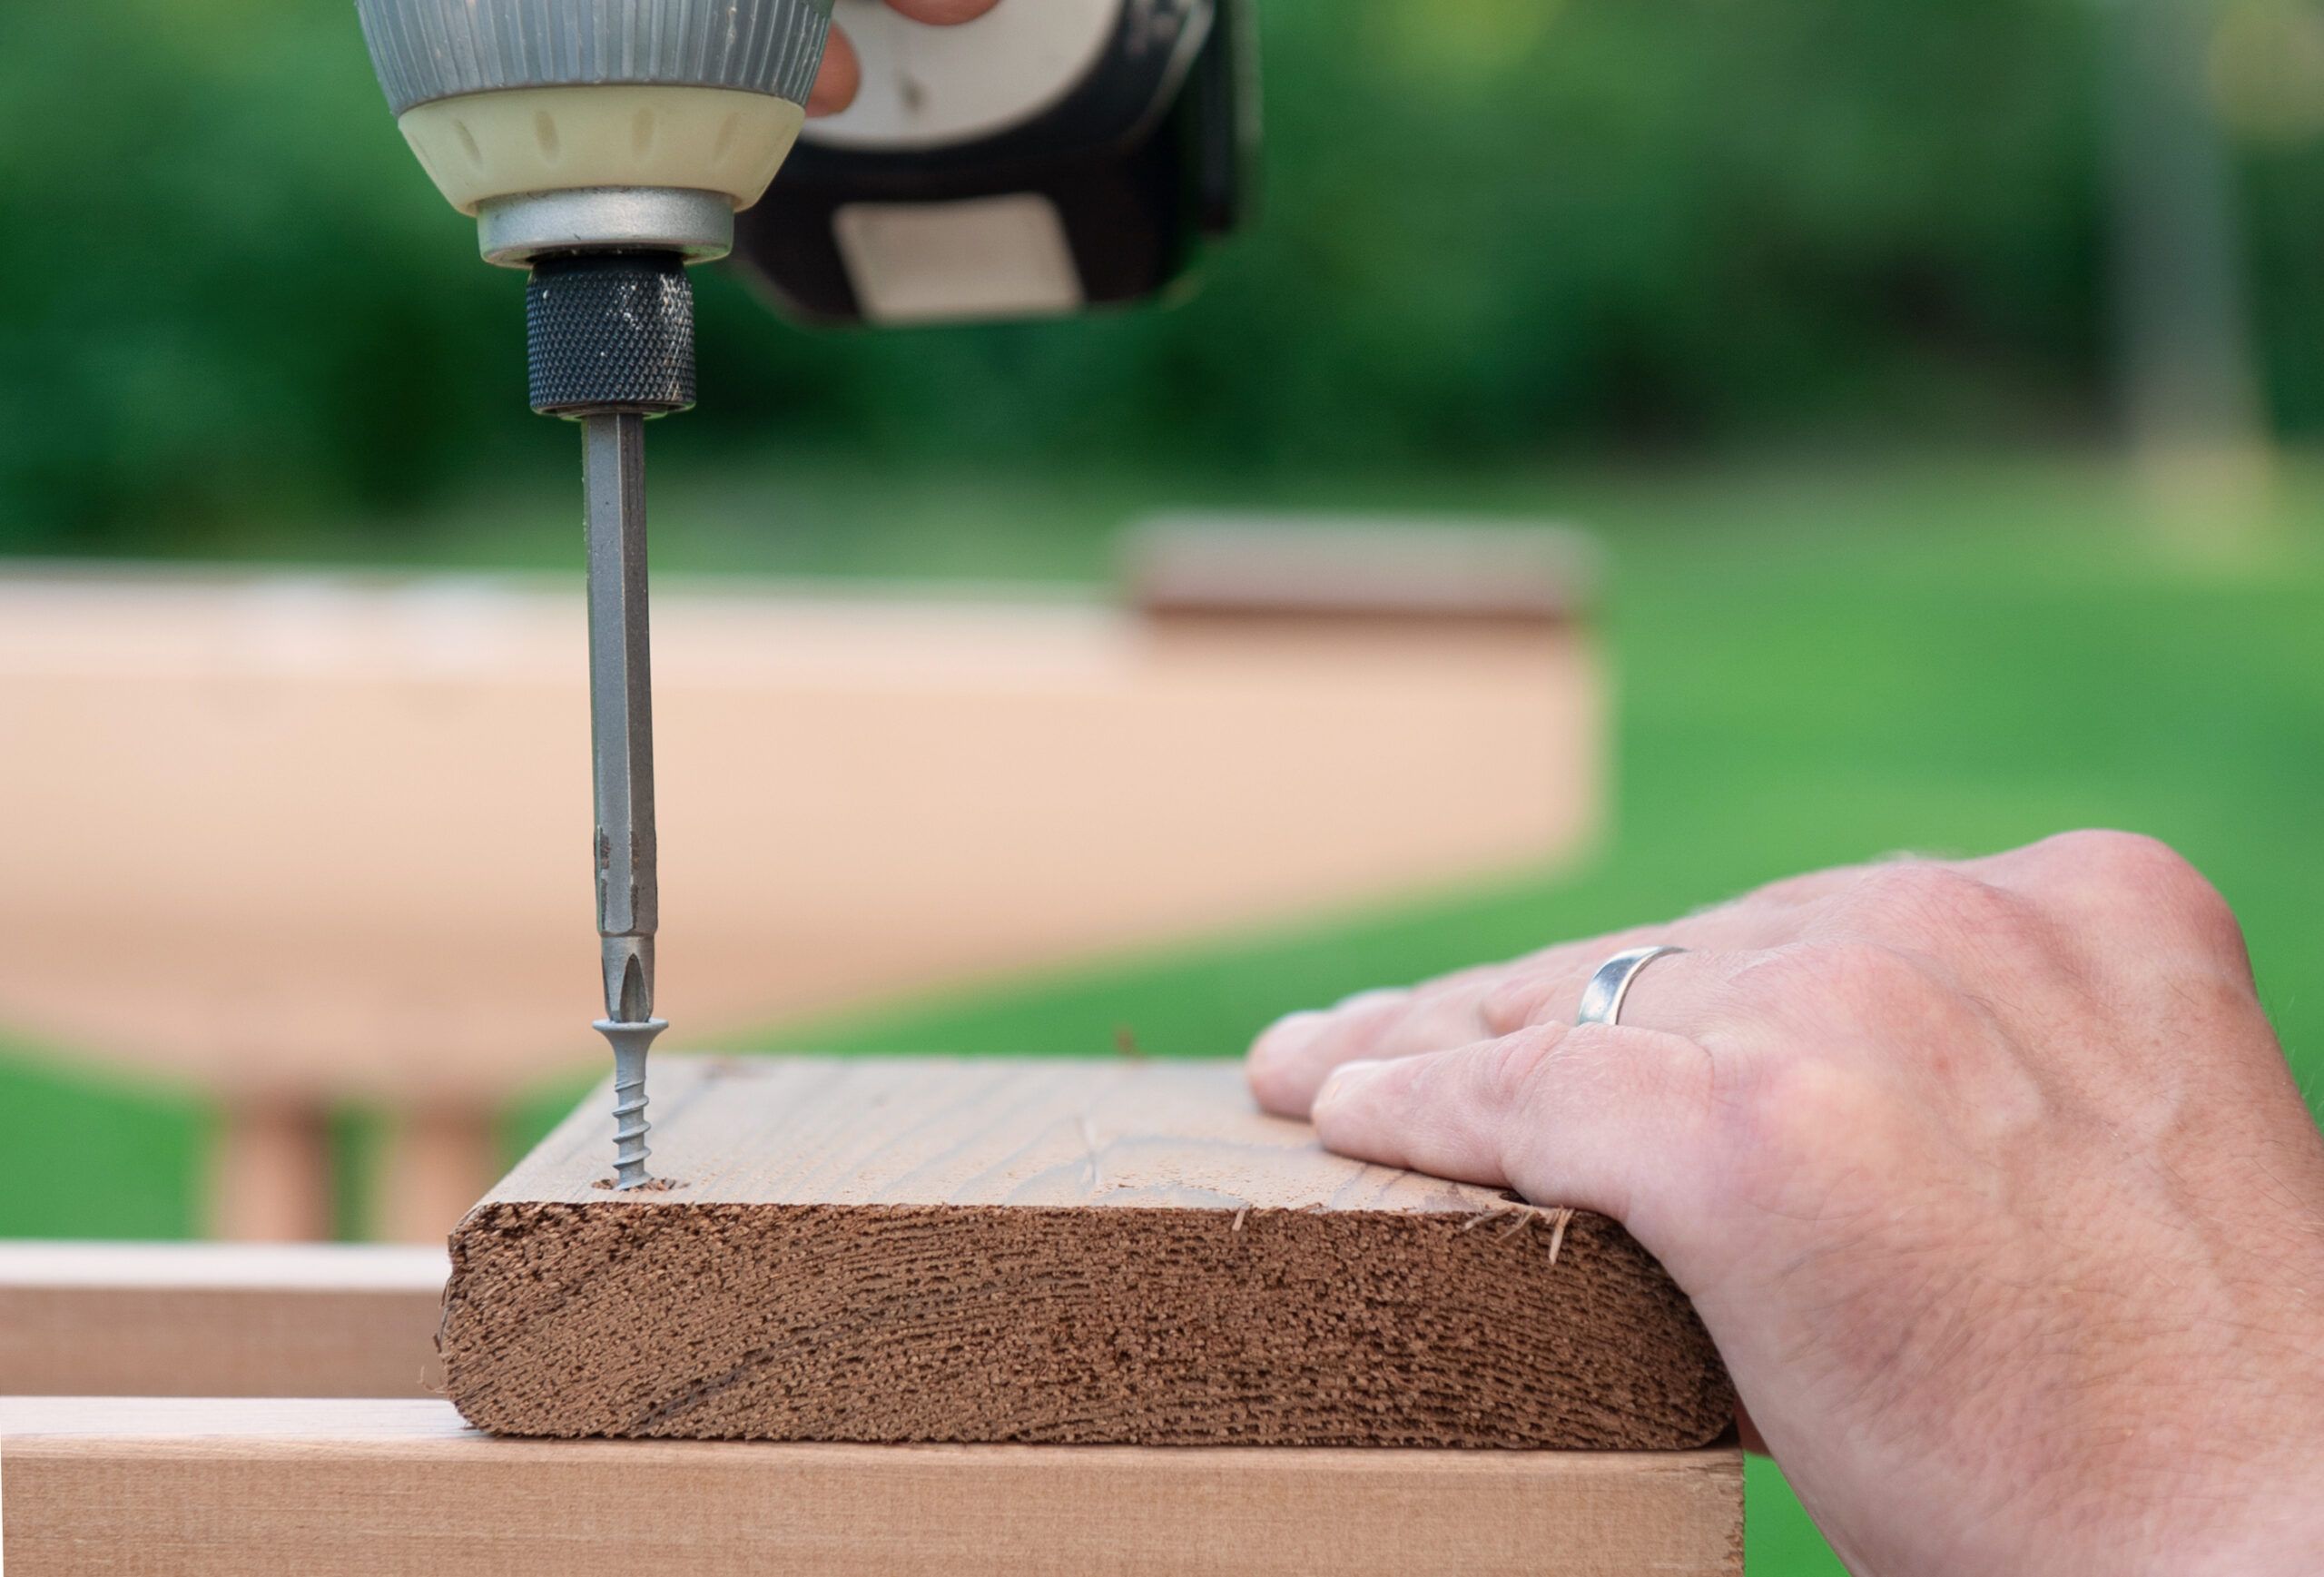
Use your drill to countersink pilot holes for the foot pads, and secure them with deck screws, as shown. Have a friend help you set the table upright on the ground, and you’re ready to build the benches.
Dry-fit the end caps, or bread boards, against two bench-seat boards, and mark where they butt into the end caps.
Line up your doweling jig with the edge of the end cap and clamp it down. Drill two holes 1⅛ inches deep, shift the jig flush with the end cap’s other edge, and drill two more holes. To make the last two pairs of holes, line up the inside edge of the jig on the register marks, for a total of four pairs of holes. Repeat the process on the other end cap.
To make matching holes on the seat boards, clamp the jig flush with each edge of the board and drill into the end grain.
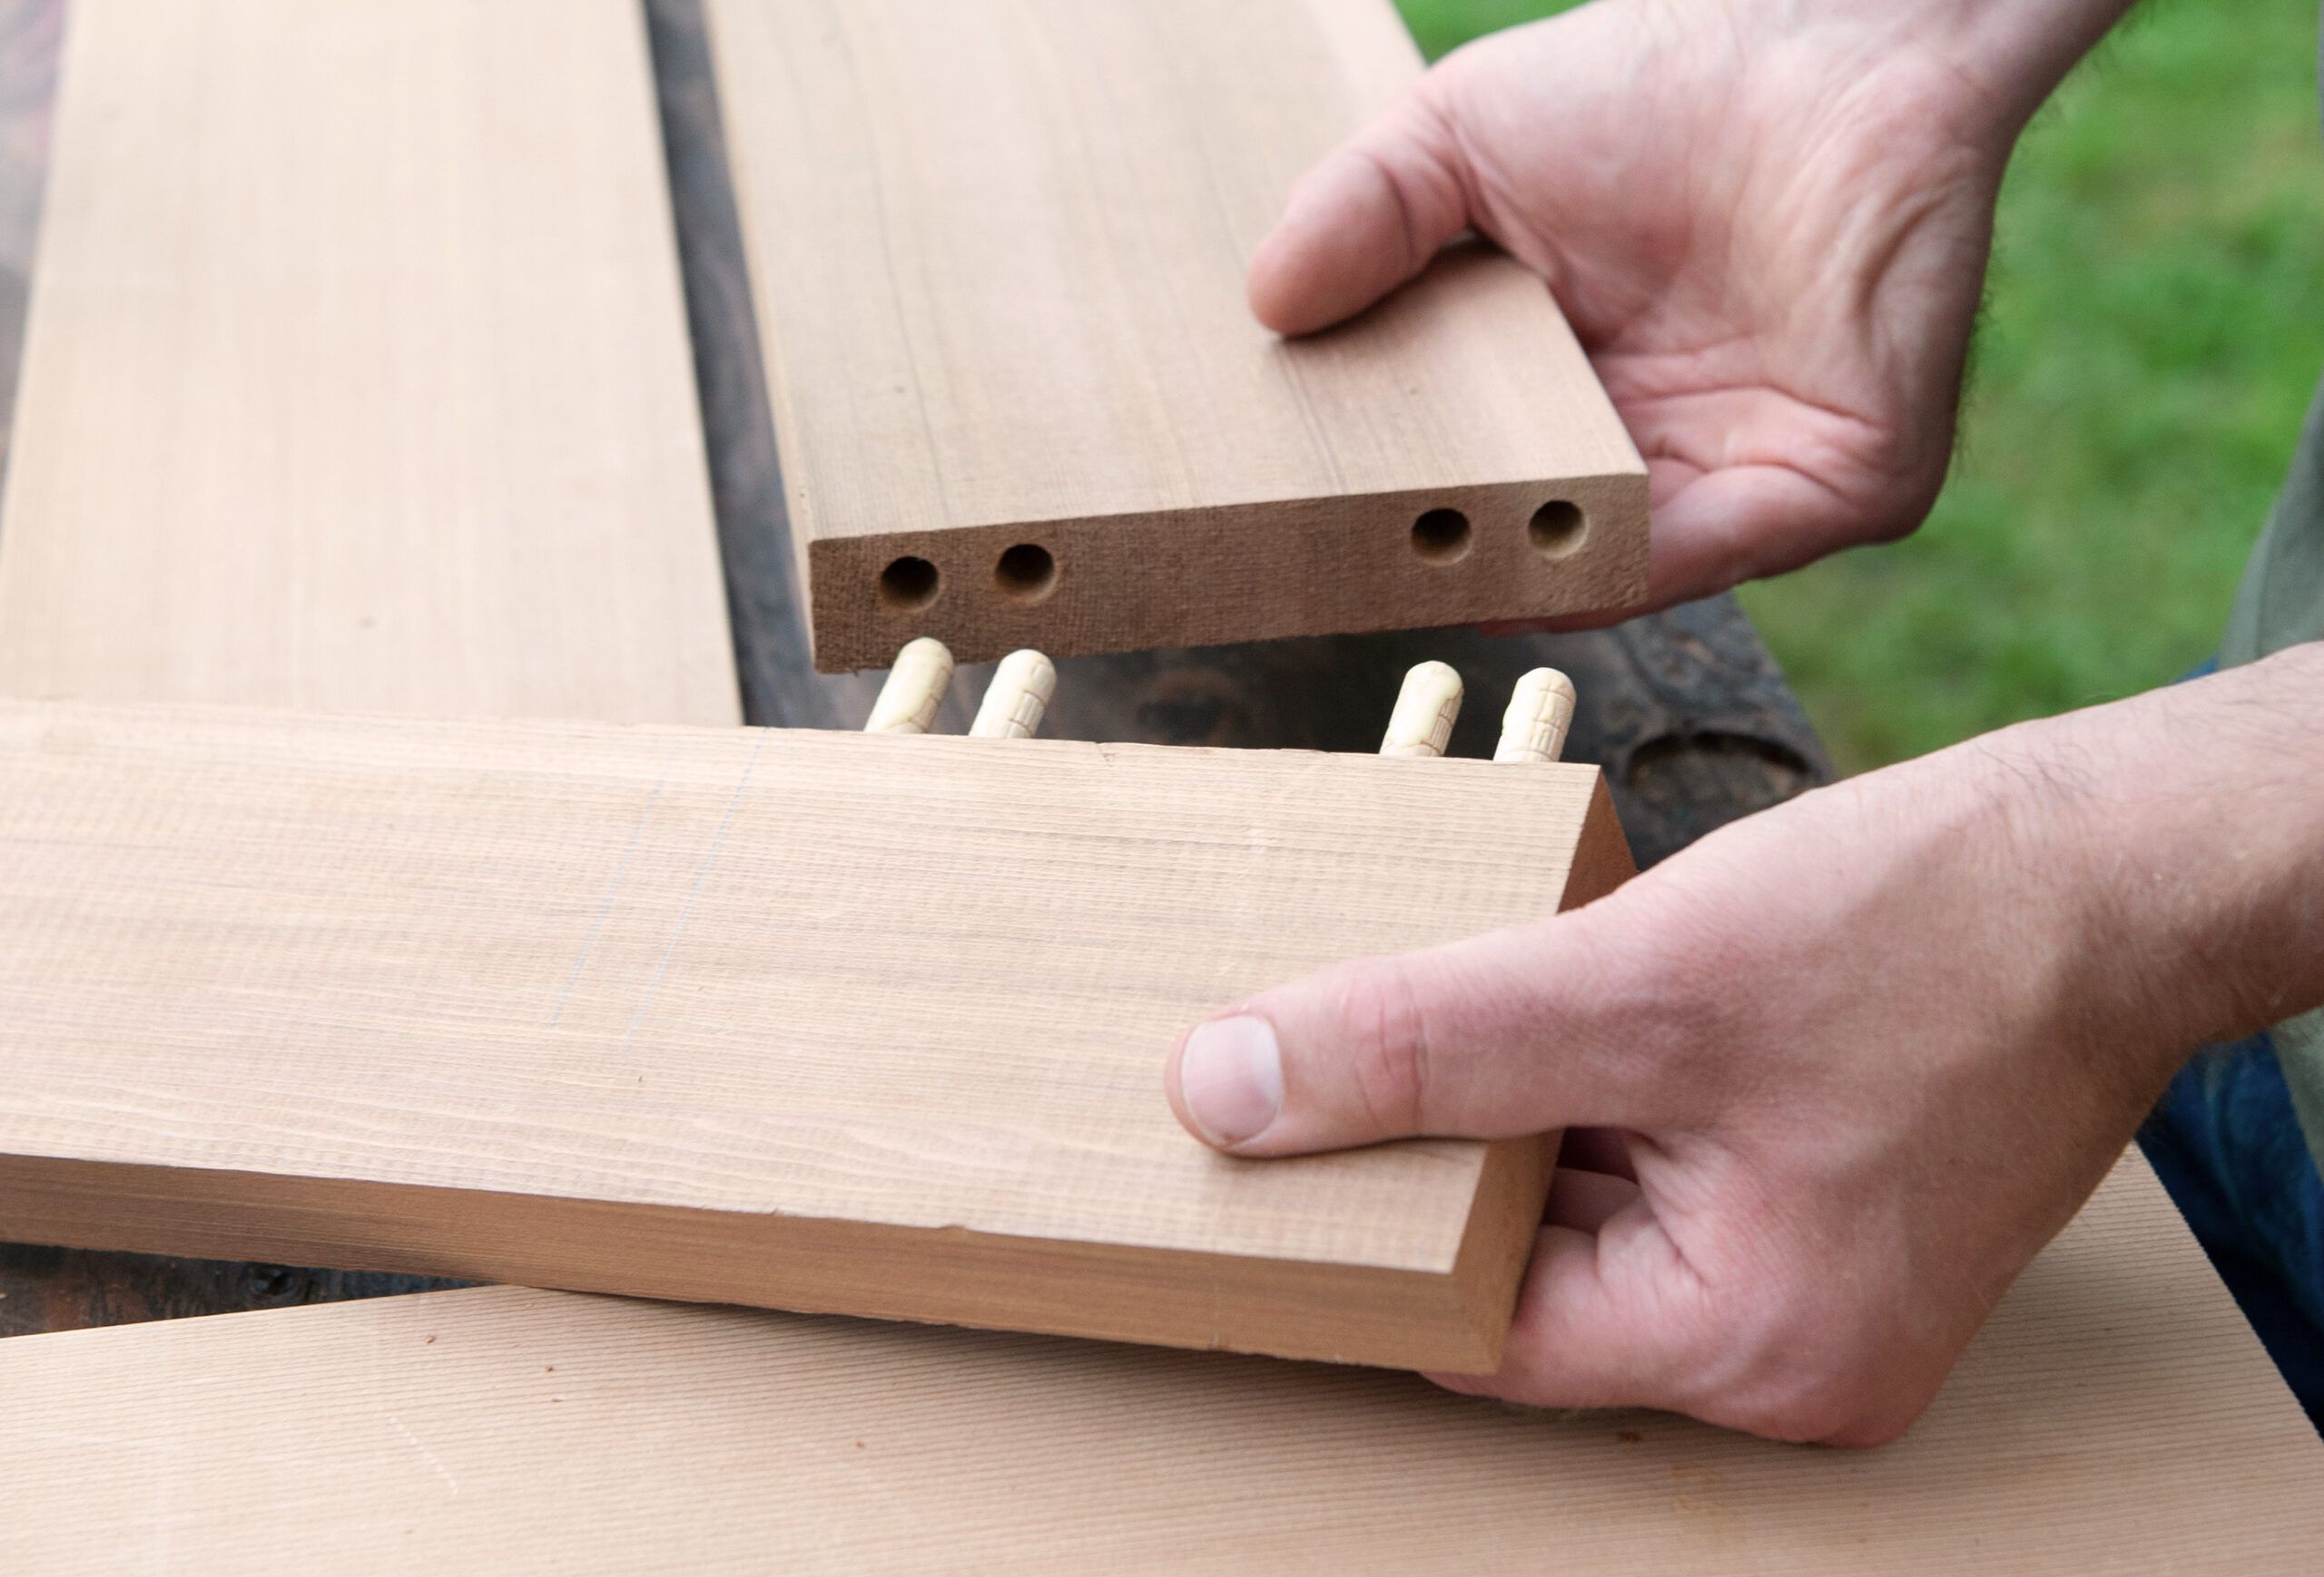
Dry-fit the bench seats with the dowels. Unless you own extremely long bar clamps, you’ll want to make a clamping jig to hold the pieces together once the glue is applied.
Screw a piece of scrap wood at one end of the work surface, position the dry-fit assembly, and secure a second piece of scrap at the other end, leaving a 1-inch gap.
Apply glue to one end of the dowels and insert them into the end cap. Apply glue to the exposed ends of the dowels and fit the end caps onto the ends of the seat boards. Lay the piece into the clamping jig.
Then use a mallet to tap wedges between the clamping jig and the end caps, as shown. Let the seat cure for at least 1 hour while you work on the trestle.
The bench trestles are smaller versions of the table trestle, with an extra center bracket. To make the feet and brackets, take a blank and find the center of the long edge, then measure and mark out 1½ inches to each side.
Measure and mark 1½ inches up from the bottom corners, and use a straightedge to make diagonal cutlines between the top marks and the side marks.
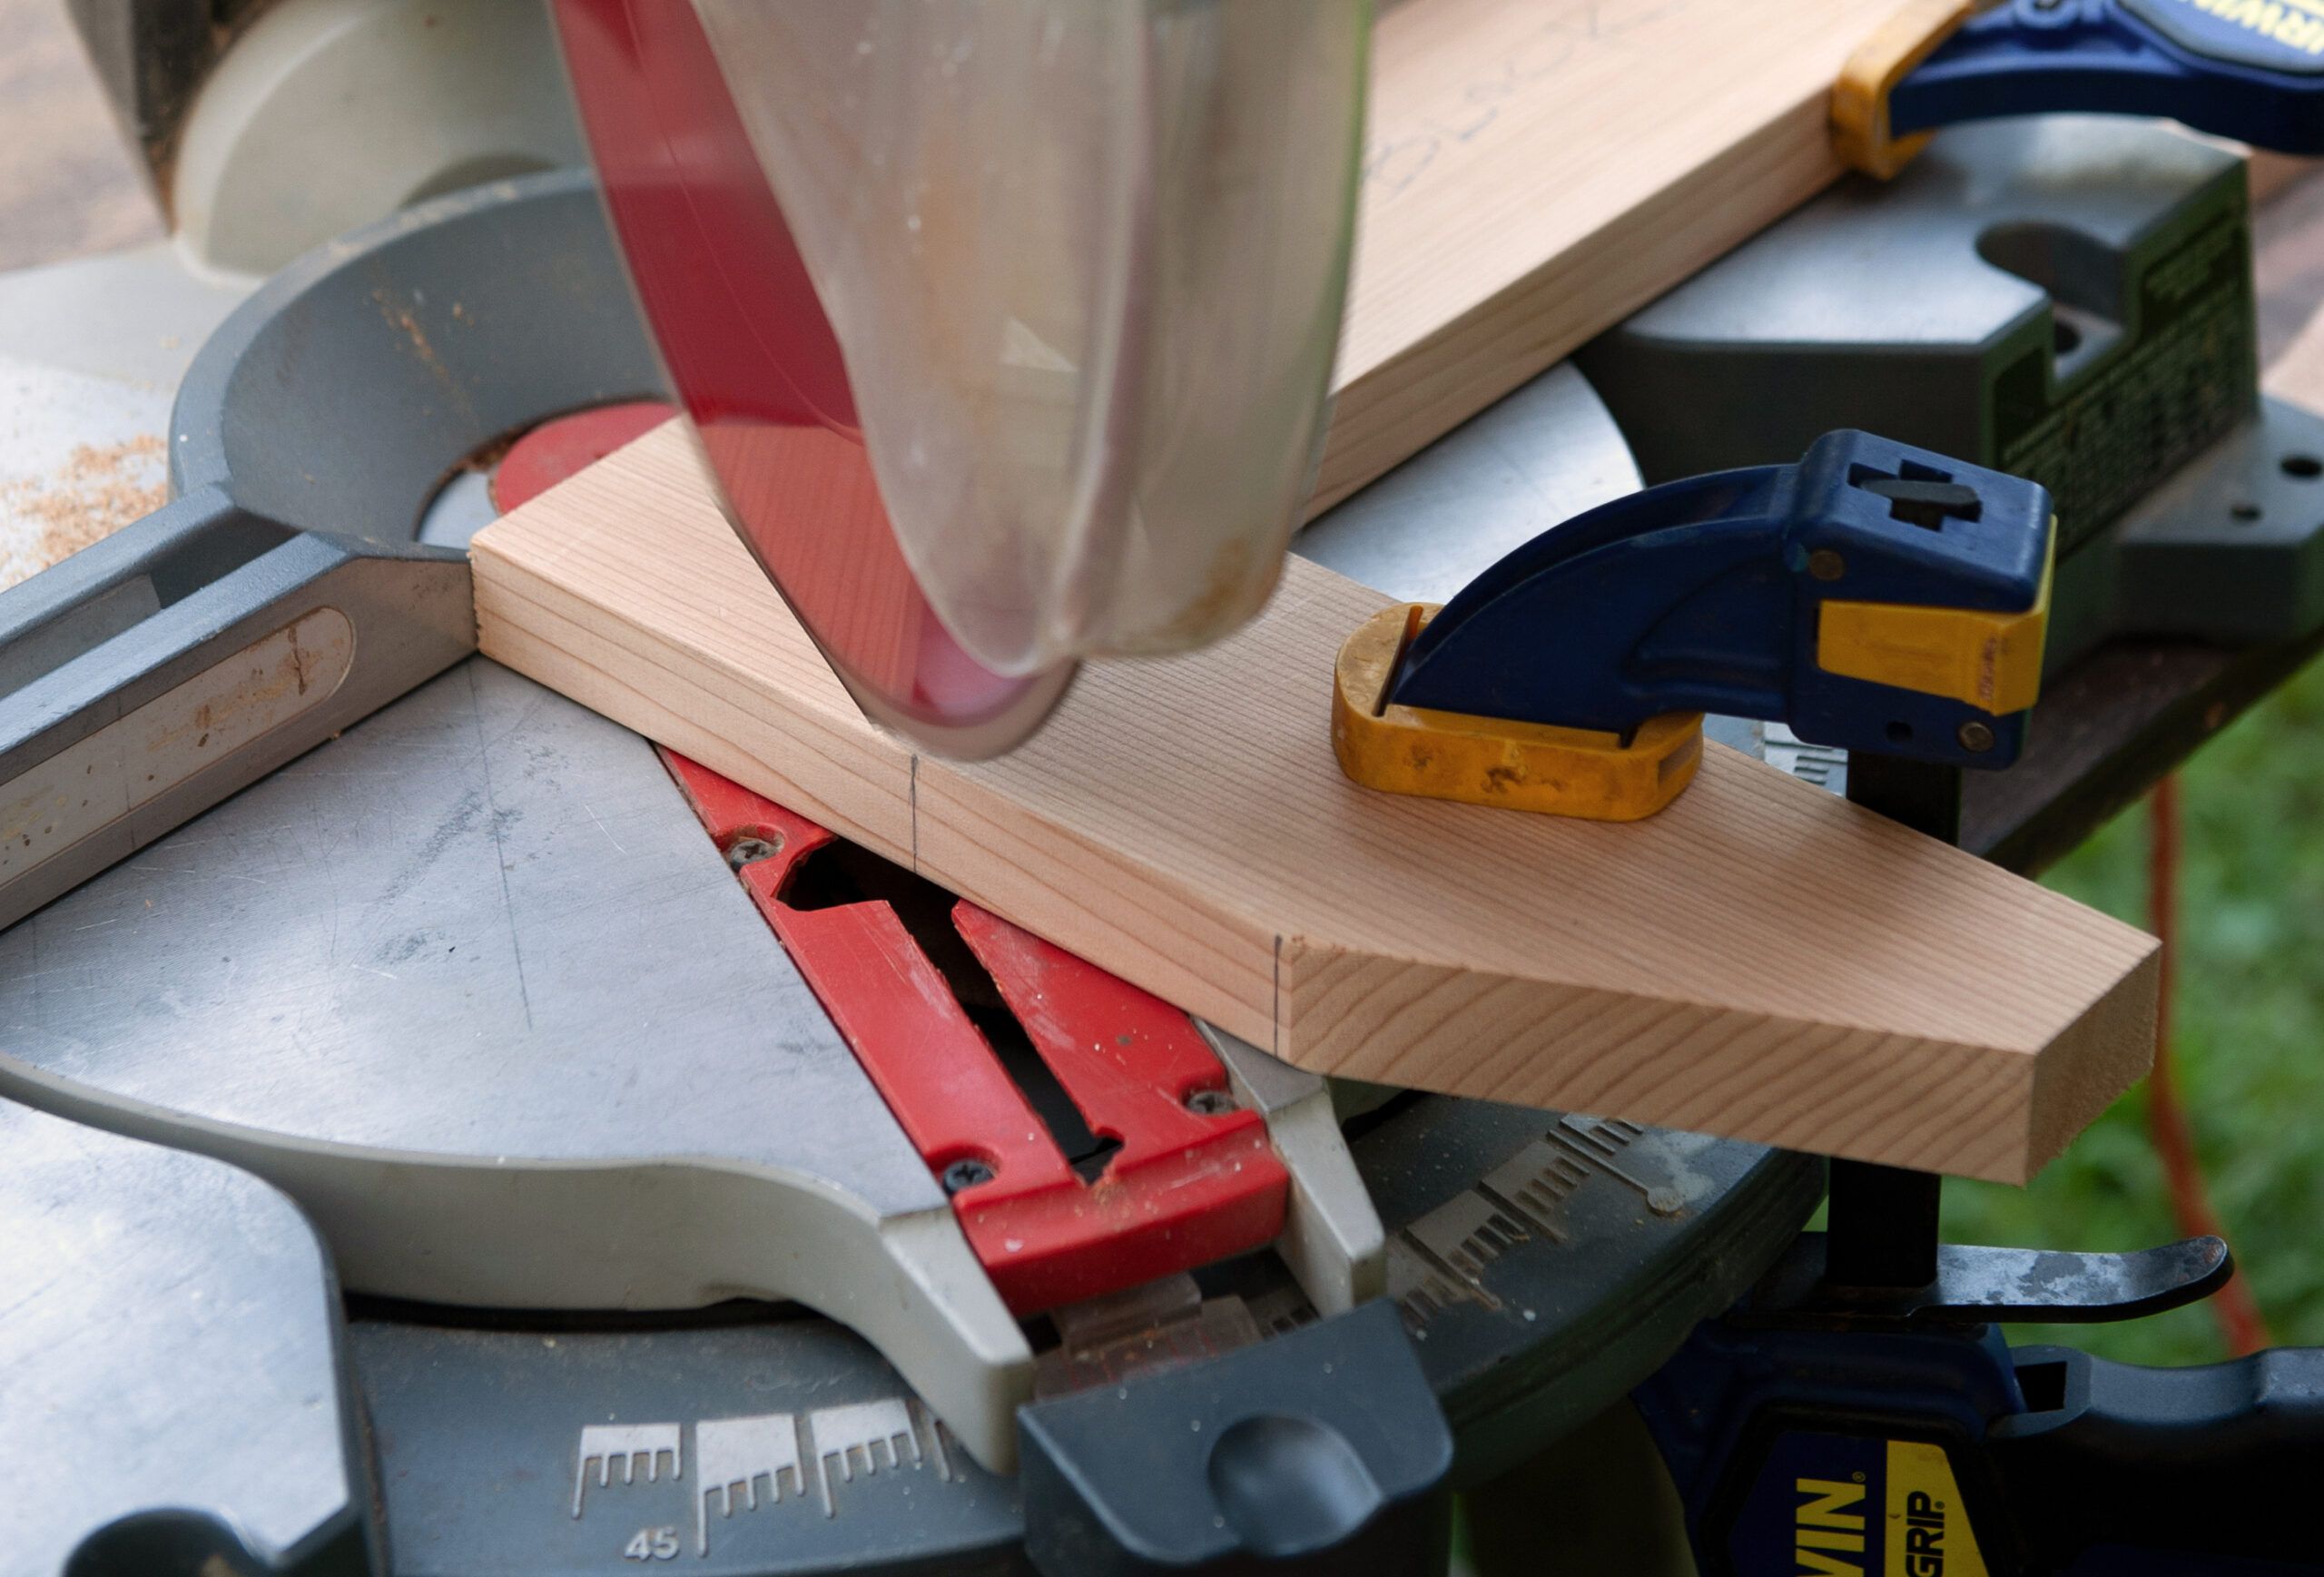
Clamp a piece of scrap to your miter saw to serve as a stop block, and clamp down each blank to cut it—keep your hands free and clear of the blade. Match your miter saw to the cut angle, make the cut, then make the mirror cut. Use that piece as a template for the other blanks, and cut all the blanks.
Clamp a 5/4 spacer between two bench-leg boards, and use your drill/driver to countersink holes and screw the feet and brackets in place. Set the fifth bracket aside and build the other leg.
Stand two bench-leg assembles on your work surface, and insert the stretcher between them. Use your drill/driver to countersink holes and screw the stretcher in place.
Stand the trestle upside down on top of the bench seat and center it. Find the center of the stretcher and insert the fifth bracket.
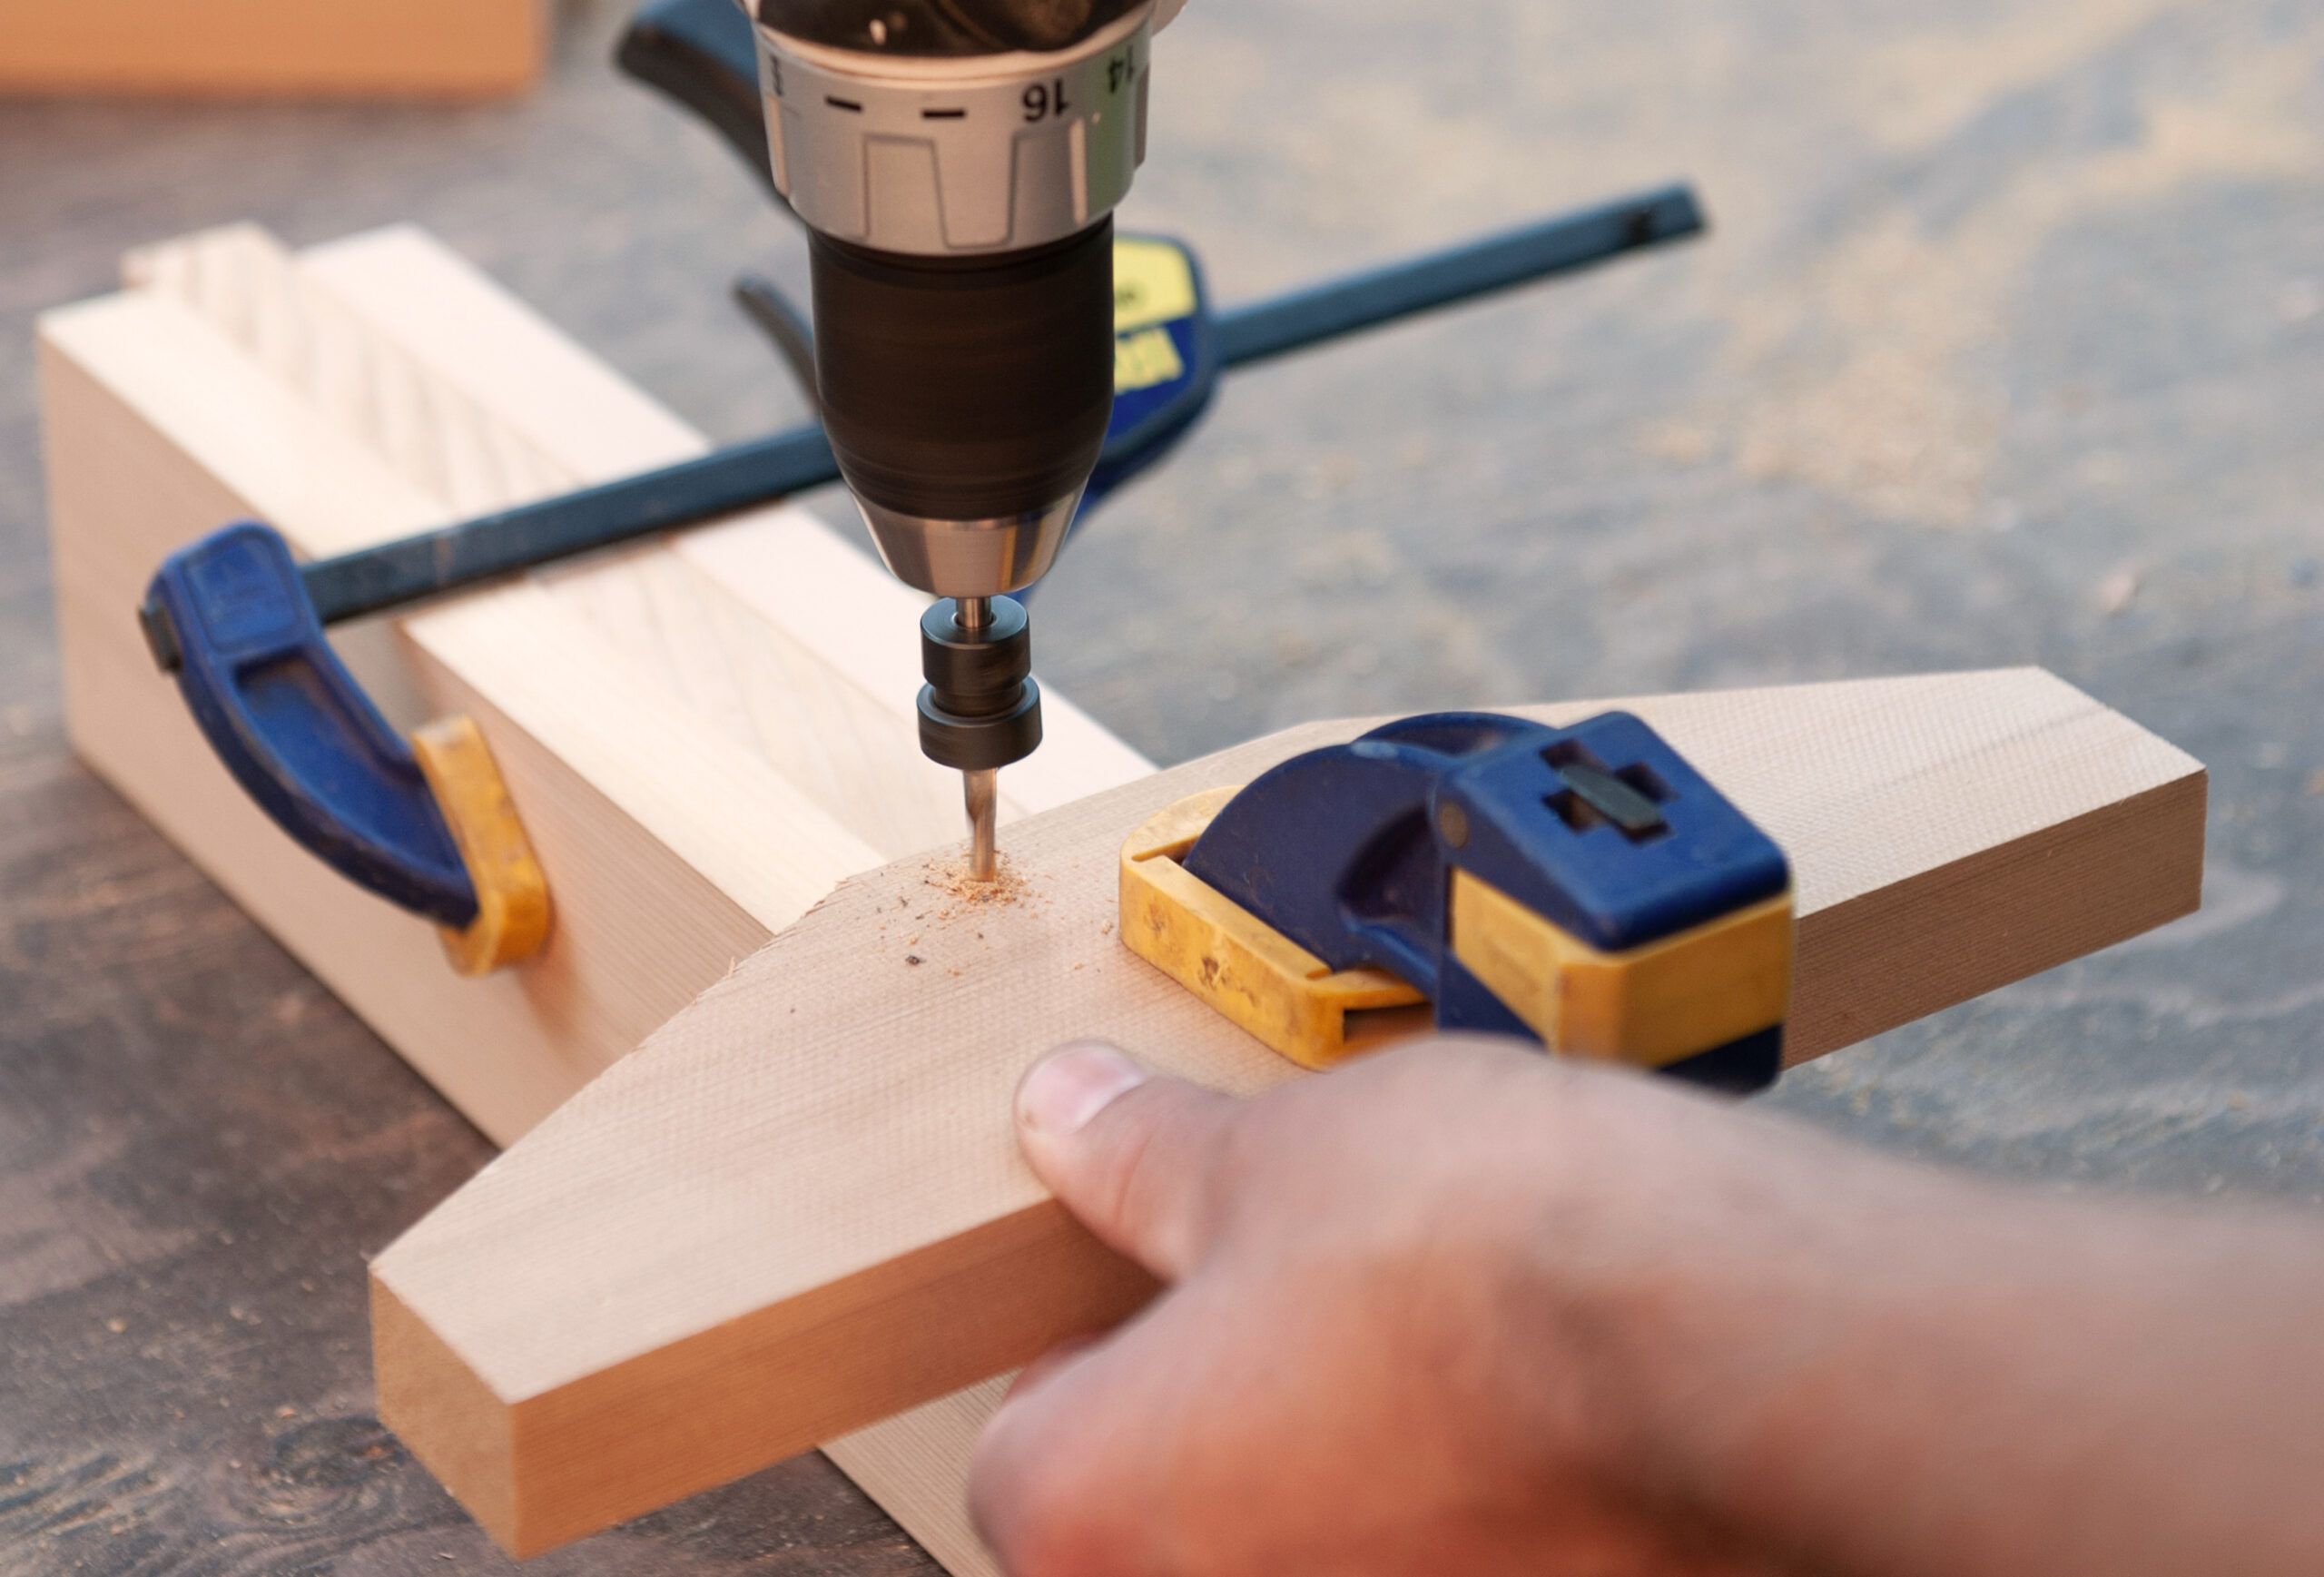
Put a ⅜-inch bit in your drill/driver, and wrap a piece of tape around the bit 1 inch from the tip. Drill countersink holes to the tape 1¼ inches from the bracket ends.
With a ⅛-inch bit, make pilot holes through each of the countersink holes. Then, with a driver bit, screw the brackets in place. Repeat to make a matching bench for the other side.